• About

Catherine Evans

~ Creative Artist and Food & Lifestyle Blogger

Catherine Evans

Tag Archives: Dessert

GERMAN APPLE CAKE

05 Wednesday Feb 2025

Posted by catherineevans63 in Food and Drink

≈ Leave a comment

Tags

Apple Cake, Baking, Cake, Dessert, desserts, Food, Recipe, recipes, Sponge Cake

Apfelkuchen Recipe

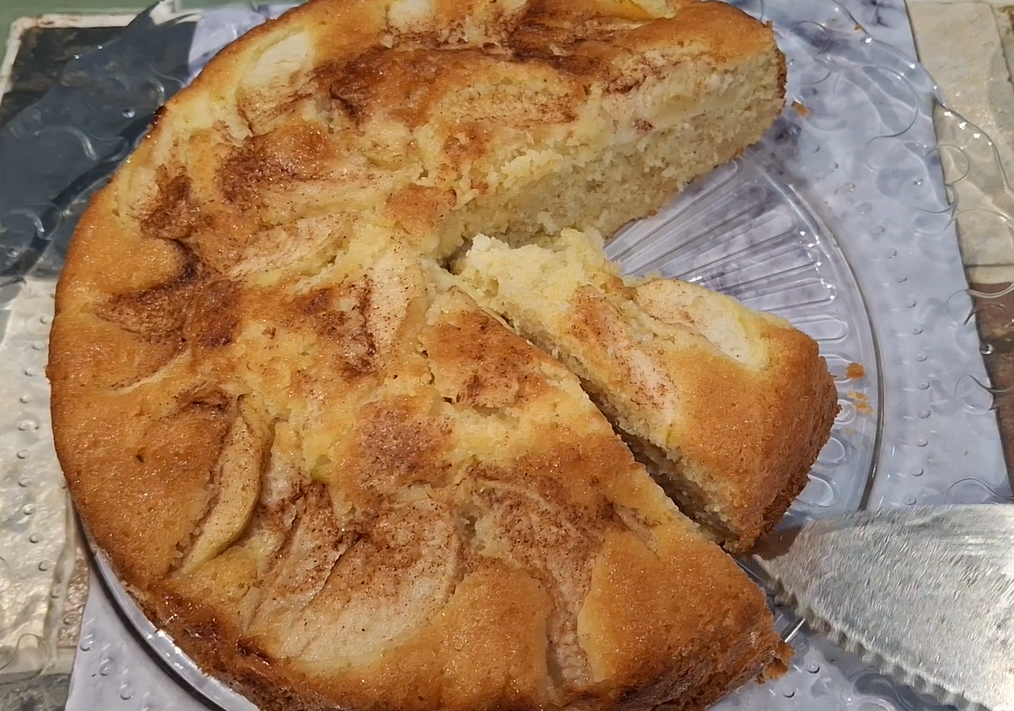
Apple cake is very popular in Germany and this is my variation on the celebrity chef Rick Stein’s classic Apfelkuchen from his “Long Weekends” series.

This yummy cake has a crunchy cinnamon sugar topping. Use any dessert apples you wish except for Bramleys as they ‘fall’ and do not keep their shape once cooked.

I have swapped out plain flour for gluten-free plain flour, golden granulated sugar for vanilla sugar and butter for Flora buttery spread.

The Apfelkuchen is nut-free, pregnancy-friendly and vegetarian making it suitable for most diets. It stays lovely and moist for a few days if kept in an airtight container – but it is so yummy it probably won’t last that long!

Ingredients

  • 2 dessert apples peeled, cored and sliced into thin wedges
  • 1 tbsp lemon juice
  • 125g (41/2 oz) Flora buttery, plus extra for greasing
  • 140g/5 oz vanilla caster sugar
  • 3 free-range eggs, at room temperature, beaten
  • 225g/8 oz plain gluten-free flour
  • 2 level tsp baking powder
  • 1/2 tsp sea salt
  • 5 tbsp full-fat milk

For the topping

  • 11/2 tbsp demerara sugar
  • 1/2 tsp ground cinnamon

Method

  1. Preheat the oven to 170C/150C fan/340F/Gas 3. Butter and line a 23cm/9″ round cake tin with greaseproof baking paper.
  2. Coat the apple wedges in the lemon juice and set aside.
  3. In a large bowl, beat together the butter and sugar, using an electric hand mixer, until pale and fluffy. Add the eggs and beat until smooth. Sift in the flour, baking powder and salt and mix well. Slowly add the milk, mixing well after each addition until you have a smooth batter.
  4. Transfer the cake batter to the cake tin. Arrange the apple slices, flat-side down, on the batter in a spiral pattern. Don’t worry if it’s not perfect.
  5. For the topping, mix together the demerara sugar and cinnamon. Sprinkle over the batter.
  6. Bake in the centre of the oven for 40-45 minutes, or until a skewer inserted in the centre of the cake comes out clean and the top is golden-brown. Leave the cake to cool in the tin for 15 minutes, then run a knife around the edges of the cake and turn it out of the tin onto a wire rack to cool completely (if wished).
  7. Serve this cake warm or at room temperature with whipped cream.

Chef’s tips

If you prefer to use butter in this recipe, make sure it is softened before combining it with the sugar.

This cake is delicious warm or cold and makes a wonderful pudding. You can also serve it with vanilla custard, creme fraiche, clotted cream or even a dollop of vanilla ice cream (my personal favourite with warm puddings), whatever floats your boat!

Here is my step-by-step video on YouTube:-

One-Time
Monthly
Yearly

Make a one-time donation

Make a monthly donation

Make a yearly donation

Choose an amount

£5.00
£15.00
£100.00
£5.00
£15.00
£100.00
£5.00
£15.00
£100.00

Or enter a custom amount

£

Your contribution is appreciated.

Your contribution is appreciated.

Your contribution is appreciated.

DonateDonate monthlyDonate yearly

COCONUT & LEMON FAIRY CAKES

26 Friday Jul 2024

Posted by catherineevans63 in Food and Drink

≈ Leave a comment

Tags

Baking, Cake, Cupcake Recipe, Cupcakes, Dessert, Fairy Cakes, Food, Gluten-free, Recipe, recipes

Fairy cakes, little treats baked in paper cases and decorated perhaps with buttercream or glace icing and sugar flowers or sprinkles, are perfect for either a tea party or children’s party. They are really very similar to cupcakes, though a bit smaller and perfect for little fingers and a not-too-sinful indulgence for grown-ups too!

This is my go-to recipe for fairy cakes and if the kids are bored on a cold and rainy day, it is an activity they can be involved in too and which I can guarantee they will enjoy. These cakes are made with one whole free-range egg, a few tablespoons of whole milk and a few basic store-cupboard ingredients. I am using gluten-free all-purpose flour and a teaspoon of baking powder but please swap for regular all-purpose flour.

Ingredients (makes 8):-

For the cakes

  • 85 g soft butter or baking spread
  • 85 g caster sugar
  • 1 large free-range egg, beaten
  • 65 g gluten-free all purpose flour
  • 20 g coconut flour (or dessicated coconut finely whizzed in the food processor)
  • 1 tsp gluten-free baking powder
  • 1 tsp vanilla extract
  • 3-4 tbsp whole milk
  • Grated zest of one unwaxed lemon

For the glace icing

  • Icing (powdered) sugar
  • Lemon juice
  • Water
  • Sprinkles or other sugar decorations of your choice

Method

1. Preheat the oven to 180C/160C fan/350F/Gas Mark 4.

2. Place the butter or baking spread and caster sugar in a large bowl and either beat with an electric whisk or cream with a wooden spoon until light and fluffy.

3. Add a little of the beaten egg to the mixture and beat until fully combined. Sift in some of the flours and baking powder and beat, to prevent any curdling. Repeat with the remainder of the beaten egg and the flours and baking powder until everything is well-combined.

4. Carefully add 3-4 tablespoons of whole milk and stir into the cake batter slowly with a spatula until fully combined.

5. Add the grated lemon zest and the vanilla extract, carefully stirring until fully combined.

6. Place 8 standard cupcake cases in a 12-hole cupcake tin and divide the cake batter equally between them. Shake the tin to level out and place in the centre of the preheated oven for 15-18 minutes (oven temperatures vary). The cakes are ready when a skewer inserted comes out clean.

7. Remove the cakes from the oven and set the tin aside for 10 minutes or so and then remove the cakes from the tin and place on a wire rack to cool completely.

8. Meanwhile, make the glace icing. Sieve some icing sugar into a bowl with a squeeze of lemon juice and a few drops of filtered water and mix well with a tablespoon to a smooth consistency. You want it so you can trace a figure of eight in the bowl of icing when you hold the spoon above it. If the icing is too thick, add a little more liquid a few drops at a time. If the icing is too thick, add a little more sieved icing sugar.

9. Carefully spoon some icing sugar over the top of each fairy cake and decorate with sprinkles or other sugar decoration of your choice, such as sugared flowers, candied lemon zest, jelly beans or other dainty candies.

10. Place the fairy cakes on a platter and allow to the icing to set in the refrigerator for 30 minutes or so and then either transfer to the tea table or a cake tin to store if they are not being eaten immediately.

Cook’s notes:

1. If you like your cakes a little more generous, use a 6-hole cake tin and larger cupcake cases and divide the mixture between them. Allow up to 20 minutes baking time accordingly.

2. If your oven temperature tends to be hotter, try baking the cakes at 170C/150C fan/325F/Gas Mark 3 or whatever you find usually works for you.

3. These cakes can also be decorated with lemon or vanilla buttercream frosting and sugar decorations, or alternatively do them as old-fashioned butterfly cakes.

Bon appetit!

Catherine

Apple and Plum Traybake Cake

Featured

Posted by catherineevans63 in Food and Drink

≈ Leave a comment

Tags

Apple, Apple Cake, Autumn, Baking, Cake, Dessert, Fall, Food, Fruit Cake, Gluten-free, Plums, Pudding, Recipe, Spelt flour, traditional, Traybake, Traybake cake

This cake makes the most of autumn fruits and is so simple to make, and is delicious and versatile. I baked one for my birthday last month when Dan and I were renting a holiday cottage on a working farm in north-west Suffolk in the middle of nowhere. It is made with basic ingredients plus locally-grown fruit which for us was either abundant on the trees or bought cheaply from the gates of people’s houses (paid for by cash or coin into an “honesty box”) and the free-range eggs I used were only £1 per half dozen from a shelter outside our nearest public house 20 minutes’ walk down the road! You can substitute the fruit used in this recipe with any you have available, such as apricots or peaches, the zest of oranges, cherries, blueberries or blackberries.

Ingredients (makes 9 larger or 12 regular pieces)

175 g gluten-free self-raising flour, sifted

175 g soft brown sugar

175 g softened butter or sunflower margarine

1 tsp ground cinnamon

3 free-range eggs

2 local apples washed, peeled, cored and chopped

5-6 local plums washed and halved, stones removed

1. Preheat the oven to 170oC/150oC fan (340oF/ 300oF fan) or Gas Mark 4.

2. Grease a 20 cm traybake tin and line the base with greaseproof paper.

3. In a mixing bowl, cream the sugar and butter or margarine together until smooth and fluffy.

4. Add an egg and beat well into the mixture, then add some of the flour and fold in completely. Repeat this process until the flour and eggs are all combined.

5. Add the ground cinnamon and fold in.

6. Gently fold the apples into the mixture

7. Pour the mixture into the prepared tin and give it a gentle shake to even out.

8. Mark the mixture into 9 or 12 with a halved plum facing upwards. If you are allowing for 9 pieces put the remaining half plum in the centre for decoration.

9. Bake for about 35 minutes in the centre of the oven or until a skewer comes out clean. Oven temperatures vary so the cake may need a few minutes longer.

10. Remove from the oven and leave to cool in the tin for at least 10 minutes, then turn out carefully on to a wire rack to cool completely. Sprinkle with sifted icing sugar and cut into pieces and serve with a slice of mature (sharp) cheddar.

COOK’S NOTES

This recipe is also good made with spelt flour. Substitute the same quantity as for gluten-free self-raising flour and sift with 2 heaped tsp baking powder.

You may substitute the 1 tsp ground cinnamon with 1 tsp ground ginger or ground mixed spice.

If you prefer, serve the traybake cake warm as a pudding served with a dollop of creme fraiche or clotted cream. Remove the cake from the oven and cool in the tin for 15 minutes before slicing and serving.

One-Time
Monthly
Yearly

Make a one-time donation

Make a monthly donation

Make a yearly donation

Choose an amount

¤5.00
¤15.00
¤100.00
¤5.00
¤15.00
¤100.00
¤5.00
¤15.00
¤100.00

Or enter a custom amount

¤

Your contribution is appreciated.

Your contribution is appreciated.

Your contribution is appreciated.

DonateDonate monthlyDonate yearly

Ginger, Lime and Orange No-Bake Cheesecake

Featured

Posted by catherineevans63 in Food and Drink

≈ Leave a comment

Tags

Cheesecake, Cream cheese, Dessert, Ginger, Lime, Lime Cheesecake, Mascarpone, No-cook cheesecake, Orange, Orange Cheesecake, Unbaked cheesecake

Who can resist a classic cheesecake for dessert with its rich, buttery base and creamy filling? Whether baked or simply prepared and refrigerated, cheesecake is so versatile and adding chocolate even as a final flourish and finishing touch elevates it to another level. Whether you go for something traditional, fruity or laced with alcohol, there is a cheesecake to please everyone.

We are currently having a new custom-built kitchen at home and have no cooking facilities other than a one-ring electric countertop hob (which I usually use for my candle-making) and a traditional coal-fired barbecue in the back garden. The next-door neighbours were coming over for dinner and I wanted to create a no-fuss dessert that was quick and easy to make and could be chilled and stored in the refrigerator until needed. Although I do enjoy a traditional baked cheesecake, I actually prefer the non-baked variety and in any case it was not possible to prepare a baked one due to the lack of kitchen facilities at present. I had decided on a Mexican-themed dinner cooked on the barbecue and rather than settle for lime, which can be a little sharp for some tastes, I thought about using a twist of orange for more subtlety combined with the gentle heat of ginger to marry the two citrus flavours, and then sprinkle over a little grated 72% dark chocolate just before serving for a further dimension; ginger and citrus flavours pair very well with dark chocolate and of course chocolate features in a wide variety of savoury Mexican dishes.

Assuming you are mindful to remove the double cream from the refrigerator at least half an hour before you intend to start making the cheesecake filling – for example, when you put the biscuit base in the refrigerator to chill – then it will take you less than 30 minutes in total to prepare in two separate stages.

Ingredients

Gluten-free; vegetarian

  • 200 g Gluten-free Ginger Biscuits (Cookies)
  • 80 g Unsalted Butter
  • 500 g Cream Cheese, such as Mascarpone
  • 110 g Icing Sugar, sifted to remove any lumps
  • Juice and zest of 1 orange and 2 limes
  • 150 ml Double Cream, whipped
  • Dark Chocolate, to decorate

Grease the inside of a 20 cm loose-base cake tin and line the base with baking parchment to fit.

Place the ginger biscuits in a clean polythene bag, tie, place on a board and bash into crumbs with a rolling pin. Alternatively, put the ginger biscuits in a food processor and pulse until they resemble fine breadcrumbs.

Melt the butter in a saucepan over a low heat, remove from the heat and quickly add the biscuit crumbs stirring well to combine.

Spoon the buttery biscuit crumbs into the cake tin, spreading evenly over the lined base and pressing them down well with the back of a metal spoon. Refrigerate for 1-2 hours to harden.

Meanwhile, tip the cream cheese and icing sugar into a large bowl and mix thoroughly with a wooden spoon to combine. Add the juice and zest of one orange and two limes and stir into the cream cheese and sugar mixture.

Pour the double cream into a separate bowl and beat with an electric or balloon whisk until it forms soft peaks and then combine with the other ingredients, mixing in thoroughly.

Pour the mixture evenly into the cake tin over the hardened biscuit base and smooth over with a palette knife and chill in the refrigerator for at least 4 hours or overnight.

Carefully push out the base of the cake tin and place the cheesecake on a board. If you are lucky you may be able to remove the cheesecake itself from the base of the tin but often I don’t risk it! Decorate the top of the cheesecake with a little grated dark chocolate before cutting into slices.

COOKS’ NOTES

You may substitute regular ginger biscuits for gluten-free, if you don’t wish to make your cheesecake “Free From”.

Quark, mascarpone, Philadelphia store’s own brand cream cheese will all work well in this recipe.

Remove the cream from the refrigerator and allow to stand at room temperature for AT LEAST 30 minutes and it should whip up in no time at all, even with a balloon whisk!

If you don’t have a cake tin you may make and serve the cheesecake in individual ramekins, which look pretty for fuss-free dinner parties. For 4-6 people, you could halve the ingredient quantities depending on the size of the ramekins. Grease each ramekin with a little melted butter, omit the baking paper but follow the recipe. Garnish with a slither each of fresh orange and lime before serving, if you like.

One-Time
Monthly
Yearly

Make a one-time donation

Make a monthly donation

Make a yearly donation

Choose an amount

£3.00
£9.00
£60.00
£3.00
£9.00
£60.00
£3.00
£9.00
£60.00

Or enter a custom amount

£

Your contribution is appreciated.

Your contribution is appreciated.

Your contribution is appreciated.

DonateDonate monthlyDonate yearly
Donate with PayPal

Blog at WordPress.com.

Privacy & Cookies: This site uses cookies. By continuing to use this website, you agree to their use.
To find out more, including how to control cookies, see here: Cookie Policy
  • Subscribe Subscribed
    • Catherine Evans
    • Join 42 other subscribers
    • Already have a WordPress.com account? Log in now.
    • Catherine Evans
    • Subscribe Subscribed
    • Sign up
    • Log in
    • Report this content
    • View site in Reader
    • Manage subscriptions
    • Collapse this bar
 

Loading Comments...