Flammkuchen, or tarteflambée, is a traditional Alsatian flatbread recipe from the German-speaking region of Alsace. Comprising bread dough rolled out very thinly in the shape of a rectangle or oval, it is covered with fromage blanc or crème fraiche, thinly sliced fried onions and bacon lardons. It is important to fry the onions slowly ensuring they are soft and golden rather than charred. The name Flammkuchen translates to “Flame Cake”, referring to the traditional method of baking the dough in a wood-fired oven.
Similar to a white pizza, the Flammkuchen dates back to the Medieval period when it provided a simple, hearty meal for peasants and farmers. Over time, it became a staple in Alsatian and German cuisines, and the various regions developed their own unique variations, which not only showcase the local ingredients and cooking methods but also demonstrate the versatility and adaptability of Flammkuchen, and it is often enjoyed at get-togethers with family and friends, as well as at social gatherings and festivals.
My YouTube video demonstrates how to prepare Flammkuchen, with one or two of my own variations. Why not try one or two of your own?!
Taken from Favourite Boating Recipes by Cas Best and inspired by a bunch of giant, prize-winning onions from a lock-side garden, this simple recipe creates a delicious, full-bodied onion soup, similar to French Onion Soup (which it would be were you to make one or two modifications to the recipe) and can easily be prepared in a slow cooker, on a camping stove, in a pot over a campfire or in the small galley kitchen of a narrow boat on the canal.
Historically, the Lock-Keeper held an important role on the waterways of Great Britain in the management and maintenance of the lock (a gated section on a canal or river) and facilitating the navigation and safe passage of boats on their journeys. Their duties would also have included opening and closing the gates, operating the lock mechanisms and sometimes managing the associated weir to control water flow and levels, especially during droughts or heavy rain.
The occupation dates back to the 1700s and the term “lock-keeper” was first recorded in 1762. Traditionally, lock-keepers lived in small, ‘tied’ cottages and often had additional responsibilities including minor repairs, selling provisions such as flowers and vegetables from their beautifully-kept gardens to passing boats and maintaining nearby canal infrastructure. The lock-keeper’s work was essential for transporting goods including coal, grain and clay during the Industrial Revolution, when canals were a primary means of inland transport.
With the decline of commercial canal traffic these days, many locks are now unstaffed however in certain regions the lock-keeper does remain important for recreational boating and water management although the role is mostly a voluntary one. At large locks or on major rivers several lock-tenders may report to a Lockmaster, who oversees operations and in other cases, a single lock-keeper may manage multiple locks, guiding hundreds of boats every day up and down the waterway.
INGREDIENTS (makes 6-8 helpings)
4 large onions, finely chopped
1 tbsp oil for frying
13/4 pints vegetable stock
1 tsp yeast extract (such as Marmite or Vegemite)
Fresh ground black pepper
Heat the oil in a large saucepan and gently fry the onions until just softened.
Add the stock and yeast extract and stir well. Season with plenty of freshly ground black pepper.
Bring to the boil, stirring, then cover and simmer gently until the onions are really soft.
Serve with chunks of fresh, crusty bread.
COOK’S TIPS
Add some fresh or dried herbs of your choice to the simmering pot. Sage, parsley and/or thyme would all work well.
For a French Onion Soup, substitute the vegetable stock with beef stock (and perhaps a cheeky splash of red wine – just because!)
To pimp this recipe up to the next level, either fry some cubes of day-or-two-old bread to serve up as croutons or, alternatively make some cheesy giant croutons with day-old bread topped with some sharp cheddar and place under the grill until bubbling and golden.
If you would like to make this recipe in a slow cooker and leave the soup to do its thing, then my video below shows you how:-
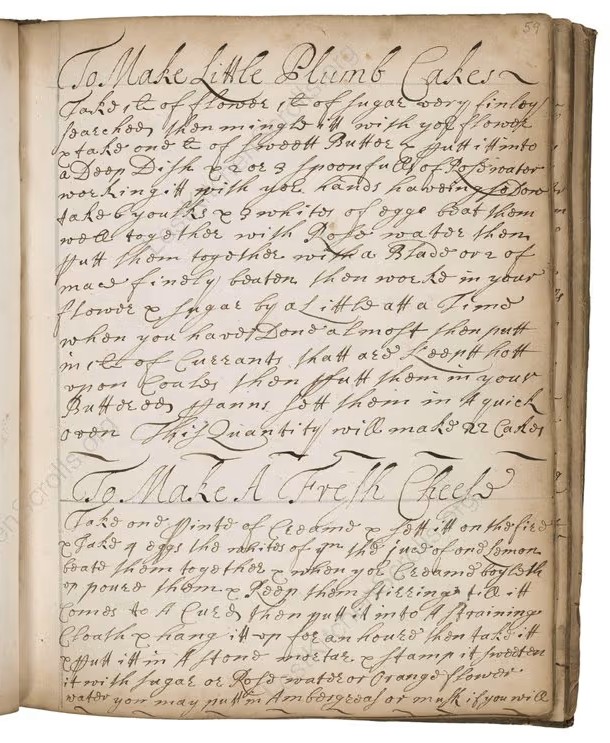
I would like to share an historical recipe with you from The Cookbook of Ann Smith, Reading for Little Plum Cakes. First published in Renaissance England in 1698, the recipe can also be found on lostkitchenscrolls.org.
The original recipe manuscript (lostkitchenscrolls.org)
The original recipe reads: “Take ½ lb. of fine Sugar dry finley þarched, then mingle it with your flower & take ½ lb. of sweet Butter & putt it into a Deep Diſh & 2 or 3 spoonfulls of Roſe Water working it with your hands take ½ lb. of Currants & take 6 yoalks & 6 whites of egges Beat them well togather with Roſe water then putt them togather with a Blade or 2 of mace findly beaten, then work it in your Flower & sugar by a little att a Time when you have Done almost then putt in it ½ lb of Currants waſhed & dried & putt hott upon Coals, then putt them in your Butter’d pañns & sett them in a quick oven. This Quantity will make 22 Cakes.”
Like most late 17th-century recipes, the recipe is written as a narrative rather than with specific measurements or listed instructions. Ingredients are given in pounds and handfuls and any descriptions or guides are aimed at the experienced cook or housekeeper. Spelling was haphazard: ‘Finley þarched’ (for ‘finely parched’), ‘yoalks’ (yolks), ‘pañns’ (pans), and the archaic long ‘ſ’ (used in ‘Roſe Water’) pepper the text. Quantities were geared towards large households rather than a single family and with a practical order of ingredients – wet and dry ingredients blended in stages for a rich, sticky batter. The recipe was created at a time when domestic baking was starting to spread among English gentlewomen, blending tradition with the new luxuries of sugar and spice. However, ‘plum cakes’ were more like dense little sponge cakes containing either raisins and currants (‘plum’ being the general term for dried fruit) rather than the airier fruit cakes of today, but they were a signature of celebration and hospitality reflected in both the increasing availability and extravagance of imported sugar and dried fruit as well as the fashion for delicately-flavoured, perfumed pastries containing aromatics such as rosewater. Ann Smith herself was probably a woman of substance who had access to the ingredients and the staff or leisure time to produce these and other confections.
What sort of equipment might the late 17th century baker had access to? The answer is, perhaps slightly more sophisticated versions of the traditional, as well as their hands as the main tool for creaming and kneading! A large earthenware or wooden mixing bowl would be used to work the butter by hand; finely woven sieves for sifting flour and sugar; and a small whisk or fork for beating eggs. Currants were washed and dried, perhaps by an open fire and mace would be ground in a mortar and pestle. The cakes themselves would be baked in small round pans similar to modern-day tart or muffin tins, all buttered well to prevent sticking. The coals on the hearth provided ‘quick oven’, which would have been managed either in a brick oven or before a free-standing range, ash and embers carefully distributed for an even heat.
As I have mentioned, a more modern-day version of the original recipe is published on lostkitchenscrolls.org, and I referred to this when making these cakes but halved the quantities (using 115 g of butter and dry ingredients rather than 225 g) and spooned the batter in cupcake cases rather than just spooning it directly into muffin tin. However, I have further simplified the ingredients and method below for ease of use.
Metric Ingredients (makes approx. 22 or up to 12 if quantity is halved)
225 g (1/2 lb) caster sugar, plus extra for dusting if liked
225 g (1/2 lb) plain (all-purpose) white wheat flour
225 g (1/2 lb) softened, unsalted butter
2-3 tablespoons rosewater
6 large eggs
A pinch (1/4 tsp) ground mace or nutmeg
225 g (1/2 lb) dried currants, raisins or sultanas
Method
In a bowl, mix the sugar with the plain white wheat flour.
In a separate bowl, soften the unsalted butter and work it well with your hands or a wooden spoon along with 2-3 tbsp rosewater until creamy and fragrant.
In another bowl, beat 6 large eggs together with a splash more rosewater.
Add a pinch of ground mace or nutmeg (a scant 1/4 tsp)
Combine the egg mixture with the butter, then gradually fold in the flour and sugar mixture, step by step, until you have a loose batter.
Towards the end of the whole mixing process, add the dried fruit and mix through.
Leave the finished batter on the counter a short time to warm at room temperature, then spoon it directly into well-buttered muffin or tart tins, or alternatively line the tins with cupcake cases and spoon the batter into those.
Tap the filled tins gently on the surface to level everything out.
Bake the little cakes in a moderately hot oven (approx. 200oC/400oF/Gas Mark 6) until golden and fragrant.
Leave the little plum cakes in their tins to cool for a few minutes before placing them on a wire rack to cool completely.
Bon appetit!
Catherine
What do you think of this recipe? Please let me know below!
I am interested in Native American history and culture and came across a recipe online for Three Sisters Stew by Lois Ellen Frank, PhD, published on 1 November 2022 and reviewed by Dietician Emily Lachtrupp, M.S., RD. This recipe is part of their showcase: There’s a Movement to Revitalize Indigenous Cuisines and Knowledge – Here’s why that Matters:-
Three Sisters Stew is an easy recipe to prepare, and is nutritious and delicious. It is naturally diabetes-friendly, nut-free, dairy-free, soy-free, heart-healthy, vegan, vegetarian, egg-free and gluten-free!
The Three Sisters are corn, beans and squash, which for centuries have been planted together by indigenous peoples and which have spiritual significance for some. In New Mexico, the saying a healthy environment means a healthy culture is a popular one, rooted in the belief that this leads to healthy people. The way these vegetables grow together on the land reinforces this idea that all things are connected. The beans climb the cornstalks, the squash leaves give shade to the soil thereby limiting weed growth, and the beans set nitrogen into the soil and help to stabilize the cornstalks.
There are 23 unique Native American communities in New Mexico, including nineteen Pueblos, three Apache tribes (Fort Sill Apache Tribe, the Jicarilla Apache Nation and the Mescalero Apache Tribe) and the Navajo Nation. Each tribe is a Sovereign Nation with its own government, customs, tradition and culture. The 19 Pueblos comprise: Acoma, Cochiti, Isleta, Jemez, Laguna, Nambe, Ohkay Owingeh, Picuris, Pojoaque, Sandia, San Felipe, San Ildefonso, Santa Ana, Santa Clara, Santo Domingo, Taos, Tesuque, Zuni and Zia.
Although this can be served in all seasons, Three Sisters Stew is an ideal winter dish and develops further if you have enough for leftovers the next day (if you can resist seconds!), and quantities can be doubled or even trebled for many or greedy appetites! I am sharing the recipe as it is which serves 8 people, but feel free to halve quantities if feeding four or fewer people. Types of squash include zucchini, pumpkin, butternut, Crown Prince and winter squash, according to seasonality.
Ingredients
1 tbsp sunflower oil (I used olive oil – I do not usually use seed oils)
1 large yellow onion, chopped (you could use a large red or white onion if preferred)
1 tbsp chopped garlic (3 or 4 fat cloves)
1 large green bell pepper, chopped (red, orange or yellow if preferred)
3 medium zucchini, diced (I used a home-grown winter squash)
1 (28 oz) can no-salt-added whole peeled or diced tomatoes. (I used one 400g can tomatoes).
2 (15 oz) cans no-salt-added pinto beans, rinsed.
2 (15 oz) cans no-salt-added pinto beans, rinsed.
11/2 cups corn kernels (I used corn cobs)
4 cups water
3 tbsp dried New Mexico red chili pepper or other mild chili pepper (I used a smaller amount of hot chili pepper)
1 tsp kosher salt
1/2 tsp dried Sonoran or Mexican oregano
1/4 tsp dried thyme
1/2 tsp ground pepper
Flat-leaf parsley and/or microgreens for garnish.
Step 1
Heat oil in a large pot over medium-high heat. Add onion and cook, stirring occasionally, until beginning to caramelize which will take 4-6 minutes. Add garlic and cook, stirring, until fragrant, for 30 seconds. Add the bell pepper and cook for 2 minutes, stirring occasionally, until slightly softened. Add the zucchini or other squash and cook, stirring occasionally, until slightly softened, for about 2 minutes. Add the tomatoes and their juice. Remember that if using whole tomatoes to break them up as you add them. Cook for a further 4 minutes, stirring occasionally, until the mixture returns to a simmer.
Step 2
Stir in the kidney beans and pinto beans, the corn and the water, and bring to a boil over a high heat. Reduce the heat to a simmer and stir in the chili powder, salt, herbs and pepper. Cook for about 20 minutes, stirring occasionally, until the liquid is a little reduced.
Step 3
Serve topped with parsley and/or microgreens, if desired.
Cook’s notes
For a heartier meal why not serve with some steamed brown rice or sweet potato, or perhaps some cornbread.
I added a pinch of sumac for an extra vibe.
Feel free to use whatever herbs you have available. I often use fresh garden herbs in recipes.
For a thicker stew, add a little coconut milk or ground almonds to taste.
Enjoy!
You can watch a step-by-step guide on my YouTube channel:-
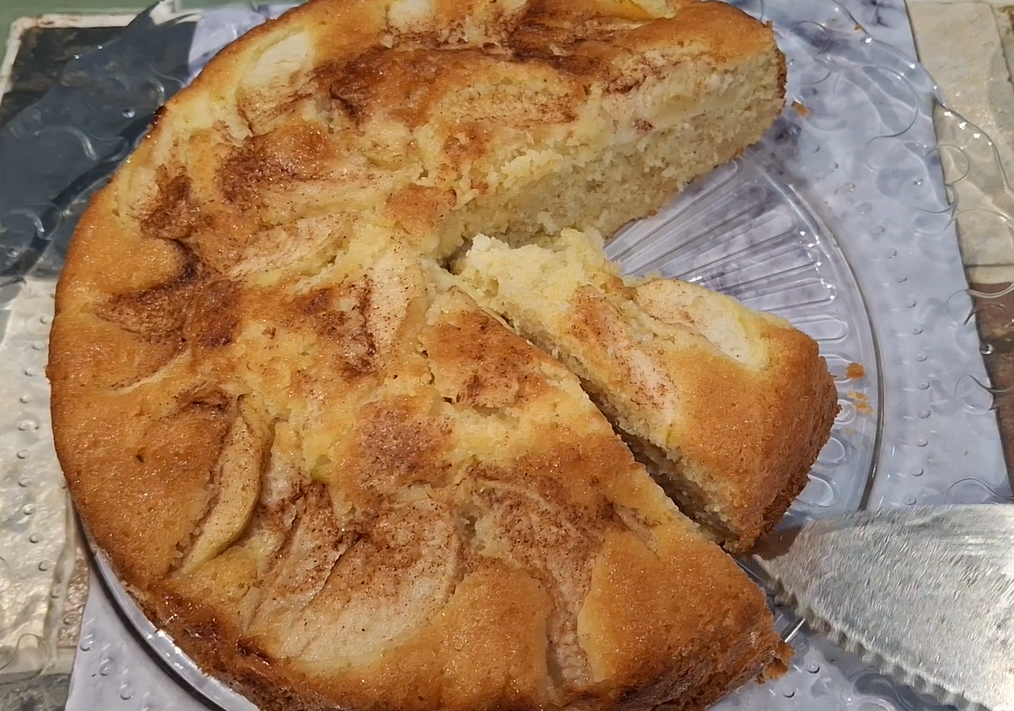
Apple cake is very popular in Germany and this is my variation on the celebrity chef Rick Stein’s classic Apfelkuchen from his “Long Weekends” series.
This yummy cake has a crunchy cinnamon sugar topping. Use any dessert apples you wish except for Bramleys as they ‘fall’ and do not keep their shape once cooked.
I have swapped out plain flour for gluten-free plain flour, golden granulated sugar for vanilla sugar and butter for Flora buttery spread.
The Apfelkuchen is nut-free, pregnancy-friendly and vegetarian making it suitable for most diets. It stays lovely and moist for a few days if kept in an airtight container – but it is so yummy it probably won’t last that long!
Ingredients
2 dessert apples peeled, cored and sliced into thin wedges
1 tbsp lemon juice
125g (41/2 oz) Flora buttery, plus extra for greasing
140g/5 oz vanilla caster sugar
3 free-range eggs, at room temperature, beaten
225g/8 oz plain gluten-free flour
2 level tsp baking powder
1/2 tsp sea salt
5 tbsp full-fat milk
For the topping
11/2 tbsp demerara sugar
1/2 tsp ground cinnamon
Method
Preheat the oven to 170C/150C fan/340F/Gas 3. Butter and line a 23cm/9″ round cake tin with greaseproof baking paper.
Coat the apple wedges in the lemon juice and set aside.
In a large bowl, beat together the butter and sugar, using an electric hand mixer, until pale and fluffy. Add the eggs and beat until smooth. Sift in the flour, baking powder and salt and mix well. Slowly add the milk, mixing well after each addition until you have a smooth batter.
Transfer the cake batter to the cake tin. Arrange the apple slices, flat-side down, on the batter in a spiral pattern. Don’t worry if it’s not perfect.
For the topping, mix together the demerara sugar and cinnamon. Sprinkle over the batter.
Bake in the centre of the oven for 40-45 minutes, or until a skewer inserted in the centre of the cake comes out clean and the top is golden-brown. Leave the cake to cool in the tin for 15 minutes, then run a knife around the edges of the cake and turn it out of the tin onto a wire rack to cool completely (if wished).
Serve this cake warm or at room temperature with whipped cream.
Chef’s tips
If you prefer to use butter in this recipe, make sure it is softened before combining it with the sugar.
This cake is delicious warm or cold and makes a wonderful pudding. You can also serve it with vanilla custard, creme fraiche, clotted cream or even a dollop of vanilla ice cream (my personal favourite with warm puddings), whatever floats your boat!
Some years ago now, my mother, following one of her trips to Scotland (my parents were both of Scottish heritage) gifted me a Hale Pocket Guide “Traditional Scottish Cookery” by Margaret Fairlie which cost just 60 pence – this was in 1995.
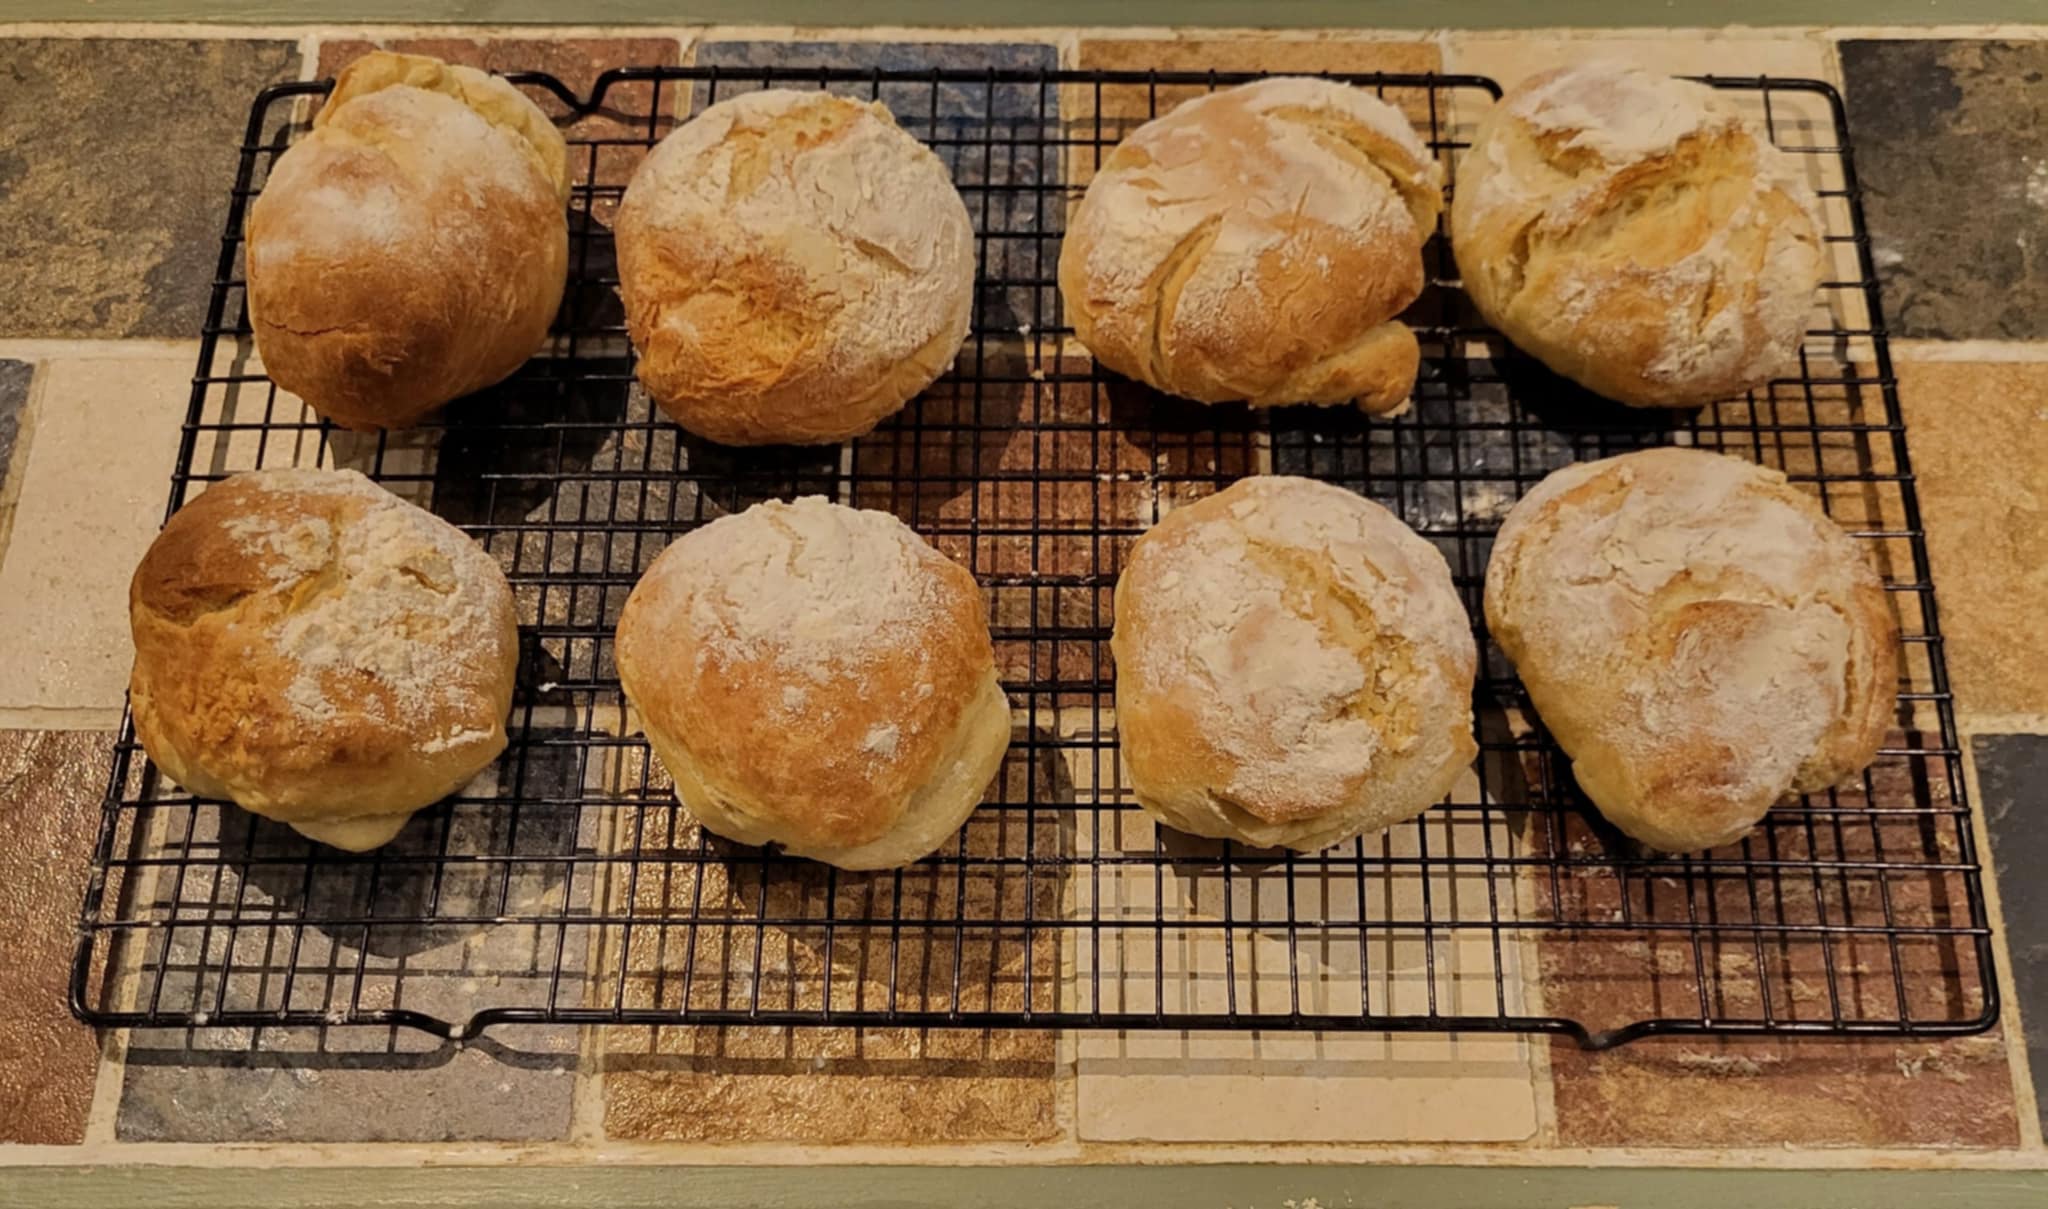
This recipe for morning rolls is taken from that pocket book, which was first published way back in 1973. I have always enjoyed cooking up Scottish cuisine as it is part and parcel of my culture and bloodline. My father’s porridge was always the best (though my mum’s was a close second) and I taught my husband how to make it the traditional Scottish way, too.
Like my mother and her mother before me, I am very fond of baking and this Morning Roll recipe is so simple, made with only a few ingredients. If you cannot find fresh yeast then substitute with 12 g dried yeast or thereabouts – round up to 2 x 7 g sachets if you wish.
Very popular, particularly in Glasgow and Fife, Morning Rolls are well-fired, airy and chewy with a crispy crust. They are sold everywhere in petrol stations, bakeries, newsagents and corner shops and are best eaten on the day they are made before they go rock hard! In Fife, a Cabin Biscuit or Roll is a local variant. Originating in Buckhaven, a town on the Firth of Forth on the east coast of Fife, sugar was added to prolong the shelf life of the roll as they were often enjoyed by crews aboard fishing boats and have distinctive prick marks on top. However, the Morning Roll or Cabin Biscuit is a bread roll and not a biscuit in either the British or American sense.
Ingredients
1 lb (450 g) plain flour
1 level tsp salt
2 oz (50 g) lard
1 oz (25 g) fresh yeast (or up to 2 x 7 g sachets dried fast action yeast)
1 tsp sugar
1/2 pt (300 ml) milk
Method
Sift the flour into a warm bowl with the salt and then lightly rub in the lard until fully combined.
In a separate bowl, cream the yeast and sugar until liquid (or if using yeast sachets, just mix them together). Strain (or tip) into flour mixture and make into a soft dough with the milk.
Cover with a tea towel and leave in a warm place to rise. This will take about an hour.
Knead lightly, then form into 3 inch (7.5 cm) rounds. Brush lightly with milk taking care not to let the milk run down the sides of the rolls, and dust with flour – you can do this with the help of a sieve or even a tea strainer!
Place on a greased and floured tin and leave in a warm place for 15 minutes.
Bake in a moderately hot oven (400oF/ 200oC/Gas Mark 6) for 15 to 20 minutes.
Turn rolls out on to a wire rack and allow to cool before serving.
CHEF’S TIPS:
Morning rolls are also delicious served still slightly warm with lashings of butter.
A delicious accompaniment to a bowl of homemade soup or filled with smoked Ayrshire bacon, square sausage or perhaps some good cheese and pickle.
Suitable for home freezing. As soon as the rolls have cooled, wrap individually in cling film, place in a freezer bag and transfer to the freezer. They are so tasty though they may not get that far!
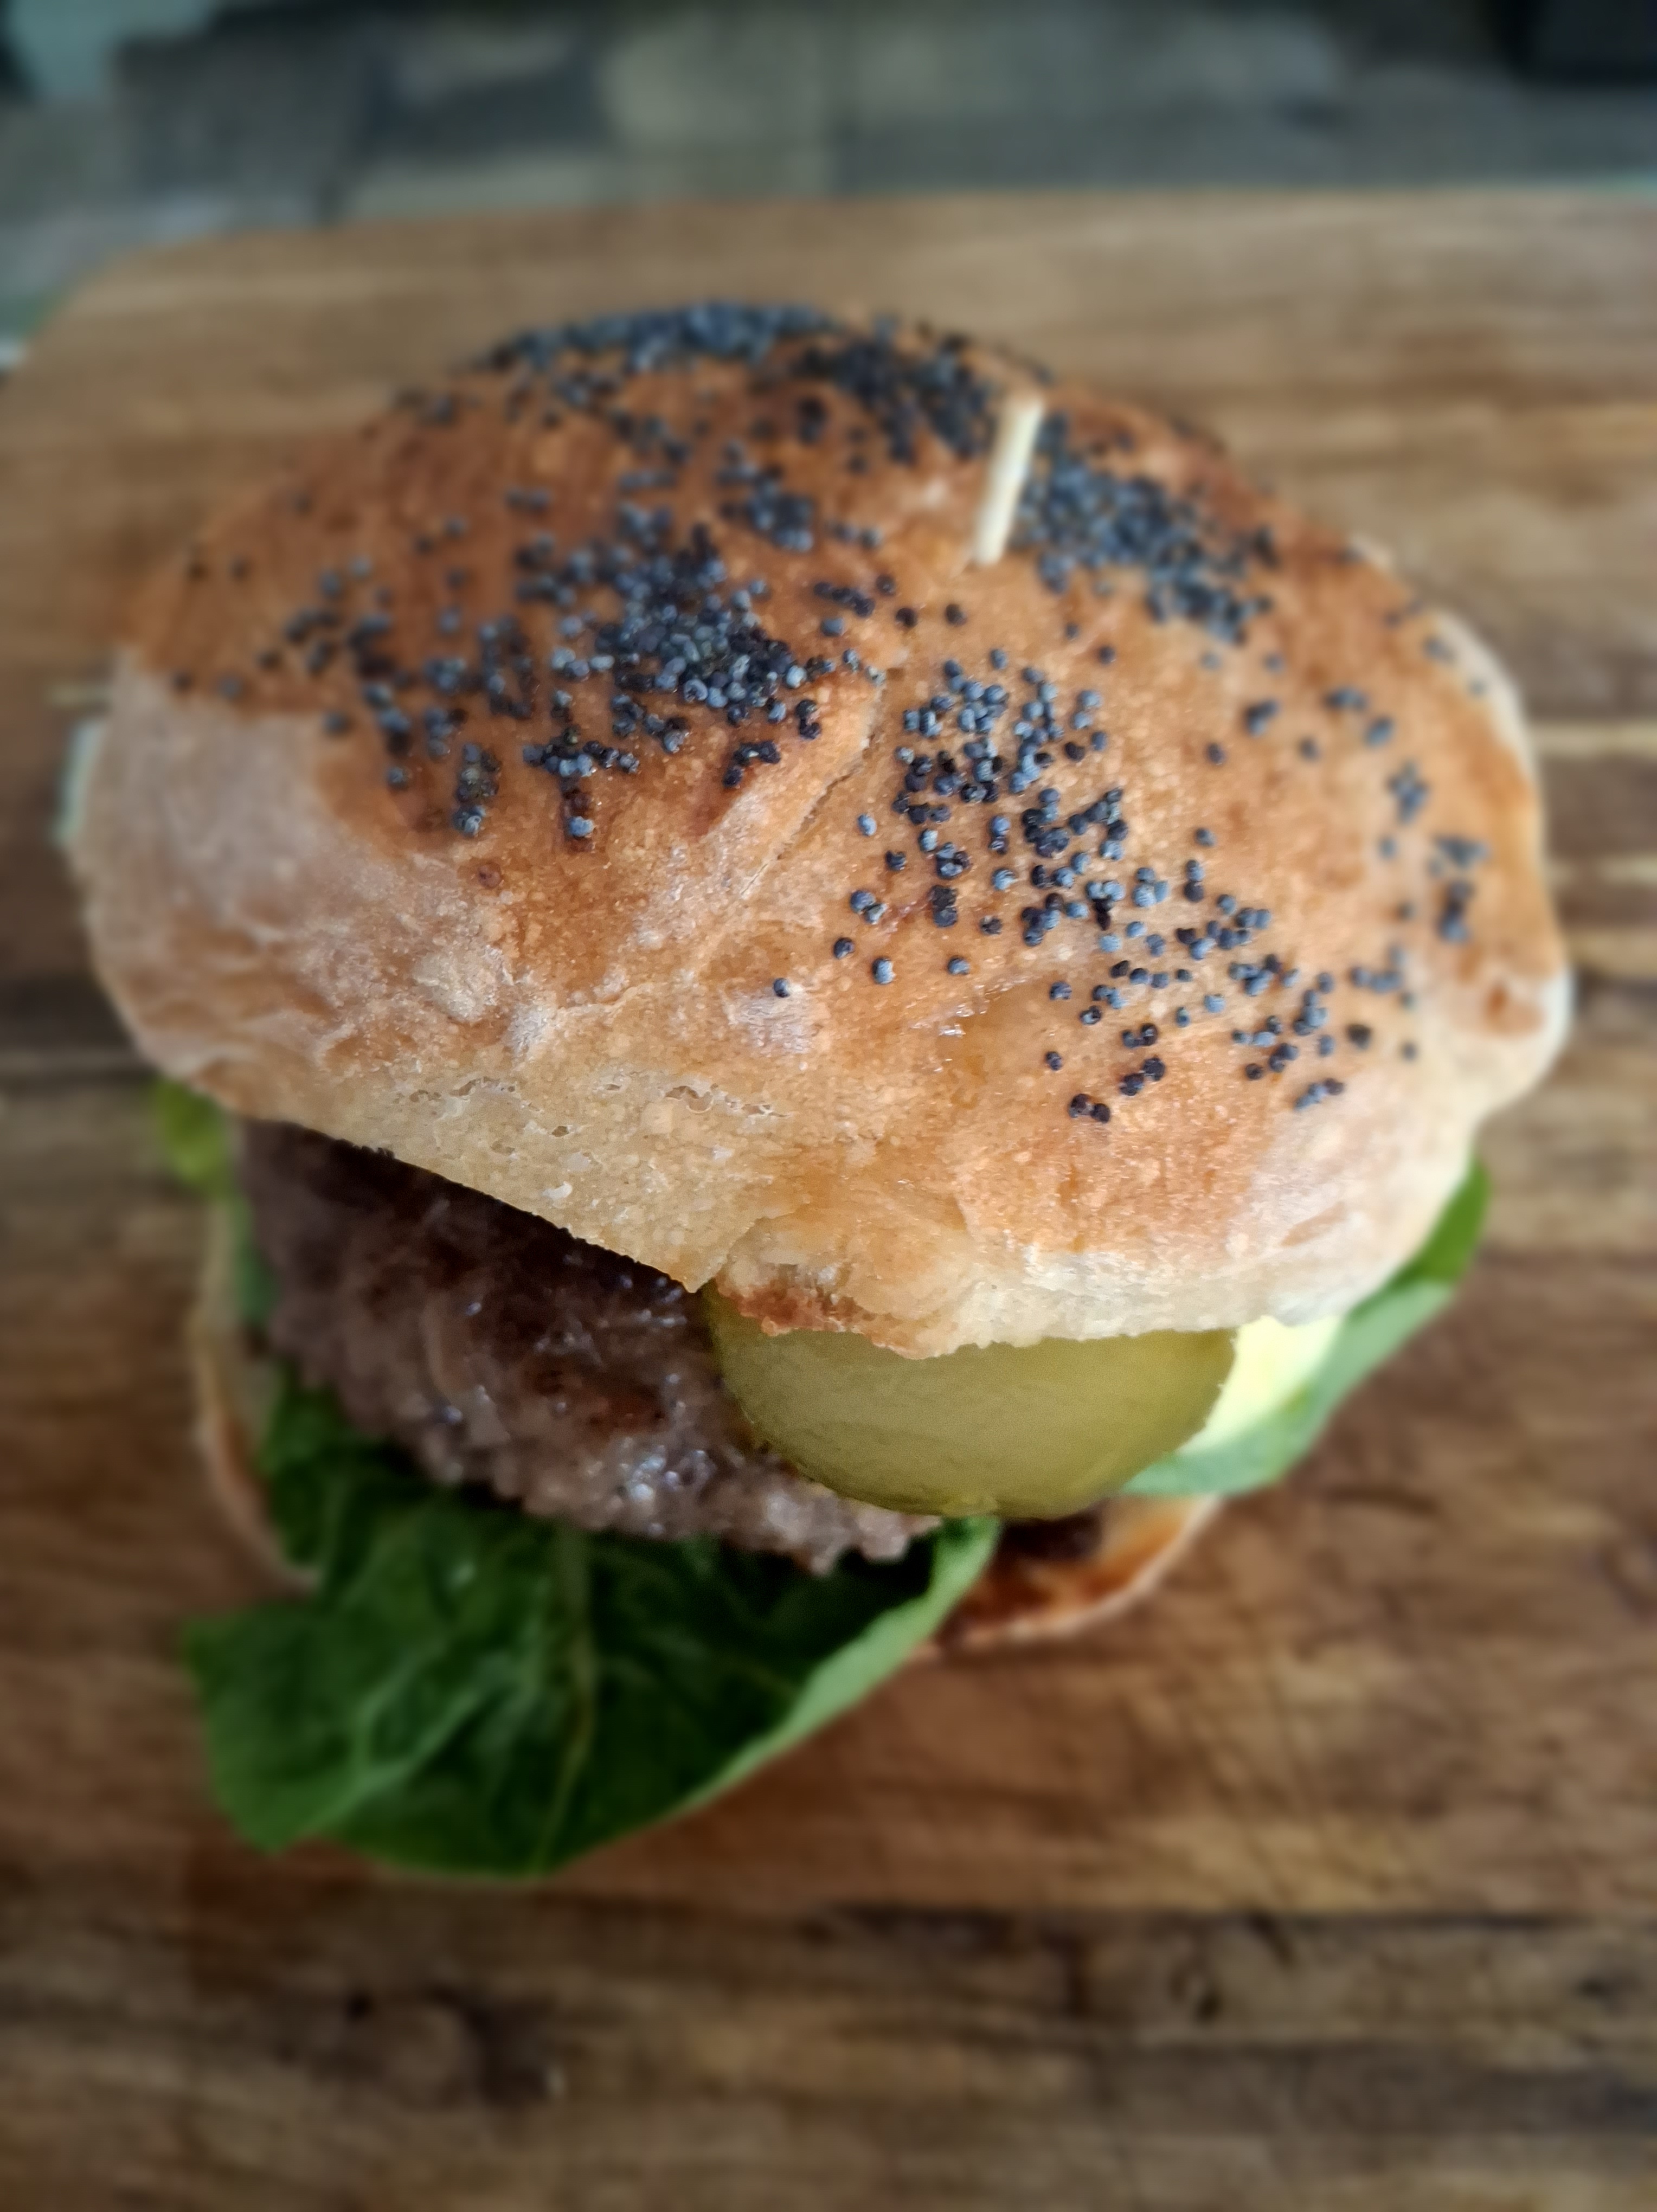
My husband Dan and I don’t eat burgers very often but when we do, I like to sandwich the patties between homemade bread rolls with all the fix-ins for us to enjoy. Dan certainly prefers my bread over shop-bought and often asks: “is it from Evans bakery?” to which I often reply: “yes” – although I am honest if the bread is shop-bought.
Below is my go-to recipe for bread rolls, enough for four people. If you have more mouths to feed, double the quantities. The recipe can be adapted to suit your own tastes, so for example you could knead in mixed seeds, chopped olives or sundried tomatoes or even herbs to the dough before its second proving.
Ingredients (makes 4)
250g Strong bread flour (I like French flour)
1 tsp fast action dried yeast
½ tsp kosher salt
165 ml Lukewarm water
Method
1. Put bread flour in a large bowl. On one side put the dried yeast and on the other the salt (the two should not come into contact with one another initially or you will kill off the yeast). Stir together well with your fingers or the blade of a dessert knife.
2. Make a well in the middle of the flour mixture and pour in about half the lukewarm water. Mix together with your fingers or the dessert knife. Gradually add more water – you may not need all the water* until you can bring the dough together into a pliable ball. You do not want it to be sticky but if you overdo the water, just gradually mix in a little more flour.
3. Place the dough ball on a clean, floured surface and knead for 5-10 minutes until the dough is smooth. Form it into a ball and place it in a large, lightly oiled bowl and cover with a clean tea towel or plastic wrap and set aside in a warm place or with an ambient temperature for at least an hour or until the dough has doubled in size. Don’t panic if it takes longer than an hour. Just leave it to prove as long as you need to until the dough has doubled in size.
4. Sprinkle some more flour on a clean surface and ‘knock back’ the dough by kneading again. If I am using spelt flour which is lower in gluten, I tend to only knead it gently to ensure a good second rise. At this point, weigh the dough and divide the weight into four balls. I always weigh each of these balls too, to make sure they are even in size.
5. Roll each ball between floured hands and flatten slightly. Place on a baking tray lined with baking paper, cover with a clean tea towel or oiled plastic wrap and leave for at least 20 minutes or until doubled in size. This may take up to 40 minutes to an hour.
6. Meanwhile, set your oven temperature to 230C/210C fan/450F/Gas 8. Brush the top of each roll with a little beaten egg and sprinkle with poppy seeds.
7. Bake rolls in the oven for 25-30 minutes** until golden brown and hollow-sounding when you tap on the base.
8. Leave on a wire rack to cool.
Enjoy!
COOK’S NOTES
* The ideal flour-to-water ratio for bread is 65 ml water to 100 g bread flour though ratios can vary and can be between 58 ml and 62 ml depending on the type of flour/grain you use.
For 8 rolls, double the ingredient quantities. So, for example, 500 g flour instead of 250 g, 2 tsp yeast, 1 tsp Kosher salt, 325 ml water.
If you do not want to bake the rolls immediately, you can place them in the refrigerator for up to 24 hours and then set aside to allow the dough to relax at room temperature and finish rising, before baking as normal. I find this method is also more tummy-kind.
** Remember oven temperatures vary and your bread rolls may take a little longer or shorter to bake so keep an eye on them in the last few minutes.
For floured rolls, omit the egg wash and poppy seeds and instead dust the tops with a little flour before baking. You can also vary the seed toppings with sesame seeds or multigrain seeds.
For savoury doughs, why not add some chopped olives, chopped sun-dried tomatoes, chopped rosemary or mixed seeds at Step 4?!
For a baguette or small loaf of bread knock back at Step 4 and then form into your baguette or loaf and leave to prove for 40 minutes to an hour or until doubled in size. Bake at Steps 6 and 7 for 30-35 minutes until golden brown and hollow-sounding.
For a large loaf, double quantities and bake as above for 45-55 minutes until golden brown and hollow-sounding.
Fairy cakes, little treats baked in paper cases and decorated perhaps with buttercream or glace icing and sugar flowers or sprinkles, are perfect for either a tea party or children’s party. They are really very similar to cupcakes, though a bit smaller and perfect for little fingers and a not-too-sinful indulgence for grown-ups too!
This is my go-to recipe for fairy cakes and if the kids are bored on a cold and rainy day, it is an activity they can be involved in too and which I can guarantee they will enjoy. These cakes are made with one whole free-range egg, a few tablespoons of whole milk and a few basic store-cupboard ingredients. I am using gluten-free all-purpose flour and a teaspoon of baking powder but please swap for regular all-purpose flour.
Ingredients(makes 8):-
For the cakes
85 g soft butter or baking spread
85 g caster sugar
1 large free-range egg, beaten
65 g gluten-free all purpose flour
20 g coconut flour (or dessicated coconut finely whizzed in the food processor)
1 tsp gluten-free baking powder
1 tsp vanilla extract
3-4 tbsp whole milk
Grated zest of one unwaxed lemon
For the glace icing
Icing (powdered) sugar
Lemon juice
Water
Sprinkles or other sugar decorations of your choice
Method
1. Preheat the oven to 180C/160C fan/350F/Gas Mark 4.
2. Place the butter or baking spread and caster sugar in a large bowl and either beat with an electric whisk or cream with a wooden spoon until light and fluffy.
3. Add a little of the beaten egg to the mixture and beat until fully combined. Sift in some of the flours and baking powder and beat, to prevent any curdling. Repeat with the remainder of the beaten egg and the flours and baking powder until everything is well-combined.
4. Carefully add 3-4 tablespoons of whole milk and stir into the cake batter slowly with a spatula until fully combined.
5. Add the grated lemon zest and the vanilla extract, carefully stirring until fully combined.
6. Place 8 standard cupcake cases in a 12-hole cupcake tin and divide the cake batter equally between them. Shake the tin to level out and place in the centre of the preheated oven for 15-18 minutes (oven temperatures vary). The cakes are ready when a skewer inserted comes out clean.
7. Remove the cakes from the oven and set the tin aside for 10 minutes or so and then remove the cakes from the tin and place on a wire rack to cool completely.
8. Meanwhile, make the glace icing. Sieve some icing sugar into a bowl with a squeeze of lemon juice and a few drops of filtered water and mix well with a tablespoon to a smooth consistency. You want it so you can trace a figure of eight in the bowl of icing when you hold the spoon above it. If the icing is too thick, add a little more liquid a few drops at a time. If the icing is too thick, add a little more sieved icing sugar.
9. Carefully spoon some icing sugar over the top of each fairy cake and decorate with sprinkles or other sugar decoration of your choice, such as sugared flowers, candied lemon zest, jelly beans or other dainty candies.
10. Place the fairy cakes on a platter and allow to the icing to set in the refrigerator for 30 minutes or so and then either transfer to the tea table or a cake tin to store if they are not being eaten immediately.
Cook’s notes:
1. If you like your cakes a little more generous, use a 6-hole cake tin and larger cupcake cases and divide the mixture between them. Allow up to 20 minutes baking time accordingly.
2. If your oven temperature tends to be hotter, try baking the cakes at 170C/150C fan/325F/Gas Mark 3 or whatever you find usually works for you.
3. These cakes can also be decorated with lemon or vanilla buttercream frosting and sugar decorations, or alternatively do them as old-fashioned butterfly cakes.
September started well with beautiful warm, sunny weather right into the second week of the month, right up until we left for a week’s holiday in south-west Scotland. In fact, the temperatures were high enough that it was like being in the South of France, albeit more humid.
The herbs were doing well being in part sun-part shade, and I treated us to a new pot of garden mint from our local garden centre and which Dan potted up into a larger, terracotta pot so it has plenty of room to grow. My late mother had several mint bushes at the end of her garden and one of my favourite culinary memories growing up is of her homemade mint sauce to accompany Sunday lunch or cheap, slow cooked cuts of lamb. These days I use fresh mint leaves in a wide variety of ways including steeped in hot water as a healthful drink, raw in salads and chopped finely in vegetarian Indian and Middle Eastern recipes; mint is delicious in falafels or mixed with yoghurt as a dressing or dip.
August’s land cress had been eaten, thus I sowed some spinach seeds in the trough of my growing table at the start of the month. The seedlings are now starting to thrive as long as we manage to keep the slugs and snails off them.
The nasturtiums were only leafing but since we returned from holiday at the weekend more new flowers have appeared and more plants have started growing in the troughs. It is now the last week of September and Dan has already enjoyed some nasturtium leaves and petals in his lunchtime salads, though growth is now slowing as we head into early autumn.
2023 has been an excellent year for salad leaves in particular and we have enjoyed a wide variety of homegrown in salads and sandwiches. As well as the spinach seeds, I also sowed some more lettuce seeds in the troughs wherever there were gaps. As long as I start to cover them with fleece for frost protection they should keep growing all winter.
The kale is also flourishing and we have had some of it chopped and lightly steamed with leftovers left to ‘fester’ for a couple of days in the refrigerator with cooked potatoes and then fried as bubble and squeak, which we enjoy with fried free range eggs for breakfast or a simple supper.
Before we went on holiday, Dan picked all the beetroot and weed potatoes and we stored them in a cool place in hessian sacks. To be honest, the beetroot didn’t last long; some we ate roasted or steamed and I sliced and pickled some of the steamed ones for later on in the year, and others I gave to my piano teacher, Jake, and our cleaner friend Val, along with kale, beetroot tops (which are a good substitute for spinach and Swiss chard in recipes), potatoes and rhubarb.
In fact, since we have returned from Scotland the rhubarb has once again expanded and we may need to cut it back yet again. Our gardener Lorraine will move the rose bush in November, and will plant the one currently in a plant pot on my great-uncle’s grave. My lovely cousin Agnes gave me a fragrant yellow rose bush for my special birthday called “Golden Memories”, and Dan is going to plant it in the new designated area. All our rose bushes are traditional, sweet-smelling ones and should make a breathtaking display next summer. Recently, we have enjoyed several vases from the rose bushes that are already well-established. We may still also ask Lorraine to split the rhubarb crowns and plant ones elsewhere, perhaps at the end of the garden near the greenhouse, or perhaps we will give away what we cannot easily accommodate.
The quinces are swelling nicely on the tree, though some of the fruits have grown rotten on the bough. However, I have picked a few lovely ones already, as well as a couple of windfalls and we should have another excellent crop this year. I usually enjoy making jars of membrillo (traditional Spanish quince paste), which goes well with cheese, nut roasts and charcuterie. Sometimes I add quince pulp just as it is to a homemade nut roast and this year I am going to try adding some to marrow chutney.
The courgettes are still thriving and most have not been devoured by garden ‘pests’; in the space of a week one of the courgettes had become an enormous vegetable marrow! I cut a small piece off the marrow last night to put in our suppertime vegetable pasta bake and Dan’s salad lunch box for today, and most of it is still sitting enormously in our ‘fridge; later in the week, most of it will become chutney.
The tomatoes have cropped incredibly well this year, with no sign of the tomato blight that spoiled last year’s crop. Before our holiday, I made a tasty tomato sauce for pasta and other dishes and we had most of that last night in the pasta bake and I am having the rest to accompany my beanburger this evening, as Dan is staying overnight at his mum’s due to his work schedule. After supper, I will be making a big batch of tomato chutney, which I prepared earlier this afternoon and takes about an hour to cook on the stove.
Needless to say, we are looking forward to more tasty pickings as the month draws to a close and it will be interesting to see what October brings.
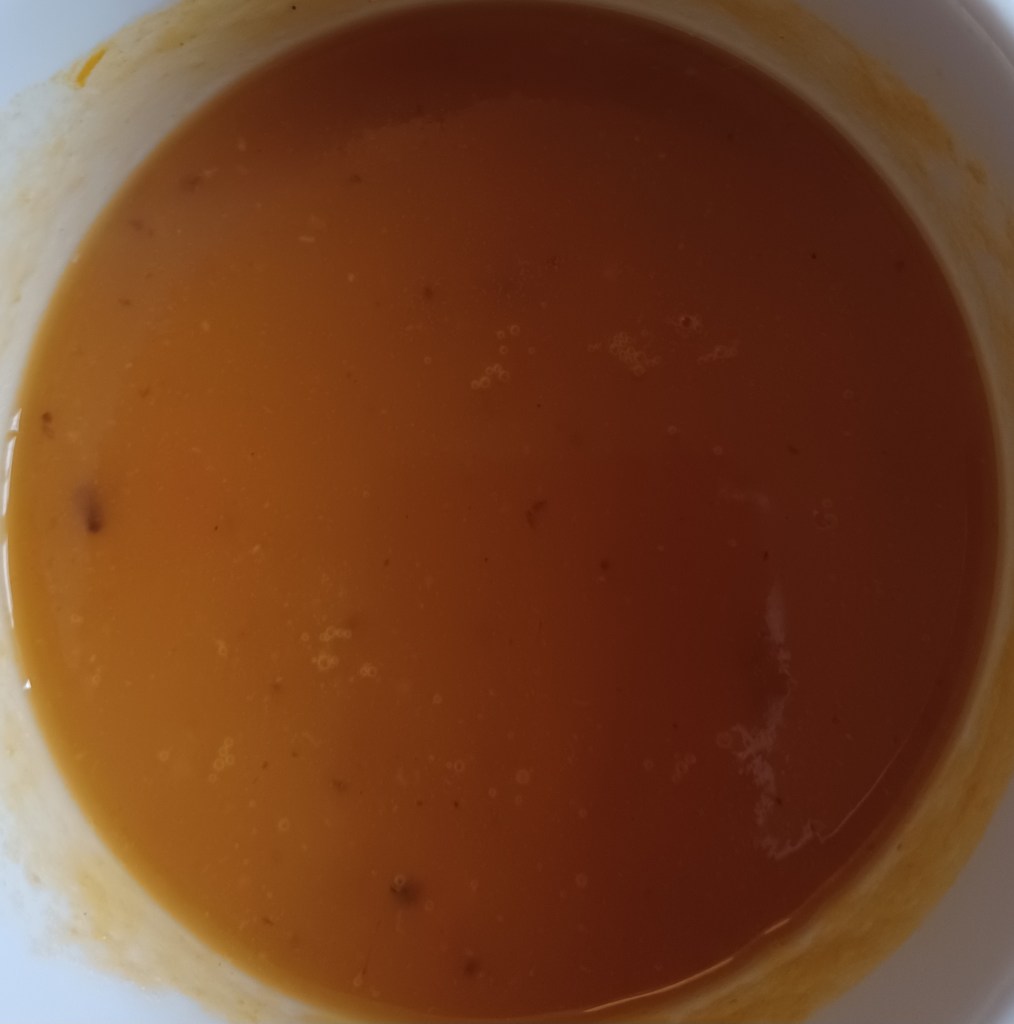
My Creamy Spiced ‘Marigold’ Soup isn’t made with any flowers at all but its attractive orange hue reminds me of the pretty African Marigolds growing in our front garden as a young girl growing up in Zambia. We lived there while my father carried out his two-year contract at the University of Lusaka and my mother was Secretary to the Bursar there. We returned to the UK in June 1971 when political and social unrest was beginning to make life increasingly difficult for the expatriate community.
This soup recipe is easy and packs a punch, taking around 15-20 minutes to prepare depending on how large or small you chop your root vegetables and using hot stock will also help things along. I have used carrots, turnip and sweet potato but you could substitute the sweet potato with squash or pumpkin, for example, as they belong to the same family of vegetables. If you avoid spicy food or are making it for people who have plainer tastes or who are unwell, you can still make this soup but omit the spices. For extra creaminess try adding a splash of coconut milk instead of cream and keep it vegan!
Ingredients (serves 4)
1 tbsp coconut or other oil
1 medium sweet potato, peeled and cubed
2 large carrots, peeled and chopped
1 small white turnip, peeled and chopped
1 celery stick, diced
1 white onion, diced
1 garlic clove, chopped finely
1 tsp curry powder (optional)
1 tsp cumin (optional)
1 tsp turmeric (optional)
2 cm piece root ginger, chopped
a good pinch of chilli flakes (optional)
1 litre vegetable stock, or vegetable water (eg left over from steamed vegetables)
1 bay leaf
Sea salt and pepper
Splash of single cream or coconut milk (optional)
Method
Scoop one tablespoon of coconut oil into a large heavy-bottomed saucepan over a medium heat and when it has melted, turn the heat right down and add the diced onion and celery adding a little sea salt and sweat them down for a few minutes. Be careful not to let them brown, they only need to be softened. Add the chopped garlic and stir through to combine.
Add the curry powder, chilli flakes and other spices (if using) and stir quickly through the softened onion, garlic and celery, then add the other vegetables, stirring everything together to thoroughly combine.
Turn up the heat a little and pour in the hot vegetable stock or vegetable water and the bay leaf and bring to the boil, then simmer until all the vegetables are cooked through, adjusting the heat if necessary.
Remove the saucepan from the heat and allow to cool slightly, remove the bay leaf and then whizz with a stick blender until smooth.
Return to a low heat, add a good splash of cream or coconut milk to your liking and check and adjust the seasoning with a sprinkle of salt and freshly ground pepper if necessary.
Ladle the soup into bowls and garnish with a sprinkling of fresh chopped parsley or coriander and perhaps a small swirl of coconut milk or cream and serve with crusty bread.
Bon appetit!
COOK’S NOTES
Omit the garlic if you do not like it
You can make this soup with pre-cooked root vegetables or leftovers, which will speed up the cooking time.
If you love coriander, add a teaspoon of ground coriander seeds at stage 2.
If you do not have any root ginger, a teaspoon of ginger powder or dried galangal will work just as well.
If you do not like spicy soup, make it without some or all of the spices but try adding 1 tbsp tomato puree or tomato ketchup
If the soup is too thick, add a little water at stage 5.
For the stock, if you are not using homemade stock then it may be made with water and a stock cube or 1 teaspoon of vegan Vegetable Bouillon. Use no more than 1 tsp Buillon to 1 litre of water as it is very salty.