Every year in the UK, some 7 million tonnes of food and drink is thrown away, much of which is past their ‘best before’ date but would still be perfectly good to eat.
Approved Food is an online store in the UK owned by Morris & Son (Leeds) Ltd of Dodworth, South Yorkshire. With the tag line Waste less, save more, they specialise in food, drinks and a wide range of other items that are often near or past their ‘best before’ (not ‘use by’) dates by offering them at discounted prices, though they also sell many other products – for example, toiletries, pet food and household items – that are still comfortably in date but at lower prices than one might find at the supermarket. Nothing sold is past its USE BY date and they currently receive 4.66/5 in reviews.
Approved Food have over 2,000 products, many at huge discounts, including Big Brands such as Kellogg’s, Walkers and Hotel Chocolat; basic store cupboard essentials; and supermarket and department store products encompassing anything from food and alcoholic beverages to toiletries, gifts and more. Their regular customers typically save around £60 on their monthly shop compared to high street prices – a saving of over £700 per year. Stock on their website updates every day – all at heavily discounted prices – and there are often special daily promotions too.
Approved Food were featured on BBC Food Fighters in July 2011 and you can watch it here:-
In lab tests all food samples were clean and safe to eat.
However, I first discovered Approved Food in May 2023 following an article in the moneysavingexpert Martin Lewis weekly newsletter, which was offering free delivery on a first online order. The cheapest delivery is £3 via DX and upgrades are available at an extra cost, but £3 is still a saving, right?!
I personally have saved £321.63 since placing my first order based on one order every 4-6 weeks on average and tend to mostly buy cat food (which always has a USE BY between 2024 and 2026) and perhaps a few store cupboard top-ups. The website is quick and fairly easy to navigate and the daily bargains are prominently flagged up, meaning you can easily add any to your basket there right away. If a product is limited to a certain quantity per customer or if a very few of an item are remaining, then it will always say so. Products you add to your basket are reserved for an hour and if you take a while browsing and exceed this time frame then there may be items that you need to remove before proceeding to checkout, and it is at this stage when the site may occasionally become a little glitchy; with a little patience I have never had a problem proceeding to payment but generally these days my strategy is to have in my mind what I need before logging in, to avoid disappointment. Online orders received before 2pm will normally be delivered within 2-3 days by DX delivery and you will need to be at home to receive your order as they are not left at your address unattended. You will be notified by DX the day before your delivery and will be texted a two-hour slot the following morning, giving you the opportunity to change the day of your delivery if necessary to one more convenient for you.
Downsides? As with any site, a few minor niggles. Most notably, when browsing the categories or running a search the majority of items that usually first appear are crisps and candy and other sugar-laden things, and you may need to do some scrolling, but please don’t be discouraged by this. A little patience will be worth the effort and your wallet will thank you too!
As the global cost of living continues to bite, many of us find it increasingly important to have a supply of ingredients in our store cupboards that we can fall back on in case of any crisis, personal or more widespread, that may affect our ability to nourish and sustain ourselves and our loved ones (including our animals).
What would we do, for example, were there to be a sudden water contamination and our mains supply was unsuitable to drink? Are we concerned about the fluoridation of our water supply and its link to cognitive decline? What would we do were the water authority to turn off the supply in order to undertake essential mains works? This particular situation arose in our area in December last year and again in early 2023. When water is essential to our existence, I believe that having supplies of bottled water for everyday use and for emergencies is vitally important, as is maintaining a water butt or any other container outside to collect rainwater, if space allows.
If someone is suddenly coming to dinner and you don’t have an opportunity to hurry to the shops, or there is a more widespread supply problem for example, or the price of everything continues to escalate, how do you keep warm and put food on the table?
All these are questions we need to be thinking about and asking ourselves how we would deal with them and, indeed, anticipating them, not with the intention of inviting negativity to manifest itself but, in a more positive way, of being prepared for any eventuality and being in a position to provide for yourself and your household and loved ones, and perhaps being able to support your local community in some way, too, in the event of a crisis.
This is where budgeting, scratch cooking and emergency food prepping come into their own. There is a growing band of YouTubers such as myself focusing more on this area. As you may know, I have been sharing budget meals and self-sufficiency for a long while now, whether it be an inexpensive, wholesome lunch or supper, a 1940s-inspired recipe, or more recently fruit and vegetable gardening and the store cupboard. Here is one of my recent videos:-
Ocado Food Haul/Prepping the Pantry
Responding to the needs of my subscribers, I intend to focus more on budget meals and pantry prepping in the future as well as other areas of self-sustainability, such as gardening, foraging/free food, home-preserving, sprouting and fermenting, etc. One of my subscribers has asked me to feature more 1940s recipes as they feel that what we are all going through is akin to wartime living, as is the need to be ever more canny with what money we have, let alone put any aside for a rainy day which of course most of us aspire to.
Of course I will share some of my activities with you all, as well as my other content and trust that you might find it interesting and entertaining. However, if you don’t, no worries; it is a free world in my world!
I have started to participate in a couple of open collaborations with GrandmaSandy and others on YouTube, as well as seeking out other content creators who share my ideas and values and lifestyle choices. Grandma Sandy came across my @catevanscuisine channel some months ago and gave me a much-needed shout-out for which I am most grateful, and I am now paying it forward and giving a shout-out to a few of the wonderful YouTubers I subscribe to:-
September started well with beautiful warm, sunny weather right into the second week of the month, right up until we left for a week’s holiday in south-west Scotland. In fact, the temperatures were high enough that it was like being in the South of France, albeit more humid.
The herbs were doing well being in part sun-part shade, and I treated us to a new pot of garden mint from our local garden centre and which Dan potted up into a larger, terracotta pot so it has plenty of room to grow. My late mother had several mint bushes at the end of her garden and one of my favourite culinary memories growing up is of her homemade mint sauce to accompany Sunday lunch or cheap, slow cooked cuts of lamb. These days I use fresh mint leaves in a wide variety of ways including steeped in hot water as a healthful drink, raw in salads and chopped finely in vegetarian Indian and Middle Eastern recipes; mint is delicious in falafels or mixed with yoghurt as a dressing or dip.
August’s land cress had been eaten, thus I sowed some spinach seeds in the trough of my growing table at the start of the month. The seedlings are now starting to thrive as long as we manage to keep the slugs and snails off them.
The nasturtiums were only leafing but since we returned from holiday at the weekend more new flowers have appeared and more plants have started growing in the troughs. It is now the last week of September and Dan has already enjoyed some nasturtium leaves and petals in his lunchtime salads, though growth is now slowing as we head into early autumn.
2023 has been an excellent year for salad leaves in particular and we have enjoyed a wide variety of homegrown in salads and sandwiches. As well as the spinach seeds, I also sowed some more lettuce seeds in the troughs wherever there were gaps. As long as I start to cover them with fleece for frost protection they should keep growing all winter.
The kale is also flourishing and we have had some of it chopped and lightly steamed with leftovers left to ‘fester’ for a couple of days in the refrigerator with cooked potatoes and then fried as bubble and squeak, which we enjoy with fried free range eggs for breakfast or a simple supper.
Before we went on holiday, Dan picked all the beetroot and weed potatoes and we stored them in a cool place in hessian sacks. To be honest, the beetroot didn’t last long; some we ate roasted or steamed and I sliced and pickled some of the steamed ones for later on in the year, and others I gave to my piano teacher, Jake, and our cleaner friend Val, along with kale, beetroot tops (which are a good substitute for spinach and Swiss chard in recipes), potatoes and rhubarb.
In fact, since we have returned from Scotland the rhubarb has once again expanded and we may need to cut it back yet again. Our gardener Lorraine will move the rose bush in November, and will plant the one currently in a plant pot on my great-uncle’s grave. My lovely cousin Agnes gave me a fragrant yellow rose bush for my special birthday called “Golden Memories”, and Dan is going to plant it in the new designated area. All our rose bushes are traditional, sweet-smelling ones and should make a breathtaking display next summer. Recently, we have enjoyed several vases from the rose bushes that are already well-established. We may still also ask Lorraine to split the rhubarb crowns and plant ones elsewhere, perhaps at the end of the garden near the greenhouse, or perhaps we will give away what we cannot easily accommodate.
The quinces are swelling nicely on the tree, though some of the fruits have grown rotten on the bough. However, I have picked a few lovely ones already, as well as a couple of windfalls and we should have another excellent crop this year. I usually enjoy making jars of membrillo (traditional Spanish quince paste), which goes well with cheese, nut roasts and charcuterie. Sometimes I add quince pulp just as it is to a homemade nut roast and this year I am going to try adding some to marrow chutney.
The courgettes are still thriving and most have not been devoured by garden ‘pests’; in the space of a week one of the courgettes had become an enormous vegetable marrow! I cut a small piece off the marrow last night to put in our suppertime vegetable pasta bake and Dan’s salad lunch box for today, and most of it is still sitting enormously in our ‘fridge; later in the week, most of it will become chutney.
The tomatoes have cropped incredibly well this year, with no sign of the tomato blight that spoiled last year’s crop. Before our holiday, I made a tasty tomato sauce for pasta and other dishes and we had most of that last night in the pasta bake and I am having the rest to accompany my beanburger this evening, as Dan is staying overnight at his mum’s due to his work schedule. After supper, I will be making a big batch of tomato chutney, which I prepared earlier this afternoon and takes about an hour to cook on the stove.
Needless to say, we are looking forward to more tasty pickings as the month draws to a close and it will be interesting to see what October brings.
Early July started as June had ended with changeable weather. I was staying in Richmond-upon-Thames with my mother-in-law “MIL”, Verna, thus Dan was entirely in charge of the garden until he arrived to pick me up on the afternoon of 4th July. During my absence he had picked a few black raspberries that had ripened and some redcurrants, though the second batch of redcurrants we picked later on in July was a smaller one and sadly the whitecurrants amounted to nothing.
The Heritage beetroot were coming along well though their leaves were looking a little tatty but nothing a little plant food wouldn’t cure and they recovered well. By now in mid-August we have already picked a few; a few golden beet, a candy stripe, a white and a red one. A couple of them had been munched a little by slugs or snails but washed and with those bites chopped out they have been perfectly delicious chopped and lightly pickled in a drizzle of home-produced raw apple cider vinegar or grated salads, with their spinach-like leaves washed and shredded, added to salads and curries.
The “weed” potatoes have continued to flourish and earlier in July, Dan harvested some and we enjoyed these at mealtimes. Funnily enough, it looks like more of these plants are cropping up in other places in that bed so we may have a good potato harvest entirely by fluke!
The beans and peas produced a very small though delicious crop, despite being trampled on by our two adopted cats, Arthur and Miss Robyn Guinevere. Our senior boy, Merlin, appears to be more enlightened and leaves our crops alone though enjoys a wander or two in the garden and a rest on the patio most days; he was always more of a house cat in his nature.
Later in June of our elderly neighbours who lives further along the street had given us a courgette plant and some tomato plants and they had bedded in really well. We are growing a wide variety of tomatoes this year, from plum to salad varieties to cherry tomatoes perfect in salads or for snacking. Once I had returned from Richmond I stopped by for a chat and she invited me in to see her garden. She has a big birthday later this year yet shows no sign of discarding her green fingers, and her ability to be sustainable and grow all she needs is impressive. She has some really inventive methods of growing fruit and vegetables and not one area of her garden is an empty space but is well-utilized. I believe gardening helps to keep her positive and young at heart and she even has carefully thought-out areas for her beloved cat Monty to enjoy.
The blueberry plant is still young and there will be no crop this year, but it is thriving among the pine needles. The plant produced a single berry which we shared. It was full of flavour and we look forward to more next year.
The second crop of radishes failed miserably. They were flourishing in July and despite being thinned out, most failed to swell or develop. Perhaps it was the soil or the weather, or perhaps it was a combination of both. One reason for radishes not developing can be if the soil is too compact or if it contains excess nitrogen. The soil was loose enough and as we have usually grown radishes in the ground in previous years, we can only assume too much nitrogen was present in the soil and in future when growing radishes in containers we will add some mulch, which should help to rectify the problem.
The butterhead lettuces were a tasty success and were picked for salads during the course of July but the second batch of seeds did not produce the hoped-for rocket as we had a rainy spell towards the end of the month and the slugs and snails stripped the rocket and the underwhelming radishes bare, so all was lost, and the nasturtiums were looking glum though a few of those have rallied round after another plant feed.
Our Garden in July
The rhubarb has cropped amazingly well this year. We have picked rhubarb every month since May right up to about a week ago. Last year the crowns were new and it was important to leave them to settle in, so this year has been their first harvest. I have chopped a lot of the July and August rhubarb into 1″-2″ chunks and stored in a big bag in the freezer for future recipes, including pies and chutneys, so we can still enjoy it once summer is long gone.
We picked some of the Heritage beetroot and all of the speciality globe carrots, all of which were delicious. The beetroot crop comprises a wide variety of types; we have white, red, golden and candy stripe. They have been pickled, grated in salads and roasted as part of a main dish with other vegetables. It is now early September and I have cooked the last of what we had picked so it’s time to pull up some more! Stored correctly or preserved and pickled they should last us through the winter months.
In August I sowed some cut-and-grow salad leaves and some land cress. The land cress is all used up now, as are some of the fast-growing salad leaves, so I have sown some more leaves along with some spinach to keep us going for the next few weeks, as we eat salad for lunch every day.
Whilst making the August video we came across some wilded blackberries nestled among our redcurrant and black raspberry canes, a sheer delight! We love blackberries made into jam or in pies and crumbles, and they are also a good accompaniment to game, which Dan enjoys. We also enjoy them just as they are, freshly picked.
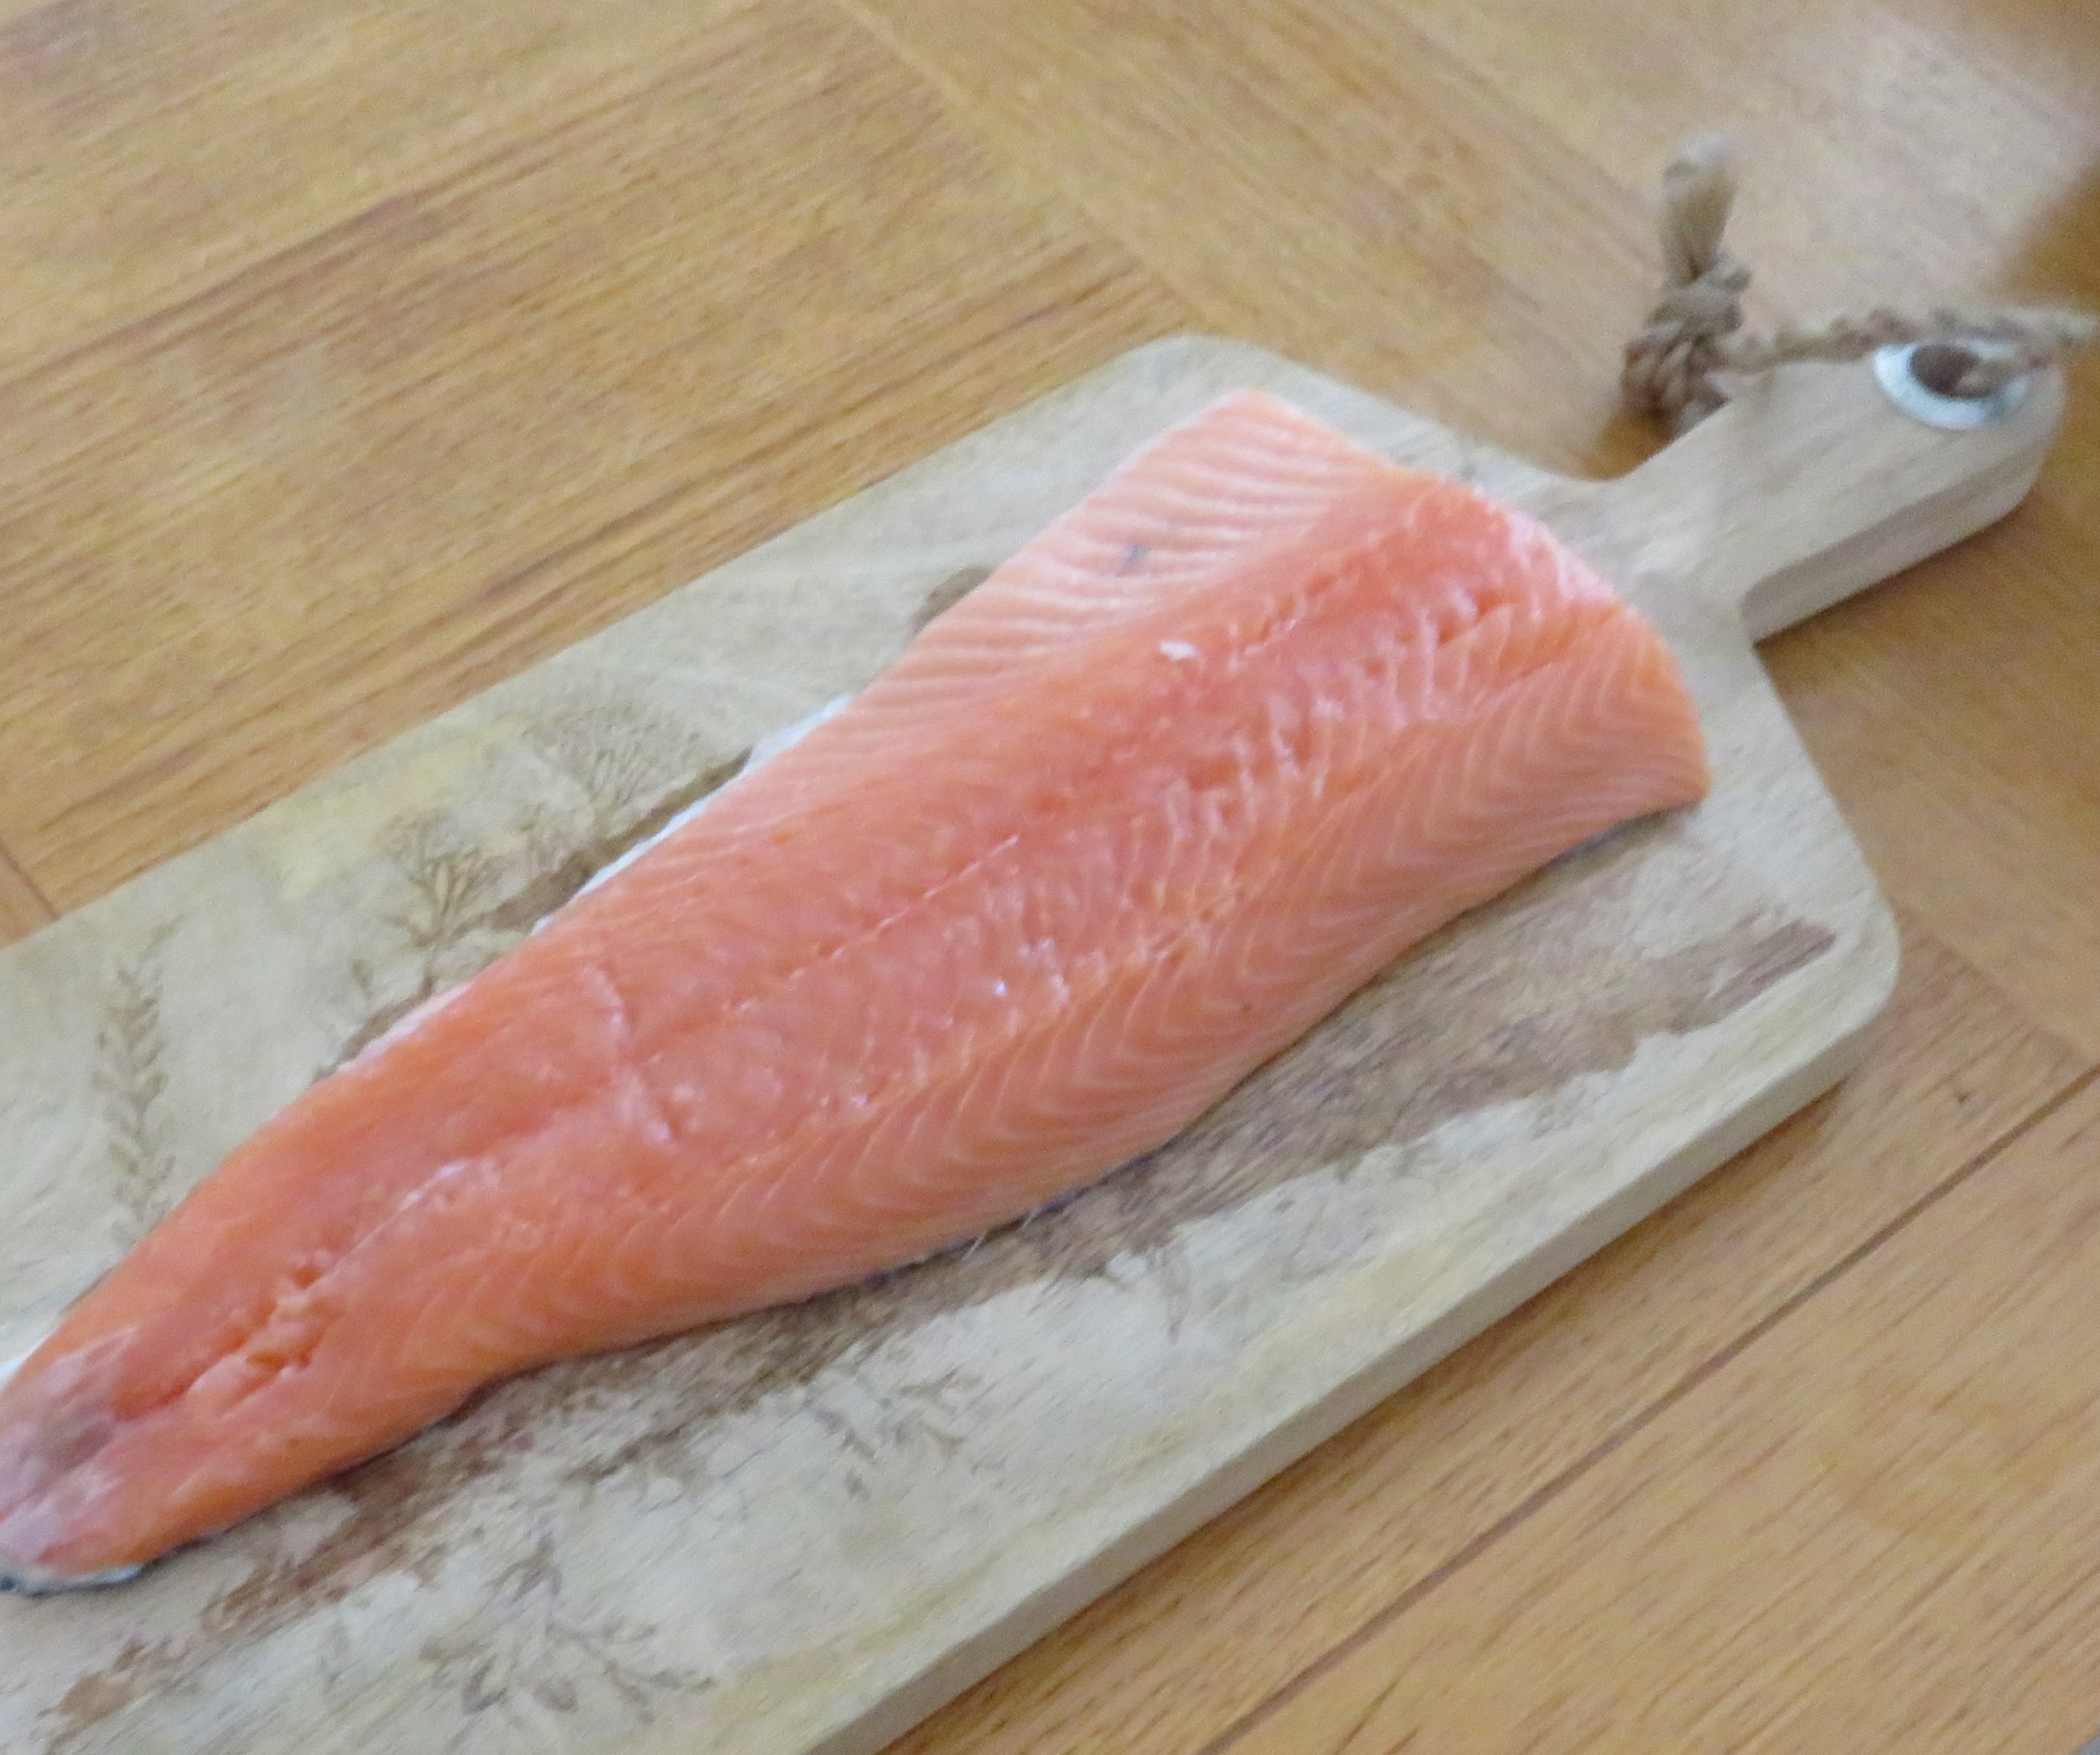
If you do not already grow any of your own produce, I hope our garden project has been inspiring you to give homegrown a try.The main thing to note is that home produce is of course at is freshest, can just be picked whenever it is needed and is way more flavourful than shop bought, which tends to be picked before it is ripe and is often stored or treated with chemicals or preservatives for a longer shelf life and therefore isn’t as fresh as homegrown or, say, foraged or purchased from a local farm shop for example. If you don’t object to finding pests in leaves and salad greens or having to wash the soil off your root vegetables, and if you have any amount of space to grow your own – even if it’s just a window box or a few plant pots or other containers – then I think homegrown is definitely the way to go.
Spring was late this year, we estimate most things are 2-3 weeks behind in growing time and despite some obvious challenges, it has not deterred us.
Dan and I have grown our own produce ever since we had our first flat together in Isleworth 16 years ago, though I personally have been growing fruit and vegetables since the mid-1990s after I left my long-term partner at the time and moved into a rented house in South Derbyshire. The property had a garden with a greenhouse and a lawn, and a shared accessway with my neighbours in the small row of railway cottages we occupied.
I started off with tomatoes and bell peppers in the greenhouse and soon discovered I had ‘green fingers’ as the space became full and I would engage in exchange and barter schemes with a couple of my neighbours who had allotments across the road from the cottages. Those allotments were on fertile land by the canal and there was a long waiting list but in any case in those days I worked full-time and therefore did not have sufficient time to invest in a large growing project, but the seeds were sown and I had fallen in love with gardening and the whole ethos behind home-produced.
Over the winter months of 2022/23 in the midst of the global cost-of-living crisis and mindful of the need for tightening our money belts, Dan and I spent some time discussing and planning what we would grow this year in an effort to become even more sustainable and self-sufficient. Although we grew a variety of fruit and vegetables last year, we knew our garden was capable of accommodating more, even with one of our two raised beds being purposely left fallow for the whole growing season to allow the soil to regain its nutrients. The continuous growing of crops eventually depletes the soil of certain nutrients, resulting in the fall in crop yield. This means that manure or fertilizers need to be added to the soil in order to replenish it with the nutrients it has lost.
There are a number of disadvantages of adding fertilizers to soil. Expensive to buy, they they are easily washed away by water and reduce the fertility of the soil. Also, they harm the microbes naturally present in soil and cause pollution. In general, fertilizers provide only a short-term fix as they also tend to change the nature of the soil, making it either too acidic or too alkaline, although some plants may thrive in one or the other. For example, blueberries must grow in acid (ericaceous) soil or potting compost with a pH value of 4.5-5.5. Our blueberry plant is happy in a corner of our garden near our quince tree among a nest of pine needles.
Over winter I ordered four wooden self-assembly ‘growing tables’ (80 x 40 x 75 cm). Made from 100% FSC sustainably sourced wood, the design comprises a trough on legs for easy-working height with a shelf underneath, from Homebase and these cost around £37 each, although the price has since gone up to £45. These I had home-delivered and Dan put them together, two for our patio and two for our greenhouse. We then lined the troughs with black membrane and filled them with topsoil. Two have since collapsed due to warpage, and so far Dan has mended one of them and we have some plastic troughs on the patio containing various salad goodies. We store and thoroughly wash and reuse all our pots and other growing containers until they fall apart, so fortunately when the tables collapsed we had other containers ready to hold the plants that had endured a nasty shock.
My main project is tending the herb garden and the salad goodies while Dan focuses on the rhubarb, the soft fruit and the vegetables in the other raised bed which needs heavy digging and with my back problems is something I am not capable of, though I do help out from time to time.
We sowed and propagated a variety of lettuce and tomato seeds indoors throughout March as the weather was still too cold to sow directly into the raised bed or any container outside, and more seeds – jalapeno, salad leaves, bell peppers = were sown indoors in early April as the weather continued to be disappointing, but finally they were ready to go outside and by the time King Charles III was coronated nasturtiums, cut-and-come again salad leaves (which were ready for harvesting) and radishes in the growing tables, more lettuce seedlings in a trough and in the greenhouse tomato plants growing well and the salad leaves, chillis and peppers sown back in April propagating in egg boxes.
We use no chemical pesticides or other chemicals on our crops but to deter slugs and snails we scatter broken-up egg shells, oatmeal or sharp sand which act as a natural deterrent, although this method is by no means foolproof. It is however kinder to creatures and the environment and ultimately our digestive systems.
The kale seeds we had sown directly in the ground in March was flourishing. Although primarily intended to provide us with a good source of nutrients during the ‘hungry gap’ period of January and February next year, later in May we were able to harvest some of the young leaves to chop finely for salads. Next to be sown directly into the ground were carrots, parsnips and Heritage beetroot, beans and peas, which would provide a variety of colours and flavours during the summer.
Two or three ‘weed potato’ plants had sprung forth. These are plants that grew out of last year’s potato crop when we had probably overlooked a few potatoes in the ground during harvesting. This seems to happen most years and the potatoes are always delicious and perfectly formed with no blight or tunnelling. A happy accident, one might say.
In the herb garden we had garlic, lavender and rosemary all growing well in pots and there was rhubarb ready for picking.
The blueberry bush we bought last year was faring reasonably well though needed repotting, though of course in the end we planted it in the ground. The quince tree provided us with a good harvest last year and was once more coming into leaf after a long winter and the black raspberry bushes and redcurrants and whitecurrants were also flourishing although we did not expect a harvest until later in June or July due to a late spring so to celebrate the Coronation, Dan was perfectly happy with a dressed crab salad containing the first of our tender, homegrown salad leaves. You can see the recipe video here:-
The month of June started with similarly mixed weather and variable results, and certain of the salad goodies were not thriving as they ought, especially the radishes which were stunted in growth and spongy and eventually I pulled them up and sowed a fresh quantity of seeds in their place. The second of the growing tables also collapsed.
The butterhead lettuces I had planted were a delight and we enjoyed them in our daily salads along with some of the nasturtium flowers and leaves that were thriving; some of them were not so these too were pulled up to make way for fresh salad goodies.
The Heritage beetroot were also beginning to flourish and we started to look forward to the time (a bit later in the year) when they would be ready to pick perhaps for a colourful beetroot salad – red, candy stripe and golden – along with some soft goat’s cheese, its creamy saltiness balancing out the sweet earthiness of the beetroot, a union of perfection with a zingy red wine vinegar dressing dancing on the tongue.
Our rhubarb was still growing lavishly. We had started harvesting it in modest quantities since early May, simply picking as much as we needed, and this continued throughout June month. A poached rhubarb compote spiked with orange juice and root ginger and finished with a drizzle of honey was a simple and healthy pudding served with some full-fat Greek yoghurt.
The carrots, peas and beans were all coming up and the black raspberries were well on their way for picking, and we started harvesting at the end of June, along with the first of the redcurrants.
The young kale we had planted earlier in the year we thinned out in June to encourage abundant growth, and the tender leaves were chopped finely and added raw to salads. Kale is a nutrition superstar literally packed with goodies; vitamins A, B6, C, K, folate, fibre, carotenoids and manganese and you can eat it every day in moderation for a real boost to your health and wellbeing and a strong immune system. Believe it or not, one single, 100g serving of kale provides over 100% of your daily intake of vitamin C, which helps to reduce the risk of cataracts. Kale also provides a rich source of tlutein and zeaxanthin, antioxidants that lessen the risk of macular degeneration and other age-related eye diseases.
In the greenhouse the bell peppers and tomatoes were in good condition. We had started spraying the leaves every five weeks with half a soluble asprin added to water in a bottle (a tip I learned from watching “Countryfile”), which helps to protect against blight. Potato plants, roses and most other plants can also be sprayed in the same way to protect against diseases.
Thus, only the salad greens were conspicuous in their lacklustre, but I was resolute in my determination to succeed.
My Creamy Spiced ‘Marigold’ Soup isn’t made with any flowers at all but its attractive orange hue reminds me of the pretty African Marigolds growing in our front garden as a young girl growing up in Zambia. We lived there while my father carried out his two-year contract at the University of Lusaka and my mother was Secretary to the Bursar there. We returned to the UK in June 1971 when political and social unrest was beginning to make life increasingly difficult for the expatriate community.
This soup recipe is easy and packs a punch, taking around 15-20 minutes to prepare depending on how large or small you chop your root vegetables and using hot stock will also help things along. I have used carrots, turnip and sweet potato but you could substitute the sweet potato with squash or pumpkin, for example, as they belong to the same family of vegetables. If you avoid spicy food or are making it for people who have plainer tastes or who are unwell, you can still make this soup but omit the spices. For extra creaminess try adding a splash of coconut milk instead of cream and keep it vegan!
Ingredients (serves 4)
1 tbsp coconut or other oil
1 medium sweet potato, peeled and cubed
2 large carrots, peeled and chopped
1 small white turnip, peeled and chopped
1 celery stick, diced
1 white onion, diced
1 garlic clove, chopped finely
1 tsp curry powder (optional)
1 tsp cumin (optional)
1 tsp turmeric (optional)
2 cm piece root ginger, chopped
a good pinch of chilli flakes (optional)
1 litre vegetable stock, or vegetable water (eg left over from steamed vegetables)
1 bay leaf
Sea salt and pepper
Splash of single cream or coconut milk (optional)
Method
Scoop one tablespoon of coconut oil into a large heavy-bottomed saucepan over a medium heat and when it has melted, turn the heat right down and add the diced onion and celery adding a little sea salt and sweat them down for a few minutes. Be careful not to let them brown, they only need to be softened. Add the chopped garlic and stir through to combine.
Add the curry powder, chilli flakes and other spices (if using) and stir quickly through the softened onion, garlic and celery, then add the other vegetables, stirring everything together to thoroughly combine.
Turn up the heat a little and pour in the hot vegetable stock or vegetable water and the bay leaf and bring to the boil, then simmer until all the vegetables are cooked through, adjusting the heat if necessary.
Remove the saucepan from the heat and allow to cool slightly, remove the bay leaf and then whizz with a stick blender until smooth.
Return to a low heat, add a good splash of cream or coconut milk to your liking and check and adjust the seasoning with a sprinkle of salt and freshly ground pepper if necessary.
Ladle the soup into bowls and garnish with a sprinkling of fresh chopped parsley or coriander and perhaps a small swirl of coconut milk or cream and serve with crusty bread.
Bon appetit!
COOK’S NOTES
Omit the garlic if you do not like it
You can make this soup with pre-cooked root vegetables or leftovers, which will speed up the cooking time.
If you love coriander, add a teaspoon of ground coriander seeds at stage 2.
If you do not have any root ginger, a teaspoon of ginger powder or dried galangal will work just as well.
If you do not like spicy soup, make it without some or all of the spices but try adding 1 tbsp tomato puree or tomato ketchup
If the soup is too thick, add a little water at stage 5.
For the stock, if you are not using homemade stock then it may be made with water and a stock cube or 1 teaspoon of vegan Vegetable Bouillon. Use no more than 1 tsp Buillon to 1 litre of water as it is very salty.
Recently I was invited on to The Jaden Show on YouTube hosted by Jaden Cornelious to discuss my music and other creativity and it was so much fun. The interview was pre-recorded over Zoom and we had much to catch up on as we hadn’t seen one another for 7 years – isn’t that crazy?!
In the late 1990s Jaden was Lead Singer/Songwriter in the UK group B-YOND who were best known for their song, “The Key”. They also performed the song “Lighten Up” on an episode of the TV programme Blue Peter in 1997. These days, Jaden is a Classical crossover artist now based in Mexico. One of his ambitions is to sing in every state of the United States and he’s performed in three so far. He is also renowned for his work with animals and community projects including the non-profit organizations JC Fundraising and Power2Endure. He is Global Ambassador at Discover the Gift, owner of Selva Singing and Director at the London Room – Recording Facility. In 2009 Jaden and friends put together an evening of celebration of songs made famous by Olivia Newton-John with the aim of raising £10,000 within 6 months for the ‘Only Olivia’ Breast Cancer Charity.
Please visit Jaden’s Facebook page to find out more about him and his work:-
Every Sunday evening the Jaden Show features a special guest and showcases some of their work. Recent shows have featured US opera singer and ballet dancer Rachel Nash; the Indian Singer, Composer and Lyricist Shoolbhrit Darshan who, from a very young age, developed a mystical thought process which is reflected in his music; and the legendary Singer/Songwriter Thereza Bazar who was one half of the 1980s Stock Aitken and Waterman pop sensation, Dollar. A warm and approachable character, Jaden seems to have the knack of making you feel comfortable and putting you at ease which encourages you to stand in your best light, and the shows are always interesting and inspiring and delivered in a friendly, down-to-earth manner.
My turn was on Sunday 19 February 2023 and you can tune in here:-
I do hope you enjoy watching it and will consider subscribing to Jaden’s channel so you are notified of new uploads and stay in the loop. Again, I would like to thank Jaden for inviting me on to the show and for all his support, which means a lot to me.
Please feel free to comment and let me know your thoughts.
For the first time in 50,000 years the green comet has been visible in the sky, bringing with it New Earth energy, along with the Full Moon in Leo on Sunday 5 February 2023. The concept of new earth is based on holy scripture, in which life will be from from evil, sin (or wrongdoing, as I prefer to call it), weeping, suffering, curse, death and mourning (Book of Revelation chs. 21 and 22). Although it will be similar to our present earth, it will be liberated from the curse of sin and will become earth as God originally intended it to be and Eden, or Paradise, will be restored. In Isaiah Ch.65 v.17 we are told: “For behold, I create new heavens and a new earth, and the former things shall not be remembered or come into mind”. From a spiritual perspective, New Earth is one in which we live our lives in enlightenment and as sovereign beings, open and receptive to what the Universe might have in store for us, and one in which happiness, peace, harmony and respect for humankind, Mother Earth, and all the creatures that dwell there with us, and in which we are fully attuned to our Higher Selves and are able to attain and hold high vibrational frequencies without feeling weighted down by low energies and frequencies associated with the manifestations of evil, darkness and the Seven Deadly Sins. Therefore, though our bodies may remain within The Matrix, we are comfortably able to occupy higher states of consciousness for our bodies are merely vehicles to enable our souls to inhabit and move around in order to carry out the missions and deeds in accordance with the contract we made prior to our present incarnation.
Perhaps you may have noticed the highly intense, bright sunlight and even brighter cloudy or overcast days we have experienced over the last few days, the daylight being piercing and almost blinding in its intensity. Like the green comet, this phenomenon to me symbolizes the incoming New Earth energy, in which new universal light codes are being made accessible to lightworkers and others who are at a particular stage in their spiritual evolution; those who are open and receptive to the divine plans of the Universe, who are able to let go of ego and the need to control, of anger and resentment, are able to forgive in any circumstance, and can demonstrate unconditional love for their fellow human beings, regardless of any differences or diversities no matter what. That is, those who have done the necessary shadow work on themselves in order to reach and maintain higher vibrational frequencies.
An ancient crystal named after the Greek Moon Goddess Selene, Selenite is ideal for the vibration of new earth because it is already attuned to the greater good of all earthly beings and its moon energy works beautifully for accessing and grounding the Light Body of an individual and for making them receptive to their higher selves. Selene has silver wings and a crescent crown and travels the sky in a gleaming chariot as she turns the golden day into the silvery night, guiding and protecting those in darkness. For the Ancient Greeks, she represented the moon herself, full of tranquility, love, light and eternal blessings – just like the crystal she embodies and symbolizing The Divine Feminine energy in action.
Typically found these days in Morocco where it is carved by hand into a variety of products used in lightwork and magick, Selenite is highly renowned for the transparent and ethereal, moon-like radiance of its crystals. It has a hardness of 2 meaning that it scratches easily, even with a fingernail, so care must be taken when handling and storing it. When not in use either leave safely in its position on your altar, perhaps cushioned with an altar cloth, or contain it in a soft velvet pouch or clean tissue paper if storing it in a drawer or a wooden keepsake box, for example.
Just like Lady Moon, Selenite reflects a shaft of white light into any environment in which it is placed and is believed to contain the pure liquid Light of Spirit that exists in the otherworldly place between light and matter. It brings with it a profound sense of calm and holds a fine, high frequency and powerful energy that surpasses most stones for opening, clearing and activating the chakras. Selenite vibrates particularly to the violet Crown and lavender-hued Higher Crown 7th and 8th Chakras, making it ideal for meditation, spiritual work such as reiki and other healing and connecting to ancient wisdom and knowledge, and for connecting with the world of spirit and one’s guides as well as the angelic and galactic realms. Thus, Selenite is an excellent crystal for developing the mind and mental powers, particularly the art of telepathic communication, between like-minded people; that is, people whose energies, behaviours, beliefs and experiences resonate with one another’s. Selenite is said to have the ability to hold telepathic information within its structure that enables one individual to send a particular thought or message into the crystal which can then be attuned to and received by a second individual, and is also said to hold earth’s own recorded history within its unique linear markings.
Whilst like other crystals Selenite needs to be regularly cleansed and charged, or re-energized, for example beneath the light of the Full Moon, passed through smudge stick or incense or soaked in pure sea salted water – spring water or natural mineral water with pure un-iodized sea salt added, or sea water itself – it can also be used for charging other crystals. It may also be used by someone to scry the truth of a particular situation that has occurred in its presence.
I currently have a few selenite products in stock in my Ebay shop, so if you are interested in this beautiful crystal please take a look:-
The Full Moon in Leo on 5 February brings with it more new earth energy as the final trail of the green comet tails off into space. This particular moon energy encourages creativity and self-expression and comes in roaring like a lion! It offers us the opportunity to say how we feel and get things off our chest and out of our system, clearing the way for us to move forward and make new progress in our lives, checking any impulsiveness with a little of that Aquarian wisdom and rationality and avoiding the temptation of making any rash decisions. Perhaps, then, this Full Moon’s energy will inspire each of us to pause and reflect with care and attention as to how we might re-energize our own minds, bodies and spirits in order to work on creating the best versions of ourselves and reach our full potential as human beings within the collective.
Grown in Mediterranean countries, Blood oranges have a very short season during the months of late winter here in the UK. They are tarter than regular oranges with a spicy, raspberry-like flavour in addition to the citrus notes and have a distinctive dark-red flesh. You may also notice that the exterior of the rind may also show some dark colouration, depending on the variety. Blood oranges can be used in soufflés and other puddings such as steamed sponge, cakes, sauces and salad dressings, marmalade, and ice cream and sorbets.
The blood orange is a natural mutation of the regular orange which itself is a hybrid of the pomelo and the tangerine. The crimson flesh colour of the blood orange is due to the presence of anthocyanins, a family of polyphenol pigments commonly found in many fruits and flowers, but unusual in citrus fruits. The anthocyanin pigments begin gathering in the vesicles at the edges of the segments of the orange segments and at the blossom end of the fruit, and continue to build up in cold storage following harvest. The main compound found in red oranges is chrysanthemin (cyanidin 3-O-glucoside) and the flesh develops its crimson colour when the fruit matures over the low temperatures of the night. Sometimes the rind is tougher and harder to peel than regular oranges.
This yummy loaf cake showcases the versatility of blood oranges and is gluten-free. A light, airy sponge, it makes the perfect teatime sweet treat. If you are unable to source blood oranges you could substitute them with red or pink grapefruit. You could also substitute the vanilla with poppy seeds, if you prefer. You should get up to 12 slices from this cake.
Ingredients
For the cake:-
50g melted butter, plus extra for greasing
1 vanilla pod
1 blood orange, juiced and zested
1 vanilla pod, split, seeds only.
200g gluten-free plain (all purpose) flour
50g ground almonds
2 tsp baking powder
3 medium free-range eggs
220g caster sugar
75ml sunflower oil
140g full-fat Greek-style yoghurt
For the icing:-
1 blood orange, juiced and rind peeled into thin strips
Up to 200g icing (powdered) sugar
50g caster sugar (optional)
1. Preheat oven to gas 3, 170oC, fan 150oC. Grease and line a 900g (2lb) loaf tin with greaseproof baking paper or a ready-made cake liner.
2. Zest and juice the blood orange and set the juice aside in a small bowl along with the vanilla seeds for approx. 10 minutes.
3. In a mixing bowl, mix the flour, ground almonds and baking powder together.
4. In a larger mixing bowl, beat the eggs with 220g caster sugar and the orange zest until light and fluffy. Mix in the oil, melted butter, yoghurt, and the vanilla and orange juice mixture. Fold in the dry ingredients in #3 above until combined.
5. Pour the cake batter into the prepared tin and bake for 45-55 minutes. Check it after 40 minutes and if it is browning too much, cover with foil. To check that it is ready, insert a skewer into the centre of the cake and see if it comes out clean. Remove the cake from the oven and allow to cool for 10 minutes in the tin before turning it out on to a wire rack and leave to cool completely.
6. Meanwhile, peel the rind of one blood orange into thin strips (or use a zester) and juice it thoroughly. Set the juice and zest aside separately. If you would like to make candied orange peel for decoration, heat 50g caster sugar with 50ml of the orange juice in a small saucepan over a fairly low heat until the sugar has melted. Add the orange strips and simmer for 5-10 minutes until translucent and softened. Remove from the heat and transfer to baking paper to cool.
7. To make the icing, mix the icing sugar with blood orange juice, 1 teaspoon at a time to achieve the consistency of double cram. If you prefer the less sugary decoration of an icing drizzle to full coverage, you will need less icing sugar and a runnier texture more like the consistency of single cream. The icing will take on an attractive light pink colour.
8. Pour the icing over the cake and top with the orange peel or candied peel and allow the icing to set before slicing. The cake will keep covered and stored in a cool place for up to 5 days.
COOK’S NOTES
If you are unable to source blood oranges, substitute them with pink or ruby red grapefruit and follow the recipe. You will need 1 grapefruit for the cake and one for the icing and decoration.
If you prefer, substitute the vanilla seeds with one good teaspoon of vanilla extract or 2 tablespoons of poppy seeds.
You can also make this cake with regular plain (all-purpose) flour for a non-gluten-free version.
You can freeze this cake un-iced. Cover in cling film, pop it into a clear, sealable food bag and label ready for the freezer.
First of all, I would like to wish all my subscribers (and other readers of my blog) a very healthy, happy and empowering 2023. If you are new to my blog, welcome, and I do hope you enjoy reading my content.
I guess it’s true to say I’ve been gone a while; there’s been a lot happening the last few months; most notably juggling balls and spinning plates in the air (metaphorically-speaking), the whole festive thing with its gift-buying-and-wrapping, tree-buying and decorating and taking down again, cooking, washing and tidying up, making and editing videos for my various platforms, wading through mountains of admin and paperwork and accounts, doing my music, making and pricing up and photographing of items for my two pitches at the Petticoat Lane Emporium in Ramsgate plus my Etsy shop and my Ebay site (basically, doing what I can to earn some money whilst also running a household and helping my piano tuner husband to be a success in his trade), visiting nearest and dearest and those further away up and down the motorway . . . and looking after our two young cats and one diabetic, arthritic and incontinent senior tabby cat, our lovely loyal boy Merlin who follows me around or sits on his favourite chairs watching me with love hearts in his eyes. Merlin was diagnosed with diabetes in October of last year, following the suspicions I had carried around for a while, watching and observing his habits and demeanor. Several months had passed before Dan would believe me and when he did, he admitted he had been in denial. We have put a lot of work in with Merlin as it takes him time to adjust to change. We have had to change his mealtime regime to twice only daily – to which he was not at all receptive for several weeks – source wet food and biscuits for him that are diabetic friendly and made of the most natural ingredients (which of course are far more expensive than regular cat foods, but anything for our boy), inject him twice a day 30 minutes’ after he has finished eating, change his pee pad in his special tray sometimes multiple times a day and mop the floor, as he often dribbles urine when he’s finished his business. I sometimes cook him fresh chicken or turkey and he might get a little of this if he’s very hungry during the day and needs a small snack; the vet said it was better than giving him more biscuit. I also groom him regularly and massage extra virgin olive oil into his fur as he is prone to flaky skin. This he enjoys very much and likes to lick the oil on his fur. Twice we also give him a fish oil powder capsule which we break into his food and mix in well. This also helps to ease his skin condition though it seems to have made only slight improvement to his mobility.
He sees the vet once a month for a checkup, to get weighed, examined and bloods taken to monitor his insulin levels. This time we discussed his mobility problems which suddenly came on more recently and seem to affect his pelvis and back legs from what we can make out when we watch him move around awkwardly. The vet was very gentle with him when she examined him thoroughly and agreed that his hip joints appear to be arthritic and at one point we heard a ‘click’. She also said that the muscles in his back legs are weak, which of course is probably due to the fact that he is no longer to move about comfortably so the muscle is wasting. At home, he is no longer able to jump on to the side of the bathtub to drink from the cold running water from the washbasin tap, something he has enjoyed for most of his life; nor is he able any longer to run up the stairs when I call to him and instead he makes a slow hop up one stair at a time, which breaks my heart. One day last week he tried to jump up on to the kitchen chair beside me and was unable to do it, his claws caught in the fabric seating, so I picked him up gently and lifted him on to the seat though mostly he can still manage without help. It is, though, heartbreaking to see him in discomfort and unable to do some of the things he used to enjoy. The vet recommended a full panel of bloodwork this time to check that Merlin doesn’t have any underlying medical conditions other than the diabetes and to rule out anything else such as side effects from his insulin. If the results come back clear, we can perhaps start him on Metacam medication and see where we go from there, though she understands I prefer the natural way and she definitely thinks animal healing is a good idea and told me she used to work at a practice that encouraged it for their furry clients.
Anyway, I digress, since this is intended to be an article about goals and New Year’s resolutions. As we journey the days in the life of January, it is perhaps opportune to think about what we might all wish to achieve during the Chinese New Year of the Water Rabbit (ironically, in which I was born almost six decades ago, in 1963) when celebrations start on 22 January.
It is customary, as one year ends, to formulate our intentions for the coming year and this is often done at New Year’s Eve or it’s equivalent, for example the Pagan festival (Sabbat) of Samhain (Halloween) or, yes, at Chinese New Year. Whether we be adult or child, deciding to set ourselves a few tasks or objectives can be both life-affirming and empowering, however resolutions often fail because they are too vague and lack real focus. For example, a desire to “eat more healthily” or “take more exercise” is not specific enough, as neither address how you are going to eat healthier or how or what exercise you intend to do. However, if for example, you say: “I am going to grow and harvest my own salad greens” or “I am going to eat a salad at least five days a week and enjoy one glass of wine a week” or “I am going to go for a swim three times a week”, then those are specific goals. This is how New Year’s resolutions are more likely to be successful.
If living a more healthy lifestyle is on of your goals, perhaps you felt guided to give Veganuary and/or Dry January a try in order to kick-start the process and shift a few pounds after the excesses of the festive season. If, at the end of it you begin to feel the benefits of the initiative and find you are enjoying trying different foods and the creative aspect of preparing a healthy, balanced meal with fresh ingredients or can see the benefit of limiting an alcoholic drink to once a week then perhaps you might decide to make it part of your everyday life. On the other hand, if you tried it as an experiment and decided you missed some foods too much but you don’t mind cutting back on them a little in future and you did lose some weight and you learned more about yourself in the process then that’s good too. Everything in life is a learning process and one size does not fit all. Do not think either that you have failed if you despised most or every aspect of Veganuary/Dry January, you didn’t lose any weight or you just couldn’t ride it out right to the end; at least you gave it a try and know beyond doubt that what is right for one person is not necessarily right for another. We only fail if we think about doing something but don’t try it out at all.
I take on board that vague resolutions may work for some people, but personally I never found they worked well for me and I need the structure and clear intention that a solid goal gives me, something to aim for at which I can monitor my progress and at the same time stay positive and focused. It needs to be something that challenges my capabilities and mindset but at the same time is realistic and achievable. Here are a few of my goals:-
To grow my social media:-
Do at least one video per week for either my Rumble channel catevansartist or one of my three YouTube channels – @catevansartist, @catevanscuisine or @electrickwytchofficial.
To do at least one video a week for either my Facebook or Instagram on whatever topic feels appropriate
To do two Facebook or Instagram live streams per month
To upload a new blog at least twice per month
To drop one dress size this year by continuing my healthy regime. This includes going out for a walk or disco-dancing at home both at least three times a week. Also my newfound interest in sprouting seeds and fermenting, as well as continuing to eat a salad every day and by growing a wider range of organic salad greens in my back garden which I can pick what I need each day and when they are at their freshest. I have already made a start on this by purchasing four “growing tables” which are wide, wooden planters at table height with shelves below for storing compost – or even more planters containing healthful goodies, especially useful for tender plants which do not fare so well in full sunlight. I have called it “My Garden Project” and will be discussing more about this in a future blog post.
To focus more on my music by:-
Piano practice 5 times a week (often I manage four).
Composition/songwriting one half-day per week
Record the 4th movement of my sonata in preparation for the studio.
“How will you achieve all of this when you already lead such a busy life?” you may ask. As a self-confessed workaholic I take this on board and one of my tasks this year is to slow down a little and make more time by cutting back on activities that have the least importance. Non-negotiable are some household chores, seeing to the cats and meal preparation. Also, paperwork and general administration is vitally important; I do my husband’s as well as my own and failure to do paperwork will land us in a mess. Plus, at some stage it would need catching up on, resulting in a potentially stressful situation. However, I am able to free up a bit more time by the way I do it, for example spending an hour a day on paperwork and admin rather than, say, two or three hours twice a week. I am also able to fix crafting activity to maybe one morning or afternoon a week. I still have outlets and online to produce items for but I have fewer of them now and no longer need to hold larger quantities of stock and can therefore produce just as much or little as I need, which also increases efficiency and turnaround. I am also an avid maker of ‘to-do’ lists and have been using these more as an exercise to see exactly what I can achieve without filling up every second of my day, as being kind to ourselves and having sufficient rest and recreation time does help with focus and productivity. I can comfortably complete four or five tasks a day but if I complete any quickly or if I choose to push myself I can manage half a dozen. I am no longer minded to tackle more than that.
Neither do I need to concentrate on all goals at once. Some goals may be ongoing, others may be achieved quickly or may not work out as planned or may need to be ‘tweaked’, or put on hold, and new ones may present themselves instead. We should remember that personal and business circumstances may change either suddenly or over time and these circumstances may have a knock-on effect on what we are able to achieve. The point is, sometimes goals take longer to achieve even if we have put in some good work, but as long as the foundations and groundwork are there they can be picked up again in the future, by which time we may have more wisdom of experience and learning that will help bring our goals to fruition in a more effective way. As long as we enjoy doing what we are doing and gradually see some results or learn more about ourselves and our aspirations in the process it’s all good. If we don’t enjoy doing what we are doing, then perhaps we might find something else to try that might work better. We are all a work in progress and there is no need to beat ourselves up about it if something isn’t quite working out. Even taking a little time out might revive and refresh our vigour.
What are your goals in 2023? Is there anything that is going particularly well for you? Is there something you are struggling with or does not inspire you? I would be interested to know, as sometimes by sharing our experiences we might learn from one another.
This cake makes the most of autumn fruits and is so simple to make, and is delicious and versatile. I baked one for my birthday last month when Dan and I were renting a holiday cottage on a working farm in north-west Suffolk in the middle of nowhere. It is made with basic ingredients plus locally-grown fruit which for us was either abundant on the trees or bought cheaply from the gates of people’s houses (paid for by cash or coin into an “honesty box”) and the free-range eggs I used were only £1 per half dozen from a shelter outside our nearest public house 20 minutes’ walk down the road! You can substitute the fruit used in this recipe with any you have available, such as apricots or peaches, the zest of oranges, cherries, blueberries or blackberries.
Ingredients(makes 9 larger or 12 regular pieces)
175 g gluten-free self-raising flour, sifted
175 g soft brown sugar
175 g softened butter or sunflower margarine
1 tsp ground cinnamon
3 free-range eggs
2 local apples washed, peeled, cored and chopped
5-6 local plums washed and halved, stones removed
1. Preheat the oven to 170oC/150oC fan (340oF/ 300oF fan) or Gas Mark 4.
2. Grease a 20 cm traybake tin and line the base with greaseproof paper.
3. In a mixing bowl, cream the sugar and butter or margarine together until smooth and fluffy.
4. Add an egg and beat well into the mixture, then add some of the flour and fold in completely. Repeat this process until the flour and eggs are all combined.
5. Add the ground cinnamon and fold in.
6. Gently fold the apples into the mixture
7. Pour the mixture into the prepared tin and give it a gentle shake to even out.
8. Mark the mixture into 9 or 12 with a halved plum facing upwards. If you are allowing for 9 pieces put the remaining half plum in the centre for decoration.
9. Bake for about 35 minutes in the centre of the oven or until a skewer comes out clean. Oven temperatures vary so the cake may need a few minutes longer.
10. Remove from the oven and leave to cool in the tin for at least 10 minutes, then turn out carefully on to a wire rack to cool completely. Sprinkle with sifted icing sugar and cut into pieces and serve with a slice of mature (sharp) cheddar.
COOK’S NOTES
This recipe is also good made with spelt flour. Substitute the same quantity as for gluten-free self-raising flour and sift with 2 heaped tsp baking powder.
You may substitute the 1 tsp ground cinnamon with 1 tsp ground ginger or ground mixed spice.
If you prefer, serve the traybake cake warm as a pudding served with a dollop of creme fraiche or clotted cream. Remove the cake from the oven and cool in the tin for 15 minutes before slicing and serving.
So much to choose from and all Hann-made in the Lake District!
In June this year Dan and I visited my beloved Lake District for a few days and it was a welcome opportunity to see my step-mum Gil and my step-sister Annabel, as well do some sightseeing and to visit my father’s grave, for the first time since the Pandemic.
The weather during most of our trip was warm and sunny and on our last day in the area Dan and I chose to take an “AA Short Walk” around the boundary of Staveley’s Mill Yard and Craggy Woods, four miles in a two-hour stretch which was very pleasant especially along the pathways shaded by trees.
We returned to our starting point and after a sandwich lunch and coffee in a local cafe we decided to have a mooch around the Mill Yard as we had heard there was a chocolate shop there – and I am never one to pass up a chocolate opportunity!
The Blind Chocolatier is on the right-hand side inside the main entrance to Staveley Mill Yard and is a cute little shop with neat rows of delectable artisan chocolates and chocolate bars attractively and clearly displayed for easier choosing, although in practice choice may be something of a novelty when everything on offer appears scrumptious and irresistible.
Whilst deliberating, we chatted to the chocolatier himself to find out more about he and his craft. A pastry chef and member of a multiple-award winning team since 2007, in July 2015 local man Stuart was diagnosed with Leber’s Hereditary Optic Neuropathy (LHON), a rare eye condition characterised by loss of vision which is often the only symptom. LHON is a mitochondrial inherited (transferred from mother to child) degeneration of retinal ganglion cells and their axons that leads to an acute or subacute loss of central vision and typically affects young males. It is only transferred through the mother as it is primarily due to mutations in the mitochondrial, rather than nuclear, genome and only the egg contributes mitochondria to the embryo which means that men cannot pass the disease on to their offspring. Although registered legally blind, Stuart has not only continued to maintain his role in a 2 Rosette Standard kitchen but has finally achieved a long-held dream of having a chocolate shop in Staveley, where his business has flourished.
Stuart told us that Christmas trade last year was very successful and hoped that despite the Cost of Living Crisis those healthy sales would be repeated as he had just invested in new tempering equipment. I said that I am sure he will continue do well; after all, who doesn’t love chocolate?!
Dan and I eventually chose two chocolates each, including cherry and blackberry varieties which Stuart put in a little box to take out, although we assured him they wouldn’t last 5 minutes and of course they didn’t; we were barely outside the door before we got stuck in and they were scrumptious and flavourful with a smooth, velvety texture. I could have eaten two or three times the quantity without any help at all from Dan!
Heaven in a box!
The Blind Chocolatier has a page on both Facebook and Instagram, sometimes showcasing new flavours in production or activities going on behind the scenes such as new product development, sneak-peaks at Christmas confectionery or making a special batch of wedding favours, as well as a website at http://www.theblindchocolatier.co.uk with an online shop offering both delivery and collection services. Choose from a wide variety of tempting and beautifully-wrapped artisan chocolate bars for £3.20 each, including Dark Chocolate with Pistachio and Almond for ‘nutty’ moments, Vegan Oat Milk and Dark Chocolate and Ginger; or what about a 6 Selection Box of Chocolates for £6, a Milk or White Chocolate 12 box or a 12 box All Rounder for £11.50 each? Postage and packing costs £6 for delivery within 1-2 days so I ordered a box of the Chef’s Selection containing 25 chocolates for £23 to send straight to my stepmother for her birthday, along with a note, and she was thrilled to receive them especially as they were made locally. I shall certainly be ordering more in the future.
If you are planning a trip to the English Lake District, why not put Staveley Mill Yard on your ‘to visit’ list? The Blind Chocolatier and his neighbours look forward to welcoming you soon.
The Blind Chocolatier is open Monday – Saturday 10 am to 5pm and on Sunday 10 am – 4 pm.
Who can resist a classic cheesecake for dessert with its rich, buttery base and creamy filling? Whether baked or simply prepared and refrigerated, cheesecake is so versatile and adding chocolate even as a final flourish and finishing touch elevates it to another level. Whether you go for something traditional, fruity or laced with alcohol, there is a cheesecake to please everyone.
We are currently having a new custom-built kitchen at home and have no cooking facilities other than a one-ring electric countertop hob (which I usually use for my candle-making) and a traditional coal-fired barbecue in the back garden. The next-door neighbours were coming over for dinner and I wanted to create a no-fuss dessert that was quick and easy to make and could be chilled and stored in the refrigerator until needed. Although I do enjoy a traditional baked cheesecake, I actually prefer the non-baked variety and in any case it was not possible to prepare a baked one due to the lack of kitchen facilities at present. I had decided on a Mexican-themed dinner cooked on the barbecue and rather than settle for lime, which can be a little sharp for some tastes, I thought about using a twist of orange for more subtlety combined with the gentle heat of ginger to marry the two citrus flavours, and then sprinkle over a little grated 72% dark chocolate just before serving for a further dimension; ginger and citrus flavours pair very well with dark chocolate and of course chocolate features in a wide variety of savoury Mexican dishes.
Assuming you are mindful to remove the double cream from the refrigerator at least half an hour before you intend to start making the cheesecake filling – for example, when you put the biscuit base in the refrigerator to chill – then it will take you less than 30 minutes in total to prepare in two separate stages.
Ingredients
Gluten-free; vegetarian
200 g Gluten-free Ginger Biscuits (Cookies)
80 g Unsalted Butter
500 g Cream Cheese, such as Mascarpone
110 g Icing Sugar, sifted to remove any lumps
Juice and zest of 1 orange and 2 limes
150 ml Double Cream, whipped
Dark Chocolate, to decorate
Grease the inside of a 20 cm loose-base cake tin and line the base with baking parchment to fit.
Place the ginger biscuits in a clean polythene bag, tie, place on a board and bash into crumbs with a rolling pin. Alternatively, put the ginger biscuits in a food processor and pulse until they resemble fine breadcrumbs.
Melt the butter in a saucepan over a low heat, remove from the heat and quickly add the biscuit crumbs stirring well to combine.
Spoon the buttery biscuit crumbs into the cake tin, spreading evenly over the lined base and pressing them down well with the back of a metal spoon. Refrigerate for 1-2 hours to harden.
Meanwhile, tip the cream cheese and icing sugar into a large bowl and mix thoroughly with a wooden spoon to combine. Add the juice and zest of one orange and two limes and stir into the cream cheese and sugar mixture.
Pour the double cream into a separate bowl and beat with an electric or balloon whisk until it forms soft peaks and then combine with the other ingredients, mixing in thoroughly.
Pour the mixture evenly into the cake tin over the hardened biscuit base and smooth over with a palette knife and chill in the refrigerator for at least 4 hours or overnight.
Carefully push out the base of the cake tin and place the cheesecake on a board. If you are lucky you may be able to remove the cheesecake itself from the base of the tin but often I don’t risk it! Decorate the top of the cheesecake with a little grated dark chocolate before cutting into slices.
COOKS’ NOTES
You may substitute regular ginger biscuits for gluten-free, if you don’t wish to make your cheesecake “Free From”.
Quark, mascarpone, Philadelphia store’s own brand cream cheese will all work well in this recipe.
Remove the cream from the refrigerator and allow to stand at room temperature for AT LEAST 30 minutes and it should whip up in no time at all, even with a balloon whisk!
If you don’t have a cake tin you may make and serve the cheesecake in individual ramekins, which look pretty for fuss-free dinner parties. For 4-6 people, you could halve the ingredient quantities depending on the size of the ramekins. Grease each ramekin with a little melted butter, omit the baking paper but follow the recipe. Garnish with a slither each of fresh orange and lime before serving, if you like.
Last year I composed a short piece of music which I named “Tranquillo” and recorded earlier this year. In Italian, Tranquillo means ‘calm’, ‘peaceful’, ‘quiet’ and I wrote the piece with meditation and relaxation in mind.
The recording incorporates natural wave sounds, sampled whilst visiting my local beach during the first Lockdown in 2020, not with anything particular in mind but with the idea that at some stage I might use the wave sounds for some kind of project in the future.
“Tranquillo” is written in C major with a 4/4 or ‘common’ time signature. It starts in the octave above middle C, in the Solfeggio frequency of 528 Hz which enables meditation, healing and transformation. To learn more about the Solfeggio scale and the role it plays in Healing and Sound Therapy, please refer to my previous blog here:-
The tempo is Andante, which in music means ‘moderately slow’ and is written as 120 at the top left-hand side of the music score, beneath the heading. It is an easy piece to play at beginner to intermediate level. Sustain pedal may be added for phrasing at the player’s discretion and the recording has been given echo to soften the tone.
The standard recording of this short piece is 2 minutes 28 seconds and this and the score is in Ternary Form, or 3 parts. Parts A and B are repeated and Part C is played once. To hear it, please visit my Bandcamp https://catherineevans.bandcamp.com/track/tranquillo
The extended (meditation) version has been looped to 11 minutes 11 seconds for YouTube (11:11:50 which they rounded up to 11:12) and the video comprises various random footage of sea and skies filmed over the last few years mostly around Thanet in coastal Kent, with certain of the sunset stills taken in Aberystwyth, South Wales in August 2019 while Dan and I were there for a family wedding.
Happy listening!
Catherine
My blog content is always offered freely but if you enjoy what you read, please tip me a peppermint tea by clicking on the PayPal button at the top of this blog. Thank you and blessed be!
I believe that in music we are often subconsciously drawn to frequencies that resonate with us or offer something which we need. Whether we simply enjoy listening to music or whether we write music or song, I believe we automatically choose particular frequencies and key signatures without necessarily intending to do so. In fact every note has its own unique frequency and wavelength. For example, I have discovered that middle C (otherwise known as C4) on the piano has a frequency of 262 Hz and vibrates to L4 – the fourth vertebra in the lumbar spine. I find this fact interesting; I have sometimes been drawn to playing pieces and indeed have composed music in this key signature without even giving it any deep and meaningful thought and simply going by instinct, despite my history of lower back problems stretching back nearly 30 years!
Sound therapy uses a variety of approaches to using vibrational frequencies to aid healing and therapy and even just playing or listening to music can help you to relax and focus. For example, Mantra is based on the resonance of specific chants. The mantra ‘OM’ vibrates to 432 Hz and has been used for thousands of years for meditation. However, if a piano is tuned to this frequency it sounds inferior to one tuned to A440 concert pitch due to calculations of the scale in the factory intended for A440 – determined by wire gauge, string length and tension.
Another tool of meditation is the use of Binaural Beats. The purpose of these frequencies is to play two slightly varying tones in each ear which then creates a third sound inside your brain in order to change the oscillation of brain waves and thus encourage a more positive state of mind and ultimately a greater sense of wellbeing.
The Solfeggio Scale is one we may be familiar with in the form of the vocal warm-up exercise: “Doh-Ray-Me-Fa-So-La-Ti-Doh” and please note the first syllable ‘Sol’ meaning ‘sun’, associated with warmth, growth, happiness and positivity. This scale is said to have been created by an 11th-century monk named Guido D’Arezzo, comprising a set of 6 tonal scales or frequencies for use in sacred chants in Latin – although in effect it existed in some form as far back as the 6th century AD. These chants contained special tones or frequencies which, when sung in harmony, and in Latin, were believed to impart tremendous spiritual blessings during religious masses. When these special frequencies were sung in harmony they were believed to bring spiritual abundance during religious masses; the combination of these ancient sacred tones and the Latin intonation had the power to penetrate throughout the recesses of the subconscious mind and support deep healing and transformation. “The Hymn to St John the Baptist” is renowned for being the most inspirational hymn ever written, featuring all six Solfeggio notes. At some point the Scale was lost only to be rediscovered in the mid-1970s by Dr Joseph Puleo, an American naturopathic physician and herbalist, and 3 lower tones were added making a total of nine, derived from numerology.
Our modern-day musical scale is slightly out of kilter from the original Solfeggio frequencies and consequently is a little more dissonant, as it is based upon what is known as the “Twelve-Tone Equal Temperament” and falls within the frequency of A440 Hz The ancient music scale was simply called “Just Intonation.” Furthermore, our modern music falls within the A 440 Hz frequency (concert pitch, as described above), which in circa 1914 was changed from A417 Hz. All nine Solfeggio frequencies together with their potential for healing and transformation are briefly addressed in turn.
174 Hz (F3 or 174.614 Hz, rounded up to 175 Hz) is the lowest of the frequencies and the first of the three more modern, lower tones. This frequency reduces and heals pain and lowers stress. It contains certain nodes and background tones that target the chakras and develop the healing power and energy to bring about a sense of wellbeing. This frequency can also help to lessen emotional pain and open you up to greater love and courage and may act as a natural anaesthetic or “painkiller”, so if you are feeling in a bad way emotionally and/or are still holding on to deep emotional wounds or scars, listening to music in this frequency may help you to release emotional damage and find the strength and courage to move forward more boldly in life, no longer holding on to ghosts of the past.
285 Hz is the second of the three lower frequencies and lies between C#4 (277.18 Hz rounded up to 278 Hz) and D4 (293.665 or 294 Hz) on the piano. This frequency is soothing and calming and “sends a message” through energy fields to heal and restore tissues and damaged organs in the body. The 285 Hz frequency also helps speed up the healing of burns, fractures, sprains, cuts, burns and other injuries to the limbs and boosts the immune system. It is believed that this frequency creates positive shifts to those near them so if, for example, you are recovering from an operation or injury or, say, you are recovering from an illness or have been feeling “under the weather” then listening to music in this frequency may help to support you in your recovery.
396 Hz is the third of the lowest frequencies and is found at G4 (391.991 Hz rounded up to 392 Hz). This frequency vibrates to the Root Chakra and also helps to balance that energy centre. It is good for letting go of grief and loss and for removing negative blocks such as fear and guilt. It is one of the fundamental frequencies in sound healing. When we have negative feelings our bodies start producing more cortisol which then affects our sleep and our general health and wellbeing. Listening to 396 Hz frequency music helps to create a strong magnetic energy field which gives us the power to achieve our ambitions, and its vibrations release us from the chains of negativity. The frequency is also used for awakening and turning grief and sadness into joy, and may be very helpful in helping to overcome bereavement particularly if you are finding it hard to come to terms with things.
417 Hz or note G#4 (415.3 Hz rounded up to 416 Hz) is the first of the original set of frequencies and vibrates to the Sacral Chakra located just below the navel. It is known as the ‘Frequency of Change’ and is used to cleanse and unblock negative or stale energy. A deeply transformative frequency, its powerful vibrations heal the brain, enabling us to overcome trauma and manage any negative thought patterns, thus it shares some aspects of its therapeutic power with the lowest frequency of 174 Hz whilst going the extra mile.
528 Hz or note C5 (523.251 Hz rounded up to 524 Hz), the octave above middle C and twice the frequency of C4, is the ‘Love’ frequency which is said to repair DNA. This frequency is equivalent to a piano tuned at A442 or C4 +16 cents on the tuning fork. I recently recorded “Tranquillo” which I composed in this key signature – again, I was simply guided to it – intended for meditation. It was only afterwards when I started looking more into the Ancient Solfeggio Frequencies when I discovered that 528 Hz music is the ultimate frequency for meditation and is best played softly. The 528 Hz frequency vibrates to the Solar Plexus. It increases positive thoughts and feelings and has been found to be the source of healing and recovery for the entire body, mind and spirit – so important for offering up the potential for DNA repair. It is linked to a natural, deep rooted link with the natural world and reinforces relationships with creativity and is perfect for when you feel in need of deep healing and to overcome traumas carried through from past lives as well as those of your ancestors. Now for an interesting scientific fact: if you tap your hand on a table, then you will have just been exposed to 528 Hz sound waves. White noise has no pitch and also has 528 Hz sonics and almost every sound except for a pure sine wave (a continuous wave as shown on a graph in mathematics, engineering and physics for example and with a smooth periodic function) contains white noise!
The 639 Hz frequency lies between D#5 (622.254 Hz rounded up to 623 Hz) and E5 (659.255 Hz rounded up to 660 Hz). This frequency is known as the Miracle Tone and vibrates to the Heart Chakra to manifest pure positive love energy. Listening to music in this frequency helps us to emotionally reconnect and attract love both from ourselves and those around us. This music can also help us to feel closer to universal consciousness, or self-realization by allowing us to look at a particular situation in a different way than before. Listeners may start to experience greater harmony in their relationships and navigate through life with better communication skills, deeper understanding, tolerance and love. Anyone struggling with turbulent or toxic relationships and co-dependency, or who is going through a rough patch in their personal life may find that listening to 639 Hz music enables them to heal and go on to transform areas of their life that no longer serve them well. The 639 Hz frequency may also be used to balance a blocked Heart Chakra which may manifest itself through low self-esteem, depression, lack of trust, low blood pressure, poor circulation and other heart and lung problems of the physical body.
The 748 Hz or note F#5 (739.989 rounded up to 740 Hz) frequency vibrates to the Throat Chakra and is used to cleanse all types of infections and dissolve toxins and electromagnetic radiations. It is directly connected to the Principle of Light – a higher form of bioenergy. Listening to music of this frequency may enable you to open up to communicate with your higher self, awakening your inner strength and intuition. It can also be used to cleanse blocked negative energy and overcome fear, overthinking and worry. Are you an overthinker? Do you spend hour after hour, day after day, week after week picking over and trying to analyze or make sense of a situation or an experience, whether it occurred recently or even long ago in your past? Then perhaps the 748 Hz frequency will enable you to take a step back and start to look at the situation more objectively and realize that’s where it belongs – in the past – and that today is for living without “what if’s” or regret. Nobody will think any the worse of you and even if they did, it is their issue to deal with, not yours.
The 852 Hz frequency (G#5 or 830.60 Hz rounded up to 831 Hz) corresponds with the Third Eye Chakra, which is known as the Seat of Intuitiveness. Music in this frequency may be used for clarity of thought, connection with the spirit world and a return to self-awareness, particularly if you have been feeling detached or disconnected from what is going on around you. In other words, if you have been feeling ungrounded or distracted and not always present in the moment.
The 963 Hz frequency lies between A#5 (932.328 Hz rounded up to 933 Hz) and B5 (987.767 or 988 Hz) and is also known as the ‘Frequency of the Gods’ or ‘Seat of the Soul’; its sound vibrates with the Crown Chakra and activates the pineal gland, which is a small pine cone-shaped gland found in the middle of the human brain, in between the two hemispheres of the epithalamus, and was one of the last glands to be discovered. The pineal gland is particularly important for the secretion of melatonin, a serotonin-derived hormone which regulates the body’s internal clock, or circadian rhythm, and sleep pattern. The gland is also rich in calcium levels, which act as a radiographer to find the middle of the brain in X-ray images. The 963 Hz frequency enables us to awaken the perfect state and make direct contact with the Universal Light, to which this frequency is attuned.
As I mentioned earlier, the contemporary music scale is a little out of step with the original Solfeggio frequencies, however there are ways of attaining a closer connection, particularly where the nearest notes on a keyboard lies further away from, or even where two lie between, the sacred frequency; for example in the case of 285 Hz, 639 Hz, 852 Hz and 963 Hz frequencies. Even note F#5 corresponding to 748 Hz frequency is a little further out than is ideal. Where a particular frequency lies between two notes, the lower of the two notes is usually taken but to the purist this is nowhere near perfect.
An alternative to the keyboard may be to apply a pitch-bend technique and/or by using a different musical instrument such as strings, pipes, gongs or Tibetan bells, for example, in order to reach the intended frequency more accurately. Please remember of course that the voice is a very versatile instrument capable of a wide variety of sounds and techniques. Holding a note at a particular frequency may be used in chant or as a popular warm-up exercise. You may try it for yourself and find that over the coming weeks and months your singing and speaking voice and vocal range improve significantly and out of that your confidence also grows. YouTube is populated by a wide variety of channels offering music full of love and light intended to heal, cleanse and uplift the body, mind and soul; if you prefer your music darker, check out the channel Atrium Carceri on YouTube for its more Gothic, sacred chants.
Please go to my YouTube Channel Cat Evans Artist to watch the video which accompanies this blog.
Thank you and Blessed be!
Catherine
My blog is always free but if you like what you have read, please feel free to “tip” me a herbal tea!
Home-smoked salmon is delicious with scrambled eggs on sourdough and garnished with fresh dill.
One of my favourite treats is smoked salmon, always a winner at parties and get-togethers and other special occasions, as is gravadlax (lox).
Smoked salmon and gravadlax both involve curing a whole salmon fillet, after which it may be thinly sliced and eaten or – as in the case of smoked salmon – hot or cold smoked over wood. Smoked salmon is relatively expensive from a supermarket being as much as £5.99 or more for 100 grams, and is therefore considered a delicacy so preparing it at home with a little know-how is usually great value for money.
An interesting fact about smoked salmon: the technique of smoking salmon was brought to the UK by Jewish immigrants from Russia and Poland who settled in the East End of London in the late-19th century. Here they smoked salmon in order to preserve it as methods of refrigeration were rather primative.
Cold smoked salmon is cured salmon that is then smoked at very low temperatures for at least 12 hours which allows it to develop a silky-smooth texture with a fresh taste and bright colour similar to that of raw salmon, whereas the higher temperature of hot-smoked salmon will give the fish a flaky texture and smokier flavour. Both types are delicious served in salads, quiches or on party canapés and are also tasty ingredients in mousses, terrines and patés.
I first tried curing and smoking my own nitrite- and nitrate-free salmon earlier last summer during the first Lockdown and bought an 800 g fillet of sashimi-grade salmon from Fruits de Mer fishmongers in Broadstairs which turned out to be a great success, so later in October I bought a 1 kg side of salmon for around £16, which yielded a generous quantity of 100-150 g packets with a total retail value of around £50 had I purchased them from the supermarket.
I researched smoking and curing methods on the internet and was surprised at the wide variations in techniques and ingredients, which might appear quite confusing to a novice as, for example, some recipes call for a large quantity of salt and a shorter curing time while others are much less salty, and the choice of salt and sugar varies too between recipes. I also referred to the ethical River Cottage Handbook No. 13 Curing and Smoking by Steven Lamb and in the end devised my own method drawing on a combination of the recipe for gravadlax (with a small amount of curing salt and a few variations) and curing times and smoking techniques gleaned from what I considered to be the best sources on the internet.
I used Cornish PDV salt and organic juniper berries from Beech Tree (beech-tree.co.uk), together with soft brown sugar and some dill – we do not use any chemicals on the produce we grow. The salt and sugar in the cure prevent the growth of harmful bacteria and, along with the other ingredients, as a seasoning for the salmon.
Ingredients for a dry cure
Once the dry rub has been applied it may be left to cure in the refrigerator between 12 hours (which will provide a milder flavour) and 48 hours, but I went for 36 hours to provide a fuller flavour that isn’t too salty. As the salmon cures in the refrigerator, massage the curing mixture into every area of the fish after 24 hours and flip it over so that no areas are missed. Generally, unless you are using a very large side of salmon, I personally do not think it is wise to leave the salmon curing for longer than 36 hours as it will become too salty. After the curing time, remove the cure under cold running water and then leave it to soak in a large bowl of cold water to cover by 3 inches for 30 minutes and then drain well in a colander. pat the salmon dry with kitchen paper and place it skin side down on a wire rack over a food standard tray (which should have the symbol of a knife and fork on the base) or a board or baking sheet lined with greaseproof paper and refrigerate it uncovered for at least 4 hours or preferably overnight to allow the pellicle to form so it is ready to smoke. The pellicle is the surface of the salmon that is most exposed during the curing process and will become slightly ‘tacky’. It develops a smokier flavour and drier, firmer texture than the flesh underneath and is very nutritious, being rich in protein and Omega 3.
If you are cold smoking your salmon, it needs to be done at an ambient temperature not exceeding 150°F (66°C) – as low as 80°F (27°C) is fine. Assuming you are smoking your salmon outdoors you may use a normal smoker (with no fire in the firebox) with a 12 inch tube filled with wood pellets, but you don’t need a professional smoking kit or anything fancy. You can use a kettle barbecue or even a fire pit with a lid and a small foil package of wood chips, or even just a stove-top smoker or a baking tray with a rack and foil and some wood chips if the weather is not on your side and you need to do the smoking indoors. Oak, maple or beech wood chips are good, we have also tried apple wood chips for a more delicate flavour. If you are using a baking tray, make sure it is one you don’t mind getting marked by the flame of a gas hob. In all cases, make sure that you soak your wood chips for an hour before use, wrap them securely in heavy-duty tin foil pierced at intervals before lighting to allow the smoke to escape and place them to one side in the base of your smoker, place the salmon on a wire rack and position it over the smoker, ensuring that the salmon is not sitting directly over the parcel of wood chips and cover with a lid or with foil. Check the temperature of the smoker regularly to ensure that it does not rise above 66°C and if it does, remove the lid to allow it to bring it back down to temperature. This process will take at least up to 24 hours depending on which cold-smoking method you choose, outside/indoor temperatures and the weight and thickness of your fish. The salmon should have an internal temperature of 120°F (49°C) when a temperature probe is inserted into the thickest part of the flesh.
Place the wood chips to one side of the salmon.
Cold smoked salmon should last 3-4 days in the refrigerator but if you cannot eat a while side of salmon within this time frame, separate the fish into smaller portions and vacuum seal or alternatively wrap the portions in cling film and put into ziplock freezer bags. This should extend the life of your smoked salmon to 3-4 weeks in the refrigerator or 3-4 months in the freezer, but it will keep almost indefinitely in a deep freezer.
If you are hot smoking your salmon, it can be done perfectly well in your kitchen with a baking tray with a rack and wood chips. Line the tray with foil and cover the bottom with wood chips. Place the salmon skin side down on to a wire rack and position over the baking tray and either put the lid on (if there is one) or cover with foil, ensuring that the foil doesn’t touch the fish. Put the tray over a medium heat to allow the wood chips to smoke; you will see smoke come out of the edges of the foil or lid. The temperature in the smoker should reach a maximum of 225ºF (107ºC) and the fish should reach an internal finished temperature of no greater than 140ºF (60ºC) to avoid the salmon from drying out. If the temperature in the smoker begins to exceed 225ºF, you may lift the lid to bring it back down again. Remove the tray from the heat and stand, covered, for 20 minutes. Test the internal temperature of the fish by inserting a clean temperature probe and if you are satisfied, lift the salmon from the rack. The flesh of the salmon should be an opaque pink and a skewer should be easy to insert but if the fillet needs extra cooking, give it a few minutes in a hot oven. To enjoy the salmon at its best, either serve and eat it right away or leave it to cool and store in a refrigerator until the next day before either using it in hot or cold recipes or wrapping it in foil and heating in the oven until warmed through.
Hot smoked salmon can be refrigerated for two-to-three weeks or one week after opening, and can be frozen for up to three months. Store the salmon in the original packaging or wrap it tightly in cling film to prevent it from drying out and to maintain its quality and succulence.
1. Rinse salmon fillet under cold running water and pat dry with kitchen paper. Place skin side down on a clean board and your fingers along the flesh side of the salmon, checking for the sharp ends of any pin bones, and pull out any you find with sterilized tweezers or needle nose pliers.
Place the salmon side on a clean board, skin side down.
2. Prepare the cure, combining all the ingredients in a bowl.
3. Spread half the cure over the bottom of a baking dish or over the inside of an extra-large ziplock bag and lay the fillet on top of the cure. If possible the cure should extend about half an inch beyond the edges of the fish on each side. Then spread the rest of the cure on top of the fish, and massage it into the flesh to distribute it completely.
Rub the salmon all over, both flesh side and skin side, with the dry cure
4. If you are using a baking dish, cover with cling film; if you are using a ziplock bag seal it and place it on a food standard tray and if you like, weight it down with something heavy. Refrigerate for 24-48 hours.
5. After 12 hours of refrigeration, massage the cure into the fish, flip the fillet over and massage the other side. Return to the refrigerator. Do this every 12 hours.
6. At the end of your chosen curing time, carefully rinse the cure off the salmon under cold running water. Then place the salmon in a deep dish or large bowl with cold water to cover by about 3 inches and soak it for 30 minutes. Drain through a colander. This process will also help to remove some of the salinity in the fish.
7. Blot both sides of the salmon fillet with kitchen paper and place it skin side down on a wire rack over a baking tray and allow the fish to dry, uncovered, in the refrigerator for at least 4 hours or overnight to allow the pellicle to form – the flesh will feel slightly tacky.
8. Smoke the salmon according to your preferred hot or cold method (as described in the narrative above this recipe).
9. When the salmon has cooled completely, transfer it to the refrigerator and chill completely before slicing or flaking (if hot-smoked) or slicing very thinly and serving with your favourite accompaniments such as cream cheese, rye bread or bagels, lemon wedges, capers, thinly sliced pink or red onions (perhaps dressed with a little white wine and tarragon vinegar) or mixed salad garnish.
Bon appetit!
COOK’S NOTES:
When slicing cold-smoked salmon use a very sharp knife preferably with plenty of length and breadth, these slicing knives are expensive but high quality and well worth the hefty price tag – Lakeland Limited sell a good one for around £63. Keep the salmon in the refrigerator until you need to slice it. If you are right-handed place the salmon in front of you so that the thinner tail end is on your right-hand side. Position the knife about a quarter of the way up the salmon (tail end) holding it almost horizontal but so that the leading edge barely cuts into the fish. Move the knife backwards and forwards along the full length of the knife as you gradually move towards the tail and slightly downwards, which should give you a slice shaped like a long D. Continue slicing towards the tail as you gradually move up the fish. The knife blade should be visible through the salmon. When you reach the skin, cut along it to remove all the salmon. Once you get to the other end of the fish, turn it and cut the other way to remove the last few slices. Don’t worry if you don’t get it right straight away, practice makes perfect, and Dan and I are not quite there yet either!
Back in June, my husband Dan and I celebrated our 12th wedding anniversary in Lockdown with a day of sausage-making followed by a socially-distanced barbecue with our next-door-neighbours, Aidan and Sophia.
The art of sausage-making involves some scientific know-how and there is an obvious difference between making fresh sausages and those that you do not intend to eat right away.
Fresh sausage does not normally need curing salt, just a teaspoon of sea salt, freshly ground black pepper, whatever herbs, spices and other flavourings you like such as apple, sun-dried tomatoes or ale, breadcrumbs or oatmeal and the best quality meat you can afford. However, if you intend to experiment with curing some of the mixture or wish to store fresh raw sausages in the refrigerator for 2-3 days, then you will need to substitute curing salt for sea salt. You may also store your fresh sausages in the freezer well-wrapped for up to 3 months, but freeze them on the day you have made them and consume them within the time frame. Making your own sausages also gives you control over the quality of the other ingredients as shop-bought sausages often contain more unsavoury parts of the animal such as snout, gums, connective tissue and so forth.
If you want to keep your bangers in the refrigerator for 2-3 days before eating them or intend to have a go at producing air-dried sausage, such as chorizo, it is important to add a special curing salt, such as potassium nitrate or pink curing salt, to your sausage recipe in order to avoid botulism. The amount of curing salt varies according to which curing salt you choose and which type of sausage you are making but in the case of chorizo, for example, it is common practice to add 0.5g of potassium nitrate per kg of meat or 2.5g of pink curing salt per kg of meat, which is about half a teaspoon.
The method of curing also varies and is often very precise. Chorizo is often air dried by hanging up in an area with a steady temperature of between 50 and 60F and a humidity of 65-80F, but some people prefer to use an air dryer. Temperature and humidity are very important to avoid problems such as case hardening, which occurs when the cases cure faster than the meat inside. This usually happens when there is not enough humidity and the meat inside will not cure properly, although it is more of a problem with fatter sausages such as salami.
Occasionally mould will form on the sausage casing. White powdery mould is usually safe, but if it forms simply wipe it off with apple cider vinegar. If green mould forms on the outside of the casing do likewise, but if it is another colour such as blue or black you will need to throw the sausage away.
If the sausage does end up dryer on the outside than the inside, wrap in waxed paper or cling film and pop it in the refrigerator for a few days which will usually correct the problem, as the humidity left in the sausages will even out, leaving a more balanced sausage.
Air dried sausage is ready to eat when it has lost at least 35% of its original weight, so make sure you weigh the sausage before you hang it up to dry and then weigh it again before cutting, when it is firm to the touch by squeezing it.
If you are thinking about curing your own sausages in this way, making a small batch of fresh sausage (containing curing salt instead of sea salt and a variety of other seasonings) for eating right away and air drying one or two of the links to experiment, may be a step forward.
Dan and I chose to make fresh sausages by hand after grinding the ingredients in a food processor, as we did not have a sausage-maker or meat-grinder.
Mixing the ingredients – this was the beef mixture
Because I wanted to make some vegetarian haggis sausages for myself, I bought one stick of Viscofan 30mm diameter 100% plant-based sausage skin from the Ebay UK seller butcherssundries_online, which cost me £8.99 including free p&p for one 15.24 metre stick. Viscofan are world-leaders in producing the finest quality sausage skins, using state-of-the-art technology to form their ingredients into casings. The casing I bought is 100% vegetarian, gluten-free, GMO-free, allergen-free and are also suitable for vegans. They are also marketed as having an excellent natural look with good frying qualities and a tender bite. The all-one-length stick is sectioned at approximately 2.5 cm intervals in folded form, which we found produced an average yield of 6 sausages and also allowed us to cut off the length of casing we needed without wasting any, knotting the cut-off end to secure before stuffing.
We started with the ingredients for the vegetarian haggis sausages, then the pork and tomato and finally the beef and red wine ones, washing the food processor thoroughly afterwards between each batch of ingredients to avoid cross-contamination. As we had no sausage-maker we first tried piping the mixture into the skin, which wasn’t very effective, but I had a brainwave and we inserted a small funnel into the open end of the casing and pushed the mixture through the funnel with clean fingers and the handle of a wooden spoon. We made sure the sausage casing was well-filled before twisting at each interval to form the individual sausage shapes, but this was the tricky part as the casing seemed less pliable than we expected so we needed to twist it several times to stay in place.
Stuffing the skins
All the sausages cooked perfectly on the barbecue, the skins did not burst and had a tender bit. We set the grill higher over the coals to allow the sausages to cook evenly. There is nothing worse than a sausage burnt on the outside and still half-cooked on the inside. We wrapped the haggis sausages in foil and placed them in a foil tray with some water and steamed them over the barbecue. All the sausages had a good consistency and tasted delicious and we all enjoyed what we ate. I served all the sausages with a good vegetarian red wine reduction, a foil tray of onions gently fried and then placed over the barbecue covered with heavy-duty foil and some creamy mashed potato, and we shared a good bottle of Champagne.
Below are my sausage recipes – simply combine all ingredients in a food processor or meat grinder before making into sausages. I eyeballed most of the ingredients based on instinct, but if you’re not a confident cook then feel free to use your own weights and measures.
BEEF AND RED WINE SAUSAGES
500g minced beef – drizzled with a good glug of Merlot and allowed to marinate overnight
A good handful of fresh breadcrumbs or oatmeal
Fresh thyme, leaves only
Sea salt and freshly ground black pepper
PORK AND TOMATO SAUSAGES
500g minced pork
A good handful of fresh breadcrumbs or oatmeal
3 tbsp tomato paste
Chopped sun-dried tomatoes if liked
Fresh thyme and chopped sage, leaves only
Sea salt and freshly ground black pepper
VEGETARIAN HAGGIS SAUSAGES
Can butter beans, drained and mashed
A good handful of oatmeal
Chopped garden herbs, leaves only – thyme, rosemary, marjoram
A good handful of vegetable suet
A glug of sunflower oil
1 tsp ground allspice
Sea salt and lots of freshly ground black pepper
We have since invested in a combined sausage-maker and meat-grinder and had a date making turkey and chorizo sausages seasoned with hot and smoked paprika, which turned out really well. We gave some to my brother and he loved them!
During the Lockdown period I have seen a few TV programmes featuring celebrity chefs preparing gnocchi.
Now, I have tried pre-packaged gnocchi from the supermarket several times in the past but it was never to my liking. It often has a strange, slimy texture and is under seasoned, tasting of very little at all; an underwhelming dining experience, it must be said.
For me, texture is a very important consideration when preparing meals. If something looks and tastes ‘wrong’ to my palate I am unable to eat it and I am sure many people share my sentiments. Gnocchi has usually had this effect upon me, thus I tend to avoid it.
However, recently having watched TV programmes showcasing tempting plates and inventive recipe ideas with gnocchi, and then discovering that gnocchi is a slightly healthier alternative to traditional white pasta, I did wonder whether I might be missing out on a taste sensation and might perhaps have more luck making my own gnocchi and, at the same time, make it gluten- and egg-free, so I decided to give it a go.
Gnocchi are little Italian soft dough dumplings often made with a blend of semolina or wheat flour, mashed potato, egg and seasoning and can be fried, baked or boiled. Other ingredients might include cornmeal or breadcrumbs, cheese or egg, and flavourings such as vegetables, herbs, cocoa or prunes.
I used Doves Farm plain (all purpose) gluten-free flour which is a blend of rice, potato, tapioca, maize and buckwheat and is also suitable for a Kosher diet. Recipes online suggest baking rather than boiling gluten-free gnocchi but I saw no reason why the little dumplings could not be boiled as long as handled with the love and respect any handcrafted product deserves.
One of the most important things is to use floury potatoes and make sure they steam dry before mashing and that it is well-seasoned with salt and pepper. The potato can be boiled first or baked in its jacket in a microwave oven before mashing A potato ricer, if you have one, makes it easier to get a nice smooth texture with no lumps, otherwise use a conventional potato masher and some elbow grease, but for my recipe do not add milk or butter or any beaten egg. Simply combine the potato with the plain flour, add chopped sage or any chopped herbs of your choice, and season well with sea salt and freshly ground pepper.
Form the gnocchi dough into little balls or lozenge shapes and use the back of a fork to create a crinkle effect, before boiling in a pan of salted water for a couple of minutes. When they are ready, the gnocchi will rise to the surface. Remove them with a slotted spoon on to kitchen paper to drain and then serve with any sauce of your choice – or even a simple drizzle of garlic infused olive oil and torn basil leaves, or a little pesto or sun dried tomato tapenade.
For a heartier plate and to keep this recipe vegan, any tomato-based sauce goes well with gnocchi, whether you roast whole cherry tomatoes in an oven with garlic and balsamic vinegar or use tinned chopped tomatoes. For a vegetarian, gnocchi can be enjoyed with roasted butternut squash and goat’s cheese or perhaps some spinach and ricotta. I decided to serve the gnocchi simply with a side of roasted Mediterranean vegetables – diced aubergine (eggplant), roughly chopped onions, tomatoes, courgette, tomatoes and bell peppers and a drizzle of balsamic vinegar.
I found the gnocchi cheap to make and easy to prepare, and the time taken was worth the effort as the result was delicious. I have discovered a liking for freshly-prepared gnocchi, they are tasty, filling and versatile and I will enjoy experimenting with different flavour and texture combinations.
Ingredients (serves 4)
For the gnocchi
400g Potatoes, mashed
50g Gluten-free Plain flour
Salt and freshly-ground black pepper
Finely chopped fresh or dried basil
For the vegetables
1 Aubergine diced into 2cm chunks
2 courgettes diced into 2cm chunks
Whole cherry tomatoes or quartered vine-ripened tomatoes
2 red onions, roughly chopped into chunks
Red and Yellow Bell Pepper, deseeded and sliced into strips
Crushed garlic cloves (optional)
Olive oil
Balsamic Vinegar
Sea salt and freshly ground black pepper
Torn basil leaves (to serve)
Boil floury potatoes in their skins in salt water, drain thoroughly and return to the pan to steam dry. Alternatively, microwave potatoes in their skins until cooked through.
Wash and prepare the vegetables, drain well on kitchen paper and place in a roasting tin with some crushed garlic cloves if liked and a good glug of olive oil, a splash of balsamic vinegar and season with sea salt and freshly ground black pepper. Place in a medium oven and roast for 20-25 minutes or until tender.
On the hob, heat a large pan of salted water and bring to the boil.
Meanwhile, as soon as the potatoes are cool enough to handle, peel the skins away with clean hands and either push the potatoes through a potato ricer or mash to remove any lumps. Turn potatoes out on to a large board.
Measure out 50g plain flour on to the board and gently mix into the potatoes, along with chopped fresh or dried basil to your liking and season well with salt and freshly ground pepper. Add a little more flour if you think it is necessary, but only add one tablespoon at a time to avoid the dough becoming too dry.
Carefully knead the dough for a few minutes until pliable and then roll into four thin sausage shapes 2-3 cm thick and cut each sausage into 3cm slices. Then either roll into balls or carefully mould into lozenges, using the back of a fork to create grooves which will help the sauce to stick to the dumplings.
Carefully place the gnocchi in the pan of salted water and boil for about 2 minutes. They are ready when they rise to the surface and they will have puffed up a bit. Cook the gnocchi in two batches of two servings to ensure they do not stick together.
Remove from the pan with a slotted spoon, toss with a little garlic-infused extra virgin olive oil and serve with the Mediterranean vegetables and torn basil leaves.
Margate Old Town is an historical area that started out life as a fishing village to become one of England’s first seaside resorts, retaining a rich maritime and cultural heritage.
Margate has been inhabited since prehistoric times with evidence of a population since the Bronze Age. It’s name probably derives from the Anglo Saxon Mer-geat meaning “gap in the cliff” or “sea gate”. During Roman times the nearby Wantsum Channel was an important maritime route and Roman artefacts suggest that Margate was used as a minor landing place. By the 8th Century AD the Anglo-Saxons had established a fishing community which was recorded in charters as Meregate.
Dan and I started our tour at Cecil Square, which was developed from 1770 onwards as the grand new town centre during the Georgian expansion of the former Tudor fishing village which included Hawley Square, Marine Gardens and the High Street. Marine Gardens showcased the sea front, the High Street was focused on commerce, while Hawley Square contained grand houses set around a garden. Together, these interconnected areas were designed to attract Londoners to holiday by the sea.
The Tudor House Museum, King Street
Dating back to 1525, this half-timbered Tudor building is currently closed for restoration and is one of Margate’s oldest buildings. Originally, it was the home of a prosperous Yeoman farmer though over the years the building has also been home to Master Mariners, Flemish weavers, Cordwainers (who traditionally made footwear and riding tack for the military from fine, soft leather) and farmers; 1776 map shows a large farmyard surrounding the residence. The Tudor House has Jacobean plaster ceilings decorated with fleur de lys, dolphins and Tudor roses, as well as period rooms and a formal garden, all of which offer a glimpse into 16th century life. Many of its features, including its two-story layout, were relatively advanced at that time. The house was an excellent example of the change that was taking place from the medieval hall-style home to picking several smaller rooms.
Other features of the house that would have been seen as contemporary at that time were an early form of double glazing and its twin chimneys. Margate Tudor House was rescued from demolition in the 1930s and refurbished using methods from the Tudor Period.
Margate Caves, 1 Northdown Road
Once a chalk mine, the caves became a Victorian attraction in 1863. They remained shut down for more than 100 years before they were rediscovered and converted into a tourist attraction. The caves were restored between 2011 and 2019. Visitors can explore the underground murals and learn more about the history of the site, including archeological finds, some of which date back to Anglo-Saxon times. The caves feature a portrait of the Viking warlord, Voltigern, a figure of historic significance in the area, as well depicting the the 7 ft tall smuggling giant which symbolises the town’s rich maritime history.
Margate Museum, Market Place
This is in the old Town Hall, which was previously the magistrates’ court and police station. It has Victorian prison cells and artefacts from archeological excavations in the area as well as displays of the local maritime history. It is currently closed for renovation.
Old Kent Market, 8 Fort Hill
This historic building was originally a cinema and is now a market with food, vintage and craft items. The Little Prince is said to be the UK’s smallest pub. The bus cafe is a popular attraction and now serves a good selection of Asian cuisine.
Margate Harbour
Turner Contemporary and Lighthouse – Designed by UK architect David Chipperfield, the gallery stands on the site of a Boarding House where the artist J M W Turner used to stay with the Landlady, his partner Mrs Sophine Booth or “The Shell Lady” (Ann Carrington 2008). The gallery itself is now a major architectural landmark.
“The Shell Lady” – At the far end of the stone pier stands the sculpture of “The Shell Lady”, created by the contemporary artist and sculptor Ann Carrington, in 2008. The sculpture is 12 feet tall and is made of bronze. This sculpture is referred to as “The Shell Lady” because it is inspired by the shell lady souvenirs featured at gift shops across the town.
Sophie Booth was born to German parents in Dover in 1798. She then relocated to Margate, where she married a local Fisherman, John Henry Pound, in 1818. Sadly, in 1821 her husband drowned at sea, leaving her with their two sons, Daniel and Joseph, but tragically Joseph died before he turned six.
She then married John Booth, a gentleman 37 years her senior, and together they established a guest house on the town’s seafront. Sophie gave birth to a son, John Pound Booth, in 1826, but he died at ten from cholera.
In 1828, J M W Turner began visiting the Booth guesthouse, as the quality of light within the area fascinated him and inspired several of his paintings. After the death of her husband in 1833, Sophia had once again become a widow, and she and Turner became lovers. Although they never married, they were both referred to as Mr. and Mrs. Booth.
You can watch my video of Margate Old Town here, to find out more about these and other stories and bring them to life.
Flammkuchen, or tarteflambée, is a traditional Alsatian flatbread recipe from the German-speaking region of Alsace. Comprising bread dough rolled out very thinly in the shape of a rectangle or oval, it is covered with fromage blanc or crème fraiche, thinly sliced fried onions and bacon lardons. It is important to fry the onions slowly ensuring they are soft and golden rather than charred. The name Flammkuchen translates to “Flame Cake”, referring to the traditional method of baking the dough in a wood-fired oven.
Similar to a white pizza, the Flammkuchen dates back to the Medieval period when it provided a simple, hearty meal for peasants and farmers. Over time, it became a staple in Alsatian and German cuisines, and the various regions developed their own unique variations, which not only showcase the local ingredients and cooking methods but also demonstrate the versatility and adaptability of Flammkuchen, and it is often enjoyed at get-togethers with family and friends, as well as at social gatherings and festivals.
My YouTube video demonstrates how to prepare Flammkuchen, with one or two of my own variations. Why not try one or two of your own?!
Taken from Favourite Boating Recipes by Cas Best and inspired by a bunch of giant, prize-winning onions from a lock-side garden, this simple recipe creates a delicious, full-bodied onion soup, similar to French Onion Soup (which it would be were you to make one or two modifications to the recipe) and can easily be prepared in a slow cooker, on a camping stove, in a pot over a campfire or in the small galley kitchen of a narrow boat on the canal.
Historically, the Lock-Keeper held an important role on the waterways of Great Britain in the management and maintenance of the lock (a gated section on a canal or river) and facilitating the navigation and safe passage of boats on their journeys. Their duties would also have included opening and closing the gates, operating the lock mechanisms and sometimes managing the associated weir to control water flow and levels, especially during droughts or heavy rain.
The occupation dates back to the 1700s and the term “lock-keeper” was first recorded in 1762. Traditionally, lock-keepers lived in small, ‘tied’ cottages and often had additional responsibilities including minor repairs, selling provisions such as flowers and vegetables from their beautifully-kept gardens to passing boats and maintaining nearby canal infrastructure. The lock-keeper’s work was essential for transporting goods including coal, grain and clay during the Industrial Revolution, when canals were a primary means of inland transport.
With the decline of commercial canal traffic these days, many locks are now unstaffed however in certain regions the lock-keeper does remain important for recreational boating and water management although the role is mostly a voluntary one. At large locks or on major rivers several lock-tenders may report to a Lockmaster, who oversees operations and in other cases, a single lock-keeper may manage multiple locks, guiding hundreds of boats every day up and down the waterway.
INGREDIENTS (makes 6-8 helpings)
4 large onions, finely chopped
1 tbsp oil for frying
13/4 pints vegetable stock
1 tsp yeast extract (such as Marmite or Vegemite)
Fresh ground black pepper
Heat the oil in a large saucepan and gently fry the onions until just softened.
Add the stock and yeast extract and stir well. Season with plenty of freshly ground black pepper.
Bring to the boil, stirring, then cover and simmer gently until the onions are really soft.
Serve with chunks of fresh, crusty bread.
COOK’S TIPS
Add some fresh or dried herbs of your choice to the simmering pot. Sage, parsley and/or thyme would all work well.
For a French Onion Soup, substitute the vegetable stock with beef stock (and perhaps a cheeky splash of red wine – just because!)
To pimp this recipe up to the next level, either fry some cubes of day-or-two-old bread to serve up as croutons or, alternatively make some cheesy giant croutons with day-old bread topped with some sharp cheddar and place under the grill until bubbling and golden.
If you would like to make this recipe in a slow cooker and leave the soup to do its thing, then my video below shows you how:-
I would like to share an historical recipe with you from The Cookbook of Ann Smith, Reading for Little Plum Cakes. First published in Renaissance England in 1698, the recipe can also be found on lostkitchenscrolls.org.
The original recipe manuscript (lostkitchenscrolls.org)
The original recipe reads: “Take ½ lb. of fine Sugar dry finley þarched, then mingle it with your flower & take ½ lb. of sweet Butter & putt it into a Deep Diſh & 2 or 3 spoonfulls of Roſe Water working it with your hands take ½ lb. of Currants & take 6 yoalks & 6 whites of egges Beat them well togather with Roſe water then putt them togather with a Blade or 2 of mace findly beaten, then work it in your Flower & sugar by a little att a Time when you have Done almost then putt in it ½ lb of Currants waſhed & dried & putt hott upon Coals, then putt them in your Butter’d pañns & sett them in a quick oven. This Quantity will make 22 Cakes.”
Like most late 17th-century recipes, the recipe is written as a narrative rather than with specific measurements or listed instructions. Ingredients are given in pounds and handfuls and any descriptions or guides are aimed at the experienced cook or housekeeper. Spelling was haphazard: ‘Finley þarched’ (for ‘finely parched’), ‘yoalks’ (yolks), ‘pañns’ (pans), and the archaic long ‘ſ’ (used in ‘Roſe Water’) pepper the text. Quantities were geared towards large households rather than a single family and with a practical order of ingredients – wet and dry ingredients blended in stages for a rich, sticky batter. The recipe was created at a time when domestic baking was starting to spread among English gentlewomen, blending tradition with the new luxuries of sugar and spice. However, ‘plum cakes’ were more like dense little sponge cakes containing either raisins and currants (‘plum’ being the general term for dried fruit) rather than the airier fruit cakes of today, but they were a signature of celebration and hospitality reflected in both the increasing availability and extravagance of imported sugar and dried fruit as well as the fashion for delicately-flavoured, perfumed pastries containing aromatics such as rosewater. Ann Smith herself was probably a woman of substance who had access to the ingredients and the staff or leisure time to produce these and other confections.
What sort of equipment might the late 17th century baker had access to? The answer is, perhaps slightly more sophisticated versions of the traditional, as well as their hands as the main tool for creaming and kneading! A large earthenware or wooden mixing bowl would be used to work the butter by hand; finely woven sieves for sifting flour and sugar; and a small whisk or fork for beating eggs. Currants were washed and dried, perhaps by an open fire and mace would be ground in a mortar and pestle. The cakes themselves would be baked in small round pans similar to modern-day tart or muffin tins, all buttered well to prevent sticking. The coals on the hearth provided ‘quick oven’, which would have been managed either in a brick oven or before a free-standing range, ash and embers carefully distributed for an even heat.
As I have mentioned, a more modern-day version of the original recipe is published on lostkitchenscrolls.org, and I referred to this when making these cakes but halved the quantities (using 115 g of butter and dry ingredients rather than 225 g) and spooned the batter in cupcake cases rather than just spooning it directly into muffin tin. However, I have further simplified the ingredients and method below for ease of use.
Metric Ingredients (makes approx. 22 or up to 12 if quantity is halved)
225 g (1/2 lb) caster sugar, plus extra for dusting if liked
225 g (1/2 lb) plain (all-purpose) white wheat flour
225 g (1/2 lb) softened, unsalted butter
2-3 tablespoons rosewater
6 large eggs
A pinch (1/4 tsp) ground mace or nutmeg
225 g (1/2 lb) dried currants, raisins or sultanas
Method
In a bowl, mix the sugar with the plain white wheat flour.
In a separate bowl, soften the unsalted butter and work it well with your hands or a wooden spoon along with 2-3 tbsp rosewater until creamy and fragrant.
In another bowl, beat 6 large eggs together with a splash more rosewater.
Add a pinch of ground mace or nutmeg (a scant 1/4 tsp)
Combine the egg mixture with the butter, then gradually fold in the flour and sugar mixture, step by step, until you have a loose batter.
Towards the end of the whole mixing process, add the dried fruit and mix through.
Leave the finished batter on the counter a short time to warm at room temperature, then spoon it directly into well-buttered muffin or tart tins, or alternatively line the tins with cupcake cases and spoon the batter into those.
Tap the filled tins gently on the surface to level everything out.
Bake the little cakes in a moderately hot oven (approx. 200oC/400oF/Gas Mark 6) until golden and fragrant.
Leave the little plum cakes in their tins to cool for a few minutes before placing them on a wire rack to cool completely.
Bon appetit!
Catherine
What do you think of this recipe? Please let me know below!
I am interested in Native American history and culture and came across a recipe online for Three Sisters Stew by Lois Ellen Frank, PhD, published on 1 November 2022 and reviewed by Dietician Emily Lachtrupp, M.S., RD. This recipe is part of their showcase: There’s a Movement to Revitalize Indigenous Cuisines and Knowledge – Here’s why that Matters:-
Three Sisters Stew is an easy recipe to prepare, and is nutritious and delicious. It is naturally diabetes-friendly, nut-free, dairy-free, soy-free, heart-healthy, vegan, vegetarian, egg-free and gluten-free!
The Three Sisters are corn, beans and squash, which for centuries have been planted together by indigenous peoples and which have spiritual significance for some. In New Mexico, the saying a healthy environment means a healthy culture is a popular one, rooted in the belief that this leads to healthy people. The way these vegetables grow together on the land reinforces this idea that all things are connected. The beans climb the cornstalks, the squash leaves give shade to the soil thereby limiting weed growth, and the beans set nitrogen into the soil and help to stabilize the cornstalks.
There are 23 unique Native American communities in New Mexico, including nineteen Pueblos, three Apache tribes (Fort Sill Apache Tribe, the Jicarilla Apache Nation and the Mescalero Apache Tribe) and the Navajo Nation. Each tribe is a Sovereign Nation with its own government, customs, tradition and culture. The 19 Pueblos comprise: Acoma, Cochiti, Isleta, Jemez, Laguna, Nambe, Ohkay Owingeh, Picuris, Pojoaque, Sandia, San Felipe, San Ildefonso, Santa Ana, Santa Clara, Santo Domingo, Taos, Tesuque, Zuni and Zia.
Although this can be served in all seasons, Three Sisters Stew is an ideal winter dish and develops further if you have enough for leftovers the next day (if you can resist seconds!), and quantities can be doubled or even trebled for many or greedy appetites! I am sharing the recipe as it is which serves 8 people, but feel free to halve quantities if feeding four or fewer people. Types of squash include zucchini, pumpkin, butternut, Crown Prince and winter squash, according to seasonality.
Ingredients
1 tbsp sunflower oil (I used olive oil – I do not usually use seed oils)
1 large yellow onion, chopped (you could use a large red or white onion if preferred)
1 tbsp chopped garlic (3 or 4 fat cloves)
1 large green bell pepper, chopped (red, orange or yellow if preferred)
3 medium zucchini, diced (I used a home-grown winter squash)
1 (28 oz) can no-salt-added whole peeled or diced tomatoes. (I used one 400g can tomatoes).
2 (15 oz) cans no-salt-added pinto beans, rinsed.
2 (15 oz) cans no-salt-added pinto beans, rinsed.
11/2 cups corn kernels (I used corn cobs)
4 cups water
3 tbsp dried New Mexico red chili pepper or other mild chili pepper (I used a smaller amount of hot chili pepper)
1 tsp kosher salt
1/2 tsp dried Sonoran or Mexican oregano
1/4 tsp dried thyme
1/2 tsp ground pepper
Flat-leaf parsley and/or microgreens for garnish.
Step 1
Heat oil in a large pot over medium-high heat. Add onion and cook, stirring occasionally, until beginning to caramelize which will take 4-6 minutes. Add garlic and cook, stirring, until fragrant, for 30 seconds. Add the bell pepper and cook for 2 minutes, stirring occasionally, until slightly softened. Add the zucchini or other squash and cook, stirring occasionally, until slightly softened, for about 2 minutes. Add the tomatoes and their juice. Remember that if using whole tomatoes to break them up as you add them. Cook for a further 4 minutes, stirring occasionally, until the mixture returns to a simmer.
Step 2
Stir in the kidney beans and pinto beans, the corn and the water, and bring to a boil over a high heat. Reduce the heat to a simmer and stir in the chili powder, salt, herbs and pepper. Cook for about 20 minutes, stirring occasionally, until the liquid is a little reduced.
Step 3
Serve topped with parsley and/or microgreens, if desired.
Cook’s notes
For a heartier meal why not serve with some steamed brown rice or sweet potato, or perhaps some cornbread.
I added a pinch of sumac for an extra vibe.
Feel free to use whatever herbs you have available. I often use fresh garden herbs in recipes.
For a thicker stew, add a little coconut milk or ground almonds to taste.
Enjoy!
You can watch a step-by-step guide on my YouTube channel:-
The Artillery Arms in Ramsgate is Grade II Listed (8 October 1972), originally known as The Ash Arms. It stands on Artillery Row at 36 West Cliff Road, and was formerly listed as 36 Royal Road (East Side). A CAMRA Guide entry for many years, this local is worth seeking out and enjoys a considerable reputation as a real ale destination. It normally features five local beers and others from independent brewers elsewhere, such as Oakham and Thornbridge. Wednesday evenings are Gourmet Night.
This small early Victorian pub dated 1840 is laid out on three levels. It has a jukebox, is decorated throughout with militaria and boasts a striking set of old well-preserved and attractively painted and stained-glass windows depicting 19th century cavalry charges and battle scenes. It is believed that the windows were designed and made by French prisoners of war brought to Ramsgate following the Battle of Waterloo.(1)
The Grade II listing states:-
“GV II Public house. Circa 1840. Painted brick with slate roof. Three storeys and basement with parapet to hipped roof and stacks to left and to rear. Two storey bow with glazing bar sashes on first and second floors. Ground floor pub front wrapped around front and returned to side elevations, with panelled aprons to frosted and stained glass windows with pilaster piers to fascia and cornice, with pediments containing relief of cannons over panelled and glazed doors on left and right corners. Left return (to West Cliff Road) with sash above panelled front, glazing bar sash over half-glazed door with semi-circular fanlight, and glazing bar sashes on each floor to left and also in two storey end wing.“(2)
On Saturday 20 July 1889 a notice of sale of the pub appeared in the Thanet Advertiser newspaper and was earmarked for auction in one lot on Wednesday 7 August 1889:-
To Brewers, Innkeeper’s, Trustees & Others.
Compact and Safe Investment, important Freehold Property, the “Artillery Arms,” occupying a splendid position on the Westcliff, at the corner of the Royal Road, Ramsgate, and on the main thoroughfare from the town to Pegwell Bay, &c., with dwelling house, workshops, builders yard, and premises adjoining.
Mr. Woods has been favoured with instructions from the owner, to sell by auction, at the “Bull and George Hotel” Ramsgate, on Wednesday, August 7th, 1889, at 3 for 4 o’clock, in one lot.
That well-known and deservedly popular old established fully licensed freehold public house, well situated at the junction of the four important roads, and enjoying the patronage of the residents as well as the visitors of this favourite seaside resort.
The “Artillery Arms” is substantially built, of good elevation, conveniently arranged, has a pretty bar with three entrances, and good cellarage. It is at present leased to Messrs. Tomson and Wotton, the eminent Ramsgate Brewers, at the nominal rental of £50 per annum. The lease expires and about 2 years, when it will doubtless readily realise at the least £100 a year.
Also the valuable Freehold Workshops and Yard adjoining, let to Mr. Coleman at rental of £9 per annum; and the compact Dwelling House adjoining at side, No. 34, West Cliff Road, rental £14 a year.
May be viewed by permission of the various tenants, and Particulars with Conditions obtained one week prior to the sale of the premises, at the “Bull and George Hotel,” Ramsgate; of W. G. Esq., Solicitor, 33, Guilford Street, Russell Square, London; and of Mr. Woods, Auctioneer and Land Agent, Hounslow.(3)
Sketch of the Artillery Arms, date unknown.(3)
The Artillery Arms is said to be haunted by two apparitions. A resident gentleman appears, dressed in early Victorian-style military uniform (for example, a ghostly reminder of the Crimean War in 1854?) and leans against an external wall watching people go by. From the ground floor is a short flight of haunted steps and manifestations include a female ghost who sits on the top step, wearing a long white nightdress and cotton mop cap. Here is my YouTube short:-
In 1934 the Landlord and Licensee, 24-year-old Albert Drapper, formerly of the Navy, was shot in the head in a taxi-cab in Paris, just a few minutes after arriving at the Gare du Nord. He passed away three hours later at the St Louis Hospital without regaining consciousness. The unfortunate young gentleman had hailed the taxi-cab at the Gare du Nord and instructed the driver to take him to the Gare de Lyon, which was the main station for trains to the south of France. Presumably he was on vacation, but do we know for sure? The taxi-cab was traversing the Place de la Republique when the taxi driver heard a shot ring out. He turned around and saw Mr Drapper huddled in a corner with a revolver in his hand. The question is, was someone after him or did he pull the trigger?(4)
On 28 February 1973 the East Kent Times and Mail(5) reported that the Ramsgate Works Committee wanted to see the Artillery Arms demolished and were approaching the planning authorities to seek a Compulsory Purchase Order on the basis that the old pub, now a free house after being sold by Whitbread’s two years earlier, was a traffic hazard. However, because of its specific architectural interest with its stained glass windows, the pub was now a listed building. Thankfully the request failed and the Artillery Arms remains a vibrant part of the local community.
(2) Kent County Council Historic Environment Record; Listed Building: THE ARTILLERY ARMS (1336327); date assigned: 8 October 1972; Listing NGR: TR3778664644
I spend increasingly less time, not merely on a laptop but also on any electronic device. Long gone are the days of scrolling on social media or doom-scrolling the latest news, which was probably done out of anxiety more than anything else. Experiences are so much more liberating when one can step out of fear.
Following my daily fix of hot water and lemon, I have breakfast – usually natural bio-yoghurt with fruit, porridge or sometimes eggs. I spend time in the kitchen every day either prepping meals or tidying up and doing the daily chores. I also do admin work for myself and Dan, who is a piano tuner-technician. If Dan has left for work very early I will feed the cats before I do anything else at all, and after 30 minutes administer our in-remission-diabetic kitty Merlin his insulin shot.
I spend some time every day in our garden, where we grow our own organic fruit and vegetables. We have overwintered veggies for a couple of years now but this is the first year where we will be growing our own produce all-year-round as food prices continue to rise here in the UK, as they are everywhere else. Gardening and being outdoors is so beneficial to my general wellbeing and mental health, especially throughout autumn and winter; I suffer from SAD and am doing my utmost to deal with it by the most natural methods I can.
I play the piano and also compose ambient music (I still notate by hand, though have recently purchased Sibelius), though I haven’t written anything new for a little while now as I haven’t necessarily been in the right headspace and often need to juggle a busy life, but I usually do piano practice most days.
Two or three days a week I do crafting – jewellery-making, candle-making or sewing – for an hour or two and the items I either list in my own webstore or in my Etsy shop or put in one of my two outlets. I am also a YouTube content creator and although my channels are very small, I produce one or two videos every week for both channels and I edit Dan’s content for his channel too. He normally uploads one video a week as well as shorts.
I do enjoy getting out and about and go for a good walk a few times a week though I try to go out every day, even if it’s just a 15 or 20 minute walk into Ramsgate or Broadstairs to shop for groceries. I like to support small local businesses and buy from the greengrocer, fishmonger, butcher and baker, even if the prices are a little higher than in the supermarkets. We also have a doorstep delivery of dairy once a week and every two months we have a delivery of raw milk products from Fen Farm Dairy, who are based in Suffolk.
These are just some of the things I do in a normal day!
What, though I ask you, does your day look like? Do let me know!
On Wednesday 8 January 2025 the UK came within a hair’s breadth of a national power blackout. Traffic lights stopping, trains halting, street lights going out, the main electricity supply ceasing to be available.
It has been suggested that the National Grid came closer than the regulator has admitted to this chaos, due to the drive to achieve Net Zero goals by 2030.
The last time this happened was in 2019. There was a lightning strike that took out 2 big power stations and we had widespread blackouts that covered about 40% of the country but fortunately this happened in the summer so it didn’t have as critical an impact as it would during the autumn and winter months, when it could lead to fatalities.
Even trains were unable to restart remotely so the main impact for the public was transport disruption. People with laptops had to travel around the country restarting stranded trains so that they could continue on their journeys. It was several hours before full power was restored in all areas of the country. This was merely the time it took to get everyone back up and running. This incident affected the east of England and happened on an afternoon and evening in mid-August so there was no issue with darkness or cold and was an inconvenience for many rather than dangerous. Hospitals have backup generation but the problem is if you have that sort of event in the winter when it’s dark and cold then it becomes far more dangerous and especially when people don’t expect it.
One of my YouTube subscribers sent me the link to an UnHeard podcast with Kathryn Porter, an independent energy consultant. This was serendipitous as I had already started researching this subject in order to start a discussion on my channel. Below is the link to the podcast should you wish to watch it, however I will attempt to unpack the science in layman’s terms in order to make it easier for people to comprehend. My own video presentation is appended at the very end of this blog.
HOW IS OUR ENERGY SUPPLIED?
It is very difficult to store electricity on such a large scale and almost none of it is stored. We have to generate the electricity we need when we need it, for example in real time. This is very important because electrical equipment starts playing up when this balance isn’t always maintained. There are all sorts of protection systems built into the grid, at power stations, sub-stations, power lines etc. They will also disconnect themselves if this balance isn’t properly maintained, so it is essential that it is always met in real time.
So you have generation and demand. Historically, generation came from a relatively small number of big power stations – coal, gas, oil and nuclear. The demand was reasonably predictable and was primarily driven by the weather so when it was cold demand went up and when it was warmer and sunnier demand went down.
The National Energy System Operator (NESO) is responsible for deciding how much energy is necessary to meet demand on the basis that the market balances itself so through price signals people will choose whether or not to run their power station because they can make money and normally you make money where there is enough demand that you will need it. This works quite well but the grid itself is complicated. National Grid runs something called the Transition System which is a high voltage grid and is the electricity equivalent of motorways and big A roads. It is the way that you funnel electricity around the country in bulk and according to demand. However, just like traffic jams there are constraints in the electricity grid and so just because you might have a lot of generation in one part of the country you might not be able to move that electricity to where the demand is or you might have an uneven distribution of demand, such as lots of demand in the south-east but less in Scotland. So the National Grid and NESO is responsible for managing that in real time, so it is they who decide what is necessary and from which source and this is done through something known as the balancing mechanism. People, generators and suppliers will say these are the prices which we are willing to increase generation, reduce generation, and the same with demand and that’s how decisions are made based on that pricing.
WHO ARE OUR SUPPLY PARTNERS AND AT WHAT COST?
Below is the list of average energy prices paid per annum across Western Europe:-
650 Euros – France
650 Euros – Belgium
620 Euros – Spain
558 Euros – Germany
558 Euros – Denmark
546 Euros – Holland
545 Euros – Austria
543 Euros – Norway
476 Euros – Finland
174 Euros – Poland
2,960 Euros – UK
As you can see from the list, by comparison the average UK householder pays at least several times these amounts! Why is this?
A BBC article online dated 31 January 2023 reported that, according to Reform UK, an estimated 87% of energy and water companies in England and Wales are foreign-owned and in 2022 The Guardian newspaper estimated that 70% of the English water industry is in overseas ownership, though overall estimates do vary. In the article, the Reform UK party proposes that companies supplying and distributing energy and water would continue to be run by private firms but 50% would be government-owned and 50% by “British pension funds”. Richard Tice the then-leader of Reform UK said that no other nation had allowed so much of its infrastructure to be in foreign hands and we are being hit in the pocket under the current system.
So why is this?
In the podcast, Kathryn Porter explains that we have no large oil power stations at all on the UK grid and have recently closed the last coal power station. We have opened a lot of wind generation on shore and off-shore. We have some solar and have opened a lot more interconnectors, which are import/export cables with other countries. We have had one with France for many decades, and have built another two with France. We also have them with Belgium, the Netherlands, Denmark and Norway. We exchange electricity with these other countries. What is making the system more complex is that wind and solar depend on the weather on a large, or macro scale because sometimes whole days are not windy or sunny and the highest period of demand every day is dinner time and in the winter dinner time happens at night so there is no solar at all during the peak in winter. However, there are micro level effects where individual gusts of wind or clouds will make a difference to your output moment to moment and so maintaining that match between generation and demand all the time becomes harder and unsustainable. Demand also gets more complicated because people might have solar panels on their roof and that looks like negative demand to the grid. People have electric cars and electrification is going to make quite a big difference to demand and so that becomes more complicated as well. The whole picture is a lot more complex and more vulnerable than it used to be 30 years ago.
The move towards renewables which people may be in favour of rather than solely being reliant on fossil fuels, the downside is that because it is variable it means that our whole system is more vulnerable to potential pressure points or even blackouts. Another big way in which renewables are causing fragility to the system. There is current and voltage on the electricity system which is alternating current – it varies in a fairly regular wave shape and this wave shape is literally generated by gas and nuclear turbines all rotating at the same speed. They rotate at 3000 revolutions per minute, which means that the wave is varying at 50 cycles per second, which is how the voltage is created and enables a plug-in appliance, for example, to work properly. The grid frequency, this ambient wave, is a really important measure within the electricity system and the difficulty is that wind and solar don’t generate this. They generate direct current such as a battery, so that doesn’t vary at all and on a chart it would show as a straight line so you have to use electronics to change it so that it can fit in with what’s happening on the grid. The problem is, if you start replacing your gas and nuclear turbines with renewables you lose the mechanism that creates the ambient wave. Gas turbines are big, heavy machines and resist changes to their speed of rotation. You want them at 3000 revolutions per minute so that you get that nice regular wave, but if you take away the gas turbine and replace it with renewables, you don’t get that. If you don’t have that stable wave happening all the time then that will lead to blackouts. Electrical equipment is so sensitive to that measure, the more we replace conventional generation with renewable energy the less stable the grid becomes.
A report by Kathryn Porter includes a graph showing the typical generation mix on a low-wind day in winter. Gas is the big chunk of this throughout the day, a big peak at dinnertime and then it comes down. There is some 10% from interconnectors, nuclear is providing 10%, biomass provides a little bit but suddenly when you look at the gas band, it is 50%. So the reality is that there is a tiny bit of solar between 11am and 2pm, but isn’t making a huge amount of difference. So basically we are still reliant on gas – and that is the problem because we are not generating enough of it.
The BBC article dated 31 January 2023 says that foreign takeovers of British companies can be blocked on grounds of national security, which happened in the case of the sale of Newport Wafer Fab to a Chinese-owned company by using the the National Security and Investment Act.
Labour intend to launch a tax-payer owned energy company modelled on France’s EDF. Named Great British Energy, it would be set up with public money but would be operated independently with any profits being reinvested.
Meanwhile, the Green Party have proposed permanently nationalising the ‘Big Five’ UK energy suppliers. This would cost an estimated £2.85 bn and would allow them to return the price cap to where it was in autumn 2022 and keep it at that level for a year.
HOW DID THINGS GO WRONG ON 8 JANUARY AND WHAT WAS THE RESPONSE?
On 8 January it was a cold day and demand ended up being higher than NESO had forecast for the day itself and higher than it had forecast for the average cold spell weather in the winter. Every year NESO produces a Winter Outlook, which tells you how much it think the demand will be and how much spare capacities, the excess amount available over demand, it will have. In October 2024 when it published that for this year, it predicted that the demand would be lower than it had been and the capacity margin would be higher. Then last Wednesday the demand turned out to be higher than the Winter Outlook had suggested and also higher than NESO’s own short-term forecasts. It was also a low wind day. Demand that day was 47 gigawats (the unit of measure) and we had only 2.5 gigawats of wind. On a good day there might be 16 or 17 gigawats. Some days we’ve had as low as 0.5 gigawats so it wasn’t the worst day but was still pretty bad. The other big impact was that the import cables had much lower availability either than normal or that NESO had said in its Winter Outlook, so we only had 5.7 gigawats available in the interconnectors. So every day everyone has to tell NESO what they are going to do and the interconnectors were all saying that they would be importing to Britain at their maximum availability through the day. So there was no leeway for NESO to ask to import a little bit more, there was literally nothing more available. So at 12.01 pm on that day NESO issued a capacity market notice, an automatic trigger warning to say that they had identified or the system had calculated that there was only 500 megawats of spare margin so more generation than expected demand. Because these notices are autogenerated, and sometimes look at out of date data, they are not the most reliable measure and especially as demand forecasts can be out of kilter by quite a margin. Catherine Porter says that she has some analysis that suggests that in the past 4 years, from the day ahead forecast, the error can be as high as 4.7 gigawats. So almost double the amount of wind that was blowing last week on the Wednesday.
The evening before, they had issued an Electricity Market Notice, which is actually a more serious warning. These notices are not issued automatically but from the control room staff identifying a potential problem. Normally, any type of these warnings get cancelled well before the actual real time moment but that Electricity Market Notice did not get cancelled until after the start of the period that it covered. This notice is set out in the grid code which is part of the rule book that drives the way the system works, so it alerts market participants to the fact that we are no longer in a business in its usual mode, we are in a mode where we are expecting some issues, so we are alerting power stations that they need to run if they can, alerting local low-voltage grids and suppliers that there might be a need for demand control which is when they actually start disconnecting load, so regions of the country could be disconnected. They notify the market of different types of tools that they might engage as there could be a potential blackout otherwise. Later that day, a third kind of notification was issued. A company called Elexon which is involved in managing the energy and electricity market issued a Loss of Load Probability (LoLP). Loss of load literally means disconnections, which can be local or national level blackouts. Alexon doesn’t issue these as notices but as a continuous calculation you can refer to at any particular time. It was 29% over 4 hours which was the highest it had reached and it is very unusual to see a loss of load probability that is not zero and it is even more unusual to see a loss of load probability that is still not zero once you get to the period it is talking about and on 8 January it never went to zero. Elexon gets its data from NESO and is not producing it independently. As we went through the evening peak, the system was showing all the time that there was a non-zero loss of load probability. So official data suggests that there was a 27%-29% change that there would have been at least some people being disconnected.
In response (Tom Whipple, science editor of the Times wrote), the energy operator insisted that, contrary to some interpretations of raw data, that we were never close a blackout on 8 January and that it was a misconception to think that a 29% risk LoLP is a warning that the buffer would run out because there was an additional buffer that they didn’t describe and didn’t publish all the data of in the publicly available dashboards and everyone was panicking about January 8th but actually there was a whole additional supply of electricity that had we hit rock bottom they could have called upon.
David Rose, Editor of UnHeard asked for the evidence of this additional supply and to detail it for us and they refused to do so and said that as an operator for the whole of the UK they don’t talk about individual units because they have lots of customers and technologies and don’t set out a list of assets that could cover a particular loss.
SQSS – there has to be a security standard but the standard was breached on 8 January. The idea is that they have a reserve which can be activated quickly. NESO has a duty of transparency so refusing to publish that data flies in the face of that transparency. It is also not the case that they don’t provide unit level information. They provide masses of unit level information through the Elexon website. Any of us can go on to the Elexon website to see what a power station was intending to do that day, was doing that day, if it changed what it did because of instructions from the National Grid, how much it got paid to make those changes. Why were they saying they said they didn’t have this information, when it is so crucial and is suddenly being held from the market and appears to be a rather inconsistent reason when looking at their normal practice? What are they trying to hide?
They said that the cables coming in from Norway provide an additional 14 megawats. This is what we were expecting to receive but the interconnector with Norway was performing at maximum capacity that whole day and there were no extra reserves that they could call on because it was all spoken for. The interconnector with Denmark is also 1400 megawatts and was expecting to run at half the capacity because of a maintenance outage but they were persuaded, or requested, to bring the interconnector early and so they did. Without that extra 700 megawatts from the Danish interconnector we would not have been able to meet demand that day. Contrary to what the regulator said, NESO cannot demand imports, so it was a request and therefore Denmark could have refused to supply any extra megawatts at all and therefore we came very close to a blackout that day. You can try and buy the extra energy if you are willing to offer more money than others but you cannot compel it.
As part of the Security Standard, or SQSS they are supposed to have a margin over demand (a backup plan) and have this reserve and the purpose of the reserve is to replace the biggest generation or import source that comes into the grid without getting hit in the pocket. So if you lose a big piece of generation or imports suddenly, then you disrupt that nice grid frequency (waves) and that can lead to blackouts (ie 2019). The idea is that they have this reserve that can be activated quickly. It should be very easy to identify which units, which power stations or batteries can provide that because they have to be instructed quickly. You can’t have hundreds of components you can make it up from, it has to be a few big assets to be able to do that.
It is also interesting that on 8 January prices in the market went sky high. You could make a lot of money running your power station. For example, Rye House was being run at a price of £5,500 a megawatt hour when the normal winter price is about £120-150, so they made more than £2 million for just a couple of hours of running and only at half the station capacity as well. So looking at the National Grid, who was providing this reserve? (Catherine said) Who decided that they weren’t going to bother making all these millions they could have been making by running that day? The just sat on the sidelines just in case. If they had decided to do that, how much did they pay them to do that? Which were these assets that were not taking advantage of these high market prices and already running? If they are already running they are not hidden in the pocket and therefore on 8 January the Security Standard was breached.
WHAT CHALLENGES DO WE FACE IN THE FUTURE?
On the current timeline, the likelihood of power outages and blackouts is likely to increase as we move closer to 2030. In 2027 we are scheduled to lose 2 of our nuclear power stations. There is uncertainty in the future of the biomass power stations because their subsidies expire at roughly the same time. Gas power stations are coming to the end of their lives. Many of them were built in the late 1990s and early 2000s with an expected lifetime of 25-30 years. This retirement plan is likely to excelerate if people believe the strategy for the gas power stations which is that by 2030 they will only be producing 5% of average annual demand. The Labour government wants to fast-forward this process towards increased renewable supply and less and less gas. And yet to meet the capacity market keep the entire 35 gw of existing gas power stations in reserve which is extremely unlikely to be achievable due to their lifespan. Batteries we have at the moment run out in an average of 1.50 hours. We have low wind conditions that can last for days, so chemical batteries won’t do this and the amount we would need to build to back up. Someone once worked out that you would need more land than we have in the UK for these batteries to fully backup wind so it’s completely unfeasible with the current technology.
Bills have been going up very consistently for the last 15 years, though more so since the global incident and the war in Ukraine, and at a time where gas prices had not been going up and were stable because of the energy transition. So you subsidise your wind power stations and your solar but then because you have the situation that it’s not always windy, you then have to build at least the same amount of capacity of something else, whether gas or nuclear or import cables and this is incredibly wasteful because you have to double up on everything. Then there is the additional infrastructure you have to build so one of the problems with the current plan which NESO has identified in their report on the Clean Power 2030 strategy is that you will have to build twice as much grid infrastructure – power lines, cables etc – in the next 5 years as we built in the previous 10 years. This is extremely likely due to the supply chains, as the planning process is very long-winded and you have 3-4 year lead times for big transformers. Nobody is going to order a big transformer if they don’t have planning permission. So if the planning permission for your power line doesn’t happen in the next year, you won’t have the kit on site to build your power line by 2030. We have the highest industrial energy prices and industrial activity is declining as a result of this.
We are paying billions of pounds a year because we haven’t built all of the grid infrastructure to allow the generation from the wind farms to reach consumers, and they have a subsidy that they only receive if they are generating and if they have to stop generating then they have to be compensated for that and those too are billions of pounds a year and this all goes straight to bills. The govt says oh renewables are incredibly cheap but where is the data to back that up? They just make statements with no substance. Well, renewables get a wholesale price for electricity but unfortunately the more renewables you have the bigger the gap between the wholesale price and the retail price that businesses and households pay because effectively a lot of the costs of renewables are not paid by the renewable generators, they are paid by consumers. Net Zero is pie in the sky! And if we start having “mythical” blackouts then that might impact people how they think about this, not to mention the economic costs as well, and already they are very unpopular many voters.
Given all the above, how are we expected to charge up our electric vehicles, power up our laptops and other devices, run our heat pumps and other methods of sustainability and cook our meals in the Net Zero utopia? Also there is a huge carbon footprint major toxic pollutions of rivers and land particularly in China where a lot of these components renewables are manufactured by forced labour. China dominates “rare earth” production because it is the only country willing to do these extremely polluting processes. How is that going to save the Planet? Nuclear energy is cleaner energy, it’s running all the time and when you actually add up all the costs of making renewables happen, then nuclear is quite competitive and it is not more expensive than wind. KEPCO built 8 big modern power stations called the APR1400 – 4 in S Korea and 4 in UAE – and they were built on average in 8.5 years each and came in on time and broadly on budget. Sign a deal with KEPCO for 5 or 6 to start with, pay for the first two with public money because the other problem we have is persuading private investors to come in, refinance after the first construction phase because they will make a ton of money when they are running, the risk is all in the building. So once they are built, sell the government stake to the private sector at a profit and make money for taxpayers and you would probably in that process demonstrate that your regulatory ducks are all lined up for the delivery of new nuclear so you would get private finance in for construction for subsequent projects. This would be the quickest, cheapest and most efficient way of delivering nuclear.
Someone said: “I left the UK 25 years ago. I live in Texas and own a large solar power plant. As a banker, I have also financed US wind, hydro, solar, coal and glass plants. I used to develop and finance gas, coal and wind power plants in the UK in the 1990s. My boss was a main board director at National Grid and one of my colleagues helped design the UK electricity market. I have also forecast gas and electricity prices in the UK. I used to know the UK market inside out. I have told people for years that closing the base load plants was idiotic and that net zero represented national suicide. I have also developed coal plants in India and China. Nobody in the power industry globally understand what Britain is trying to do. The political media class has been brainwashed and Milliband and Boris are idiots. They don’t understand how any of this works.”
WHAT CAN WE DO IN THE EVENT OF A BLACKOUT?
Here are a few ideas:-
Butane gas cylinder and camping stove
A portable or standby generator such as a Jackery or Bluetti – one you can plug appliances into and can be charged up or work on solar.
Off-grid Batteries or battery backup system with smart battery management system and Bluetooth – good for van lifers too.
Solar panels or other solar powered items including task lighting.
Like a scout, on a day-to-day basis endeavour to be prepared for any eventuality in whatever way(s) you can and within your means and you won’t go far wrong. In the event of a crisis most people will pull together and get through the experience all the wiser.
My video:
If you find my video interesting and informative, please do ‘like’, comment, share and subscribe – and thanks as ever for your support.
Apple cake is very popular in Germany and this is my variation on the celebrity chef Rick Stein’s classic Apfelkuchen from his “Long Weekends” series.
This yummy cake has a crunchy cinnamon sugar topping. Use any dessert apples you wish except for Bramleys as they ‘fall’ and do not keep their shape once cooked.
I have swapped out plain flour for gluten-free plain flour, golden granulated sugar for vanilla sugar and butter for Flora buttery spread.
The Apfelkuchen is nut-free, pregnancy-friendly and vegetarian making it suitable for most diets. It stays lovely and moist for a few days if kept in an airtight container – but it is so yummy it probably won’t last that long!
Ingredients
2 dessert apples peeled, cored and sliced into thin wedges
1 tbsp lemon juice
125g (41/2 oz) Flora buttery, plus extra for greasing
140g/5 oz vanilla caster sugar
3 free-range eggs, at room temperature, beaten
225g/8 oz plain gluten-free flour
2 level tsp baking powder
1/2 tsp sea salt
5 tbsp full-fat milk
For the topping
11/2 tbsp demerara sugar
1/2 tsp ground cinnamon
Method
Preheat the oven to 170C/150C fan/340F/Gas 3. Butter and line a 23cm/9″ round cake tin with greaseproof baking paper.
Coat the apple wedges in the lemon juice and set aside.
In a large bowl, beat together the butter and sugar, using an electric hand mixer, until pale and fluffy. Add the eggs and beat until smooth. Sift in the flour, baking powder and salt and mix well. Slowly add the milk, mixing well after each addition until you have a smooth batter.
Transfer the cake batter to the cake tin. Arrange the apple slices, flat-side down, on the batter in a spiral pattern. Don’t worry if it’s not perfect.
For the topping, mix together the demerara sugar and cinnamon. Sprinkle over the batter.
Bake in the centre of the oven for 40-45 minutes, or until a skewer inserted in the centre of the cake comes out clean and the top is golden-brown. Leave the cake to cool in the tin for 15 minutes, then run a knife around the edges of the cake and turn it out of the tin onto a wire rack to cool completely (if wished).
Serve this cake warm or at room temperature with whipped cream.
Chef’s tips
If you prefer to use butter in this recipe, make sure it is softened before combining it with the sugar.
This cake is delicious warm or cold and makes a wonderful pudding. You can also serve it with vanilla custard, creme fraiche, clotted cream or even a dollop of vanilla ice cream (my personal favourite with warm puddings), whatever floats your boat!
Some years ago now, my mother, following one of her trips to Scotland (my parents were both of Scottish heritage) gifted me a Hale Pocket Guide “Traditional Scottish Cookery” by Margaret Fairlie which cost just 60 pence – this was in 1995.
This recipe for morning rolls is taken from that pocket book, which was first published way back in 1973. I have always enjoyed cooking up Scottish cuisine as it is part and parcel of my culture and bloodline. My father’s porridge was always the best (though my mum’s was a close second) and I taught my husband how to make it the traditional Scottish way, too.
Like my mother and her mother before me, I am very fond of baking and this Morning Roll recipe is so simple, made with only a few ingredients. If you cannot find fresh yeast then substitute with 12 g dried yeast or thereabouts – round up to 2 x 7 g sachets if you wish.
Very popular, particularly in Glasgow and Fife, Morning Rolls are well-fired, airy and chewy with a crispy crust. They are sold everywhere in petrol stations, bakeries, newsagents and corner shops and are best eaten on the day they are made before they go rock hard! In Fife, a Cabin Biscuit or Roll is a local variant. Originating in Buckhaven, a town on the Firth of Forth on the east coast of Fife, sugar was added to prolong the shelf life of the roll as they were often enjoyed by crews aboard fishing boats and have distinctive prick marks on top. However, the Morning Roll or Cabin Biscuit is a bread roll and not a biscuit in either the British or American sense.
Ingredients
1 lb (450 g) plain flour
1 level tsp salt
2 oz (50 g) lard
1 oz (25 g) fresh yeast (or up to 2 x 7 g sachets dried fast action yeast)
1 tsp sugar
1/2 pt (300 ml) milk
Method
Sift the flour into a warm bowl with the salt and then lightly rub in the lard until fully combined.
In a separate bowl, cream the yeast and sugar until liquid (or if using yeast sachets, just mix them together). Strain (or tip) into flour mixture and make into a soft dough with the milk.
Cover with a tea towel and leave in a warm place to rise. This will take about an hour.
Knead lightly, then form into 3 inch (7.5 cm) rounds. Brush lightly with milk taking care not to let the milk run down the sides of the rolls, and dust with flour – you can do this with the help of a sieve or even a tea strainer!
Place on a greased and floured tin and leave in a warm place for 15 minutes.
Bake in a moderately hot oven (400oF/ 200oC/Gas Mark 6) for 15 to 20 minutes.
Turn rolls out on to a wire rack and allow to cool before serving.
CHEF’S TIPS:
Morning rolls are also delicious served still slightly warm with lashings of butter.
A delicious accompaniment to a bowl of homemade soup or filled with smoked Ayrshire bacon, square sausage or perhaps some good cheese and pickle.
Suitable for home freezing. As soon as the rolls have cooled, wrap individually in cling film, place in a freezer bag and transfer to the freezer. They are so tasty though they may not get that far!